Whimsical Whisker Wagon Free Crochet Pattern
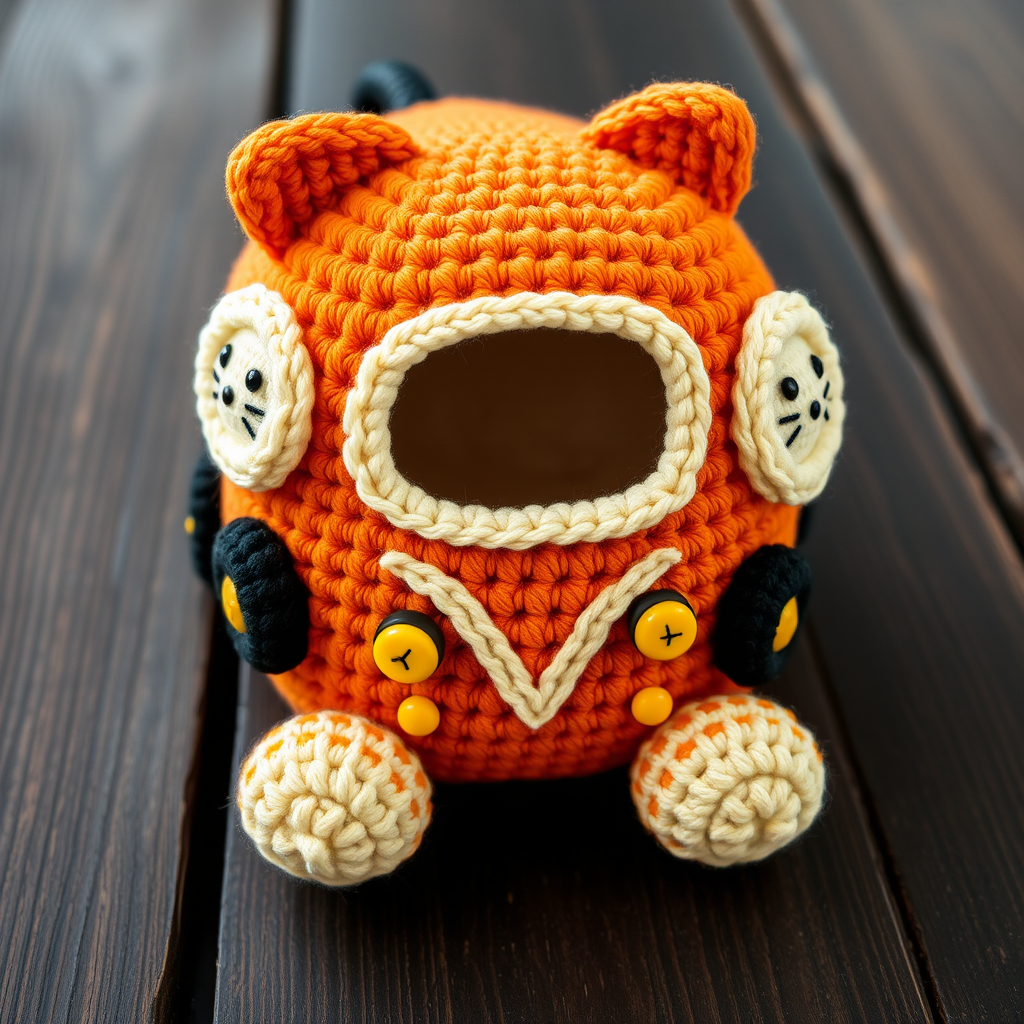
Whimsical Whisker Wagon: A Free Crochet Pattern for a Magical Cat Bus
Welcome to a world where imagination meets yarn! Today, I'm thrilled to share a truly enchanting project that will bring a smile to crafters of all ages: the Whimsical Whisker Wagon. This charming feline-inspired vehicle is the perfect blend of cozy decor and playful toy, designed to spark joy in any room. Whether you're looking for a unique gift for a cat lover, a whimsical addition to your nursery, or simply a fun weekend project, this amigurumi pattern is sure to delight. With its soft, textured body and adorable embroidered face, this little bus is more than just a craft—it's a handmade piece of magic.
This pattern is beginner-friendly, using basic crochet techniques like the magic ring, single crochet, increases, and decreases. The result is a sturdy, huggable creation that sits upright proudly. Let's gather our supplies and get ready to crochet a little bit of whimsy!
Materials Needed
Before we dive into the stitches, let's ensure you have everything you need. This project uses simple, readily available materials:
- Yarn: Worsted weight yarn in the following colors:
- Orange: Main body (approx. 100-150 yards)
- Cream: Windows (small amount)
- Black: Wheels and facial details (small amount)
- Yellow: Headlights (small amount)
- Crochet Hook: Size F/5 (3.75 mm) hook. This smaller hook size creates the tight, firm stitches needed for amigurumi so the stuffing doesn't show through.
- Yarn Needle: A tapestry needle for sewing pieces together and weaving in ends.
- Stuffing: Polyester fiberfill stuffing for a soft, squishy finish.
- Stitch Marker: To keep track of your rounds.
- Optional: Safety eyes (8mm or 9mm) or black embroidery thread for the face.
Gauge: 4 inches = 16-20 stitches in single crochet. Note: Gauge is not critical for this project, but maintaining consistent tension will ensure your pieces are proportionate.
Step-by-Step Instructions
Let's break down the pattern into manageable sections. We'll start with the main body, then create the smaller components, and finally assemble our Whimsical Whisker Wagon. Remember to work in continuous rounds (spiral) unless otherwise stated, and use your stitch marker to mark the beginning of each round.
Abbreviations
- ch = chain
- sc = single crochet
- inc = increase (2 sc in one stitch)
- dec = decrease (sc two stitches together)
- sl st = slip stitch
- st(s) = stitch(es)
- Rnd = round
Part 1: The Body (Make 1 in Orange)
The body is worked from the bottom up, starting with a magic ring. This creates a seamless, rounded shape.
- Start: Make a magic ring.
- Rnd 1: 6 sc in ring. (6 sts)
- Rnd 2: inc in each st around. (12 sts)
- Rnd 3: (sc in next st, inc) around. (18 sts)
- Rnd 4: (sc in next 2 sts, inc) around. (24 sts)
- Rnd 5: (sc in next 3 sts, inc) around. (30 sts)
- Rnd 6: (sc in next 4 sts, inc) around. (36 sts)
- Rnd 7: (sc in next 5 sts, inc) around. (42 sts)
- Rnd 8: (sc in next 6 sts, inc) around. (48 sts)
- Rnd 9-18: sc in each st around. (48 sts) – Work even for 10 rounds. This creates the tall, cylindrical body of the bus.
- Rnd 19: (sc in next 6 sts, dec) around. (42 sts)
- Rnd 20: (sc in next 5 sts, dec) around. (36 sts)
- Rnd 21: (sc in next 4 sts, dec) around. (30 sts)
- Rnd 22: (sc in next 3 sts, dec) around. (24 sts)
- Rnd 23: (sc in next 2 sts, dec) around. (18 sts)
- Stuff firmly: Now is the time to stuff the body with fiberfill. Make sure it's packed tightly so the shape holds well, but not so much that it's rock hard.
- Rnd 24: (sc in next st, dec) around. (12 sts)
- Rnd 25: dec around. (6 sts)
- Finish: Fasten off, leaving a tail. Weave the tail through the front loops of the remaining 6 stitches and pull tight to close the hole. Weave in the end securely.
Part 2: Windows (Make 3 in Cream)
These are flat circles that will be sewn onto the body. They represent the bus windows.
- Start: Make a magic ring.
- Rnd 1: 6 sc in ring. (6 sts)
- Rnd 2: inc in each st around. (12 sts)
- Rnd 3: (sc in next st, inc) around. (18 sts)
- Rnd 4: (sc in next 2 sts, inc) around. (24 sts)
- Rnd 5: (sc in next 3 sts, inc) around. (30 sts)
- Finish: Fasten off, leaving a long tail (about 12 inches) for sewing. These will be flat circles.
Part 3: Wheels (Make 4 in Black)
These are small, stuffed spheres that give the wagon its vehicle feel.
- Start: Make a magic ring.
- Rnd 1: 6 sc in ring. (6 sts)
- Rnd 2: inc in each st around. (12 sts)
- Rnd 3: (sc in next st, inc) around. (18 sts)
- Rnd 4: sc in each st around. (18 sts) – Work even for one round to give the wheel a bit of depth.
- Rnd 5: (sc in next st, dec) around. (12 sts)
- Stuff lightly: Add a small amount of fiberfill to give the wheel a soft, rounded shape.
- Rnd 6: dec around. (6 sts)
- Finish: Fasten off, weave in the end. Repeat for the remaining three wheels.
Part 4: Headlights (Make 2 in Yellow)
These tiny circles add a pop of color and character to the front of the bus.
- Start: Make a magic ring.
- Rnd 1: 6 sc in ring. (6 sts)
- Rnd 2: inc in each st around. (12 sts)
- Finish: Fasten off, leaving a long tail for sewing.
Part 5: Assembly
Now for the fun part—bringing all the pieces together! Take your time with the placement to ensure your Whimsical Whisker Wagon looks balanced and adorable.
- Position the Windows: Place the three cream circles onto the body. One should be centered on the front, and the other two on the sides. Position them about 2-3 rounds below the top of the body (where the decreases began). Use pins to hold them in place while you sew. Using the long tail, whipstitch around the edge of each window to secure it to the body.
- Attach the Wheels: Sew the four black wheels onto the bottom of the body. Place two on each side, near the bottom edge, evenly spaced. They should sit just below the windows. Use the yarn tail to sew them on securely with a few firm stitches.
- Add the Headlights: Sew the two yellow headlights onto the front of the body, just above the bottom edge, on either side of the front window. They should be positioned symmetrically.
- Embroider the Face: Using black yarn and your yarn needle, embroider a cute cat face on the front cream window. Here's a simple guide:
- Ears: Create two small triangles at the top of the window. To do this, make a small straight stitch, then angle two stitches down to form a triangle shape.
- Eyes: Make two small oval shapes (or use safety eyes if you prefer). For ovals, make a small horizontal stitch and then a slightly larger one below it.
- Nose: Make a small triangle in the center, just below the eyes.
- Mouth: Create a curved "w" shape below the nose with two small angled stitches.
- Add Whiskers: Using black yarn, stitch three straight lines extending outward from each side of the face. Keep them thin and delicate for a whimsical look.
Finishing Touches
Once all pieces are attached and the face is complete, weave in all loose ends carefully. Give your Whimsical Whisker Wagon a gentle squeeze to shape it, and it's ready to delight! This charming piece makes a wonderful gift, a playful toy, or a unique piece of decor that adds a touch of handmade magic to any space.
I hope you enjoyed creating this whimsical project. Happy crocheting, and may your yarn always be tangle-free!


