Whimsical Waffle Cone Amigurumi Free Pattern
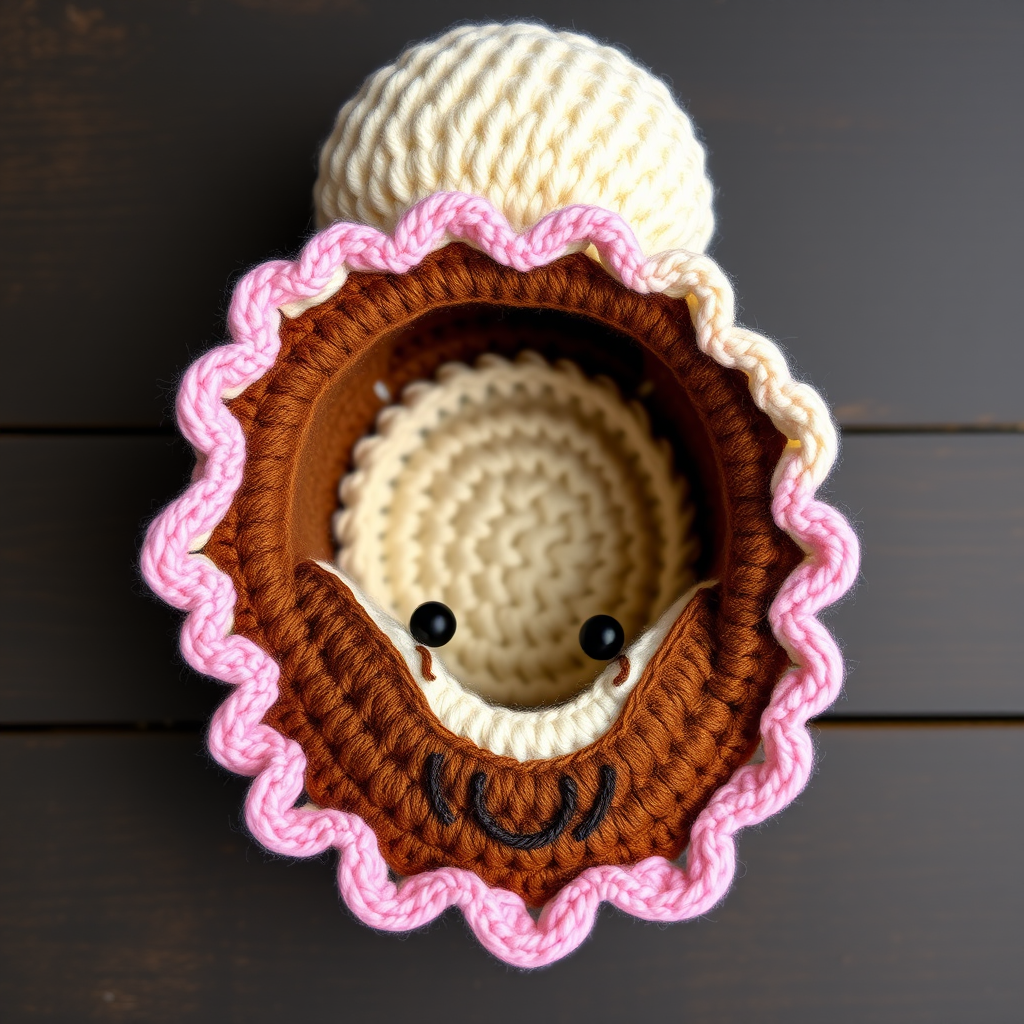
Whimsical Waffle Cone Amigurumi: A Beginner-Friendly Crochet Pattern
Are you ready to add a sprinkle of sweetness to your yarn collection? This Whimsical Waffle Cone Amigurumi is the perfect project for crafters of all levels. With its delightfully textured waffle cone and a scoop of pastel pink "drip," this charming dessert companion brings a playful twist to your handmade creations. Whether you're looking for a cozy weekend project, a unique gift, or simply a cute desk buddy, this pattern delivers. Let's dive into the world of amigurumi and create something truly scrumptious together!
Materials Needed
Before we begin, gather your supplies. This project uses simple, accessible materials that you likely already have in your crafting stash:
- Yarn: Worsted weight yarn in three colors:
- Cream (for the ice cream scoop)
- Light pink (for the drip edge)
- Chocolate brown (for the waffle cone)
- Crochet Hook: 4 mm (G/6) hook
- Safety Eyes: 8 mm (or black yarn for embroidered eyes)
- Stuffing: Polyester fiberfill
- Notions: Yarn needle, stitch marker, scissors
Note: Gauge is not critical for amigurumi. However, aim for tight, firm stitches to prevent the stuffing from showing through.
Abbreviations
Familiarize yourself with these standard crochet abbreviations before starting:
- MR: Magic ring
- sc: Single crochet
- inc: Increase (2 sc in one stitch)
- dec: Decrease (sc two stitches together)
- sl st: Slip stitch
- ch: Chain
- st(s): Stitch(es)
Step-by-Step Instructions
Part 1: Ice Cream Scoop (Cream Yarn)
We'll start with the star of the show—the fluffy ice cream scoop. Work in continuous rounds without joining unless otherwise noted.
- Round 1: Make a magic ring, work 6 sc into the ring. (6 sts)
- Round 2: Inc in each stitch around. (12 sts)
- Round 3: (Sc in next st, inc) repeat 6 times. (18 sts)
- Round 4: (Sc in next 2 sts, inc) repeat 6 times. (24 sts)
- Round 5: (Sc in next 3 sts, inc) repeat 6 times. (30 sts)
- Round 6: (Sc in next 4 sts, inc) repeat 6 times. (36 sts)
- Rounds 7-12: Sc in each stitch around. (36 sts) — Work even for 6 rounds to create the sphere shape.
- Round 13: (Sc in next 4 sts, dec) repeat 6 times. (30 sts)
- Round 14: (Sc in next 3 sts, dec) repeat 6 times. (24 sts)
- Round 15: (Sc in next 2 sts, dec) repeat 6 times. (18 sts)
Insert the safety eyes: Position them between rounds 8 and 9, spacing them about 6 stitches apart. If using embroidered eyes, wait until assembly. Stuff the scoop firmly with fiberfill, shaping it into a round ball.
- Round 16: (Sc in next st, dec) repeat 6 times. (12 sts)
- Round 17: Dec in each stitch around. (6 sts)
Fasten off, leaving a long tail. Thread the tail through a yarn needle, weave it through the front loops of the remaining 6 stitches, and pull tight to close the hole. Weave in the end securely.
Part 2: Pink Drip Edge (Light Pink Yarn)
This charming detail creates the wavy "melted" effect at the base of the scoop.
- Attach the light pink yarn to the bottom edge of the ice cream scoop—the opening where it will meet the cone. Use a slip knot and pull through any stitch.
- Round 1: Ch 1, sc in the same stitch. Then, (ch 3, skip 1 stitch, sc in the next stitch) repeat this sequence all the way around the bottom edge of the scoop.
- Join with a sl st to the first sc. Fasten off and weave in the ends carefully.
Pro tip: The ch-3 loops will naturally curl and cascade, creating the illusion of dripping ice cream.
Part 3: Waffle Cone (Chocolate Brown Yarn)
Now, let's build the crunchy base for our dessert.
- Round 1: MR, 6 sc. (6 sts)
- Round 2: Inc in each stitch around. (12 sts)
- Round 3: (Sc in next st, inc) repeat 6 times. (18 sts)
- Round 4: (Sc in next 2 sts, inc) repeat 6 times. (24 sts)
- Round 5: (Sc in next 3 sts, inc) repeat 6 times. (30 sts)
- Rounds 6-10: Sc in each stitch around. (30 sts) — Work even for 5 rounds to form the cone's height.
- Round 11: (Sc in next 3 sts, dec) repeat 6 times. (24 sts)
- Round 12: Sc in each stitch around. (24 sts)
- Round 13: (Sc in next 2 sts, dec) repeat 6 times. (18 sts)
- Round 14: Sc in each stitch around. (18 sts)
Stuff the cone lightly, leaving the top opening un-stuffed for easier assembly. Fasten off, leaving a long tail for sewing.
Part 4: Adding the Waffle Texture (Optional but Recommended)
This step elevates your cone from simple to spectacular!
- Thread a yarn needle with a contrasting darker brown yarn.
- Insert the needle from the inside of the cone to the outside at the base.
- Create diagonal lines across the cone's surface in one direction, spacing them evenly.
- Then, create diagonal lines in the opposite direction to form a crosshatch (diamond) pattern, mimicking real waffle squares.
- Keep the stitches loose and even. When finished, weave the ends inside the cone.
Part 5: Assembly
Bringing all the pieces together is the most satisfying part!
- Attach the scoop to the cone: Position the ice cream scoop on top of the cone, ensuring the pink drip edge overlaps the cone's opening nicely. Using the long tail from the cone, sew the scoop to the cone by stitching through both layers securely. Go around the entire circumference for a firm hold. Weave in all ends.
- Embroider the face: Using black yarn or embroidery floss, stitch a small, sweet smile directly below the safety eyes. You can also add tiny blush marks with pink yarn if desired.
- Optional cherry on top: Create a tiny cherry by making a MR with red yarn, working 6 sc, and closing it. Sew it securely to the top center of the ice cream scoop.
Finishing Touches
Your Whimsical Waffle Cone is almost ready for its debut! Take a moment to:
- Ensure all yarn ends are woven in thoroughly and trimmed.
- Gently squeeze and shape the amigurumi, adjusting the stuffing for a plump, even appearance.
- Fluff the pink drip loops with your fingers to make them stand out.
Congratulations! You've just created an adorable, handmade dessert companion that's perfect for display, gifting, or adding a touch of whimsy to your day. This pattern is wonderfully forgiving for beginners, and the result is a professional-looking piece you'll be proud of. Happy crocheting!


