Whimsical Meadow Bloom Hair Scrunchie Free Pattern
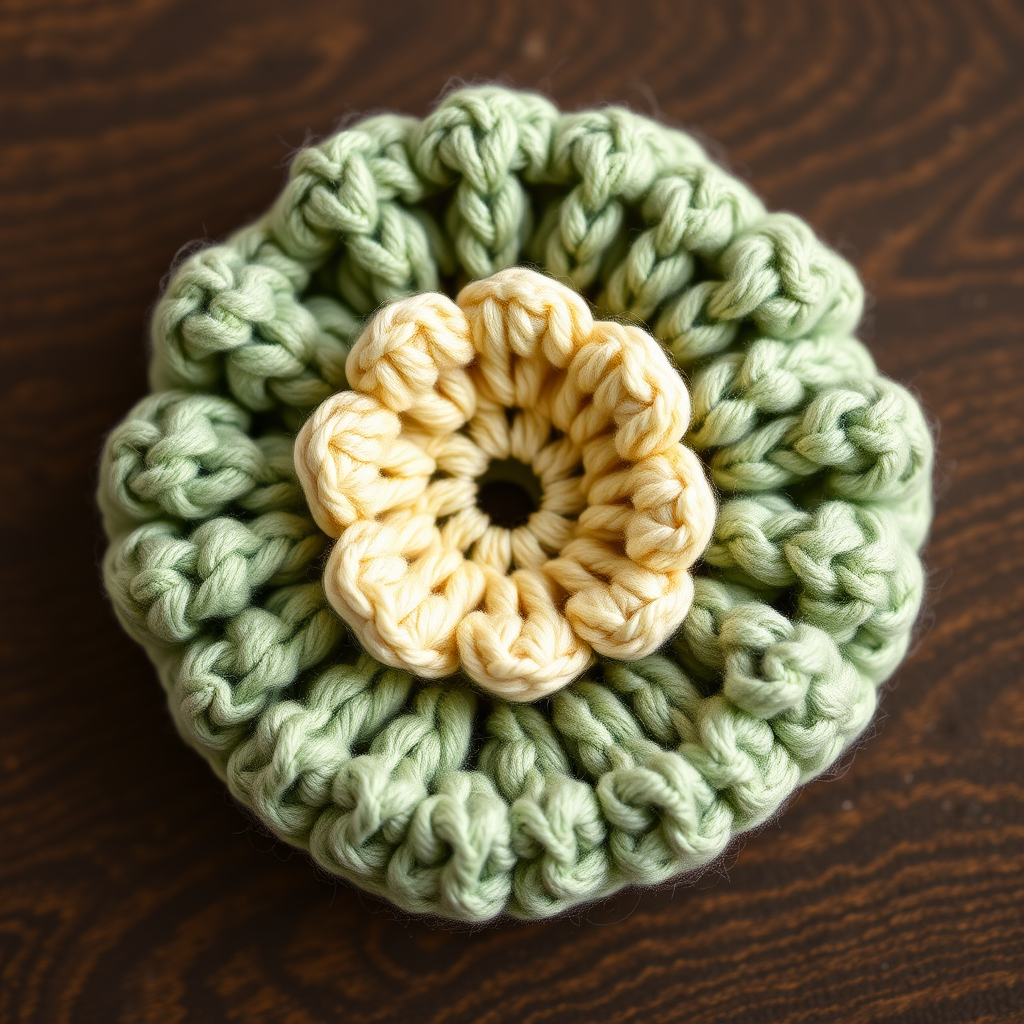
Whimsical Meadow Bloom Hair Scrunchie: A Beginner-Friendly Crochet Pattern
Elevate your everyday ponytail with this charming crochet scrunchie adorned with a delicate floral twist. This quick project adds a touch of handmade elegance to any outfit, making it a perfect gift for loved ones. Whether you're a seasoned crocheter or just starting your yarn journey, this pattern is designed to be approachable, rewarding, and utterly delightful. The finished piece features a plush, textured base in a soft sage green, topped with a single, three-dimensional cream flower that brings a whimsical, meadow-inspired charm to your hair.
Materials Needed
Before you begin, gather the following supplies. This project uses simple, readily available materials, making it an ideal weekend craft.
- Yarn: Worsted weight cotton yarn in two colors:
- Main Color (MC): Approx. 20g (e.g., soft sage green) for the scrunchie base.
- Contrast Color (CC): Approx. 10g (e.g., warm cream) for the flower.
- Hook: G/6 (4.0 mm) crochet hook.
- Hair Elastic: 1 standard hair elastic (approx. 2 inches in diameter).
- Notions: Yarn needle for weaving in ends and sewing, and a pair of scissors.
Note on Gauge: Gauge is not critical for this project, but aim for a tight tension to ensure the scrunchie hugs the hair elastic securely and the stitches are dense.
Abbreviations
Familiarize yourself with these standard crochet abbreviations before starting:
- ch = chain
- sc = single crochet
- dc = double crochet
- hdc = half double crochet
- sl st = slip stitch
- rnd = round
Step-by-Step Instructions
Follow these detailed instructions carefully. The project is divided into three main parts: the scrunchie base, the flower motif, and the final assembly. Take your time, and you'll have a beautiful accessory in no time.
Part 1: Scrunchie Base (Worked in Continuous Spiral)
This section creates the plush, ruffled base that covers the elastic. We'll work in a spiral, which means you won't join rounds with a slip stitch until the very end, creating a seamless tube of fabric.
- Attach Yarn to Elastic: Place the hair elastic on your hook by inserting the hook through the center of the elastic and pulling up a loop of MC yarn. Ch 1 (this does not count as a stitch).
- Round 1 (Covering the Elastic): Work 30 sc evenly around the entire elastic. Ensure the yarn completely covers the elastic, working snugly but not too tightly. When you reach the starting point, join with a sl st to the first sc. (30 sc)
- Round 2 (Increasing): Ch 1. Work 2 sc in each sc around. This doubling will create the ruffled fullness. Join with a sl st to the first sc. (60 sc)
- Round 3 (Even Rows): Ch 1. Work 1 sc in each sc around. Join with a sl st to the first sc. (60 sc)
- Round 4 (Even Rows): Repeat Round 3: Ch 1, 1 sc in each sc around. Join with a sl st to the first sc. (60 sc)
- Finishing the Base: Fasten off the yarn, leaving a tail of about 6 inches. Use your yarn needle to weave in this end securely into the inside of the scrunchie base.
Part 2: Flower Motif (Make 1)
This creates the charming, dimensional flower that will adorn your scrunchie. The magic ring technique ensures a tight, closed center.
- Start with a Magic Ring: With CC yarn, make a magic ring. (If you're unfamiliar with this technique, wrap the yarn around your fingers twice, insert the hook, and pull up a loop. Then ch 1 to secure.)
- Round 1 (Center): Ch 3 (this counts as your first dc). Work 11 dc into the ring. Pull the tail to close the ring tightly. Join with a sl st to the top of the ch-3. (12 dc total)
- Round 2 (Creating Petal Loops): *Ch 5, sl st in the next dc.* Repeat from * to * around. You will create 12 loops total. Join with a sl st to the first sc of the round. (12 loops)
- Round 3 (Forming Petals): In each ch-5 loop, work the following sequence: (sc, hdc, 3 dc, hdc, sc). This creates a rounded petal shape. After completing all 12 petals, join with a sl st to the first sc of the round.
- Finishing the Flower: Fasten off, leaving a long tail (approx. 12 inches) for sewing the flower onto the scrunchie base.
Part 3: Assembly
Now, we'll bring the two pieces together to create your finished scrunchie.
- Position the Flower: Place the flower on the scrunchie base. For a whimsical look, position it slightly off-center rather than perfectly in the middle.
- Sew the Flower: Thread the long tail from the flower onto your yarn needle. Stitch through the center of the flower and into the scrunchie fabric. Work your way around the center of the flower, making secure stitches that anchor it firmly to the base. Go around the center at least twice to ensure it's well-attached.
- Weave in Ends: Once the flower is secure, weave the needle through the back of the flower and the scrunchie to hide the tail. Trim any excess yarn.
Finishing Touches
Gently stretch the scrunchie to ensure the stitches are even and the elastic is fully covered. Fluff the petals of the flower with your fingers to give them a nice, rounded shape. Your Whimsical Meadow Bloom Hair Scrunchie is now ready to wear or gift! This project is perfect for using up scrap yarn and makes a lovely, heartfelt present for friends, family, or even yourself.


