Sunny Meadow Chick Egg Cozy Free Pattern
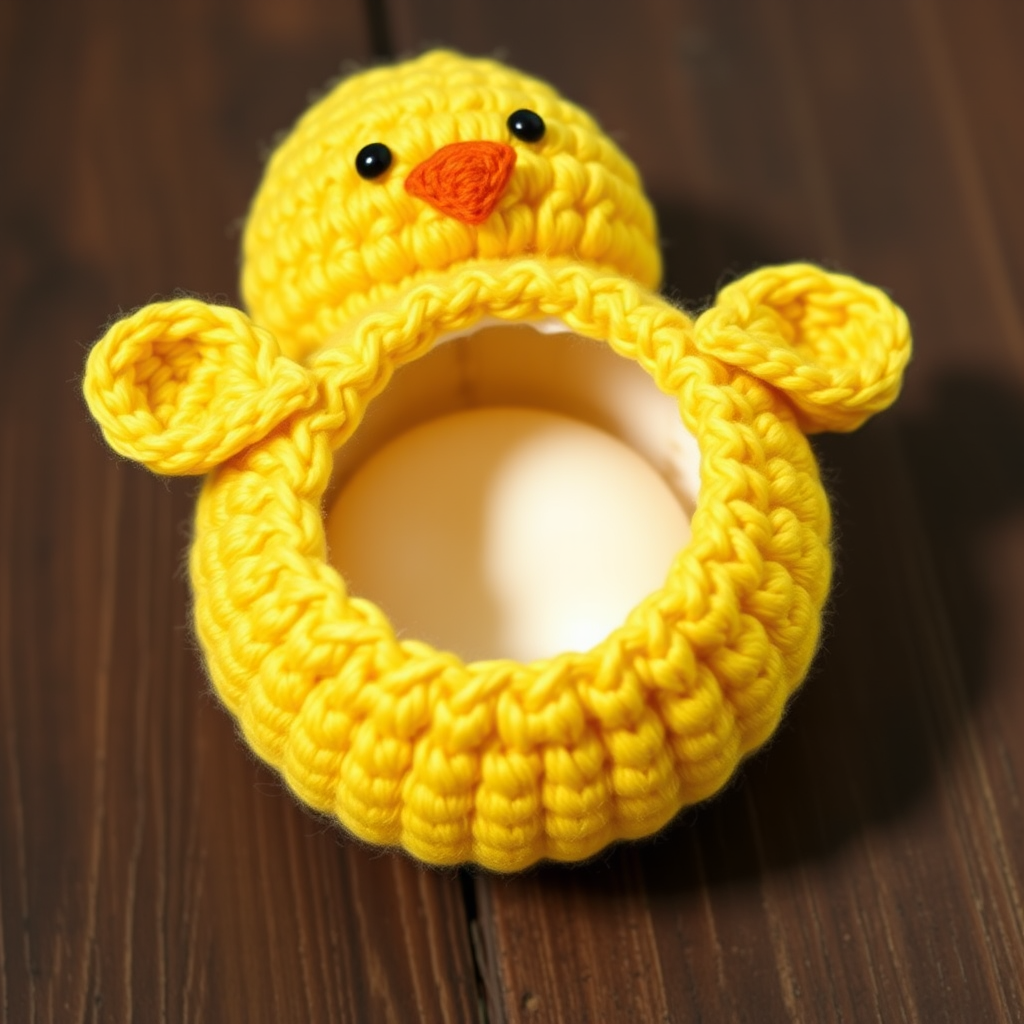
Bring a Smile to Your Table: The Sunny Meadow Chick Egg Cozy
Are you looking for a quick, delightful, and heartwarming crochet project? Look no further than the Sunny Meadow Chick Egg Cozy! This charming pattern is the perfect way to add a touch of spring to your breakfast table, Easter brunch, or even a whimsical farmhouse-themed kitchen. It’s a fantastic beginner-friendly project that works up in no time, using simple stitches to create a plush, adorable chick that keeps your hard-boiled egg warm and your spirits high. Whether you're a seasoned crocheter or just picking up a hook for the first time, this little chick is sure to become a favorite.
This pattern is designed to be accessible and fun. We'll guide you through every step, from the magic ring to the final assembly, ensuring you end up with a cute and functional egg cozy that looks like it came straight from a boutique. Let's get started on making your very own sunny meadow friend!
Materials Needed: Your Crochet Toolkit
Before we dive into the stitches, let's gather our supplies. This project is wonderfully minimal, making it a great stash-buster. Here’s what you'll need:
- Yarn: Light (DK) weight yarn in three colors:
- Yellow (Main): For the chick's body and wings. You'll need approximately 25 yards.
- Orange (Beak): Just a tiny amount, about 2 yards.
- Black (Eyes): A small scrap for embroidering the eyes.
- Crochet Hook: 3.5 mm (E/4) crochet hook. This size is perfect for DK yarn to create a tight, sturdy fabric.
- Fiberfill Stuffing: A small amount to give the chick a soft, rounded shape.
- Yarn Needle: For sewing the pieces together and weaving in ends.
- Stitch Marker: To keep track of your rounds, as this pattern is worked in a continuous spiral.
- Scissors: For cutting your yarn.
Note on Gauge: Gauge is not critical for this project, but it's important to maintain a tight tension. This prevents the stuffing from showing through your stitches. As a general guide, you should aim for approximately 5 single crochets per inch.
Step-by-Step Instructions: Crocheting Your Chick
This pattern is worked in continuous rounds (spiral) unless otherwise stated. Always use a stitch marker to keep track of where each round begins. Let's start with the main body!
Chick Body
We'll begin by creating the base of the chick, which will form the cozy that fits over your egg.
- Round 1: With your yellow yarn, make a magic ring. Work 6 single crochets (sc) into the ring. Pull the tail to close the ring tightly. (6 stitches)
- Round 2: Work 2 sc in each stitch around. This is an increase round. (12 stitches)
- Round 3: *Sc in the next stitch, 2 sc in the next stitch* (this is an increase). Repeat from * to * around. (18 stitches)
- Round 4: *Sc in the next 2 stitches, 2 sc in the next stitch* repeat around. (24 stitches)
- Round 5: *Sc in the next 3 stitches, 2 sc in the next stitch* repeat around. (30 stitches)
- Rounds 6-10: Sc in each stitch around for 5 rounds. This creates the straight, cylindrical body of the cozy. (30 stitches)
- Round 11: *Sc in the next 3 stitches, sc2tog* (single crochet two together, a decrease) repeat around. (24 stitches)
- Round 12: *Sc in the next 2 stitches, sc2tog* repeat around. (18 stitches)
- Round 13: *Sc in the next stitch, sc2tog* repeat around. (12 stitches)
Finishing the Body: Fasten off, leaving a long tail (about 12 inches) for sewing. Now, stuff the body lightly with your fiberfill. The goal is to give it a nice, plump shape without making it too firm. The bottom of the cozy should remain open so it can sit over the egg. Set the body aside.
Wings (Make 2)
These little leaf-shaped wings are crocheted flat in rows. They add the perfect touch of charm.
- Row 1: With yellow yarn, chain (ch) 4. Sc in the 2nd ch from the hook and in the next 2 chains. (3 stitches)
- Row 2: Ch 1, turn your work. Sc in each stitch across. (3 stitches)
- Row 3: Ch 1, turn. Sc2tog (decrease), then sc in the last stitch. (2 stitches)
Finishing the Wings: Fasten off, leaving a tail for sewing. Repeat this entire process to make a second wing.
Beak
This tiny beak is quick to make and adds so much personality.
- Round 1: With orange yarn, make a magic ring and work 4 sc into the ring. (4 stitches)
- Round 2: Sc in each stitch around. (4 stitches)
Finishing the Beak: Fasten off, leaving a tail for sewing. You should have a tiny, rounded cone shape.
Assembly: Bringing Your Chick to Life
Now for the fun part—putting all the pieces together! Take your time and use your yarn needle for a neat finish.
- Attach the Wings: Position the wings on the sides of the chick body. They should be placed about 1 inch down from the top opening (the part that will go over the egg). Sew them on securely using the tails you left.
- Attach the Beak: Sew the beak to the front center of the chick, positioned between the wings. It should be about 1.5 inches down from the top edge.
- Embroider the Eyes: Using your black yarn and yarn needle, embroider two small French knots or a few small straight stitches for the eyes. Place them just above the beak, spaced about 0.5 inches apart. Make sure they are symmetrical for a cute, even expression.
- Weave in Ends: Carefully weave in all loose yarn ends on the inside of the cozy to keep it looking clean and professional.
Finishing Touches & How to Use
Your Sunny Meadow Chick Egg Cozy is now complete! To use it, simply place it over a warm, hard-boiled egg. The top opening should stretch slightly to fit snugly around the egg's middle, with the chick sitting on top like a little hat. It's the perfect addition to an Easter basket, a fun breakfast surprise, or a lovely handmade gift. Enjoy your adorable creation!


