Sunny Citrus Cozy Pouch Free Pattern
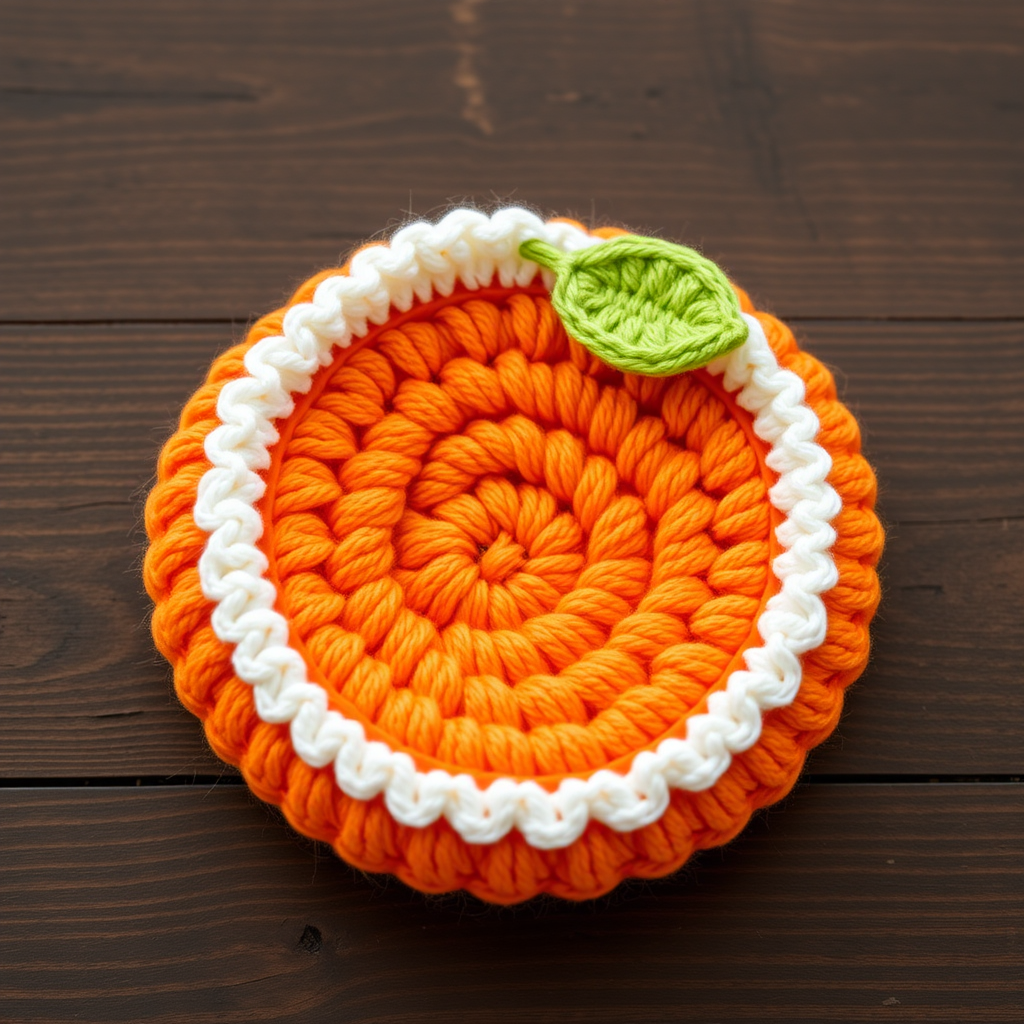
Sunny Citrus Cozy Pouch: A Free Beginner Crochet Pattern
Brighten up your day and your storage solutions with this adorable Sunny Citrus Cozy Pouch! This charming amigurumi-style project is shaped like a juicy orange slice, complete with a crisp white rind and a sweet green leaf accent. It's the perfect size for holding earbuds, lip balm, small treasures, or for gifting to a citrus-loving friend. Best of all, this pattern is designed with beginners in mind, using simple single crochet stitches worked in continuous rounds. Let's dive in and create something zesty and delightful!
Materials Needed
Before you begin, gather the following supplies to ensure a smooth crafting experience:
- Yarn: Worsted weight cotton yarn in three colors:
- Orange (for the main pouch panels)
- White (for the rind edge)
- Green (for the leaf accent)
- Crochet Hook: US G/6 (4.0 mm) crochet hook
- Stitch Marker: To keep track of your rounds
- Yarn Needle: For weaving in ends and sewing pieces together
- Scissors: For cutting yarn
- Optional: Fiberfill stuffing for a plump look
Gauge: 4 single crochet stitches = 1 inch in continuous rounds. (Gauge is not critical for this project, but maintaining consistent tension will give you a neat, even result.)
Step-by-Step Instructions
This pouch is worked in continuous spiral rounds. Use a stitch marker to mark the beginning of each round and move it up as you work. Do not join rounds unless otherwise specified.
Front Panel (Orange Slice)
This panel features the beautiful spiral texture that mimics the flesh of an orange.
- Round 1: With orange yarn, make a magic ring. Work 6 single crochet (sc) into the ring. (6 stitches)
- Round 2: Work 2 sc in each stitch around. (12 stitches)
- Round 3: *Sc in the next stitch, 2 sc in the next stitch*; repeat from * to * around. (18 stitches)
- Round 4: *Sc in the next 2 stitches, 2 sc in the next stitch*; repeat from * to * around. (24 stitches)
- Round 5: *Sc in the next 3 stitches, 2 sc in the next stitch*; repeat from * to * around. (30 stitches)
- Round 6: *Sc in the next 4 stitches, 2 sc in the next stitch*; repeat from * to * around. (36 stitches)
- Round 7: *Sc in the next 5 stitches, 2 sc in the next stitch*; repeat from * to * around. (42 stitches)
- Round 8: *Sc in the next 6 stitches, 2 sc in the next stitch*; repeat from * to * around. (48 stitches)
- Round 9: *Sc in the next 7 stitches, 2 sc in the next stitch*; repeat from * to * around. (54 stitches)
- Round 10: *Sc in the next 8 stitches, 2 sc in the next stitch*; repeat from * to * around. (60 stitches)
- Rounds 11-12: Sc in each stitch around. (60 stitches)
Fasten off and weave in the yarn end securely.
Back Panel (Plain)
This panel is the solid backing of the pouch.
- Rounds 1-10: Repeat Rounds 1 through 10 exactly as you did for the front panel. Do not fasten off after Round 10.
- Round 13: Sc in each stitch around. (60 stitches)
Fasten off, leaving a long tail (approximately 18-20 inches) for sewing the panels together.
Rind Edge
This creates the crisp white border that frames the orange slice.
- With the white yarn, join with a slip stitch to any stitch on the edge of the front panel.
- Chain 1 (does not count as a stitch), then work 1 sc in the same stitch.
- Work 1 sc in each stitch around the entire edge of the front panel.
- Join with a slip stitch to the first sc of the round.
Fasten off and weave in the end.
Assembly
Now it's time to bring your pouch together!
- Place the front and back panels together with their wrong sides facing each other. The right sides (the nicer-looking sides) should be facing out.
- Thread the long tail from the back panel onto your yarn needle.
- Using a whip stitch, sew the two panels together around the edge. Insert your needle through both layers, working evenly around the circle.
- Stop sewing when you have a 2-inch opening left.
- Carefully turn the pouch right side out through this opening.
- Optional: Lightly stuff the pouch with fiberfill for a plump, cushiony look. Do not overstuff, as you want it to remain flat enough to close easily.
- Whip stitch the remaining opening closed. Weave in all yarn ends securely.
Leaf Accent
Add a touch of botanical charm with this simple leaf.
- With green yarn, chain 8.
- Row 1: Sc in the 2nd chain from the hook. Work 1 half double crochet (hdc) in the next chain. Work 1 double crochet (dc) in the next 3 chains. Work 1 hdc in the next chain. Work 1 sc in the last chain.
- Fasten off, leaving a tail for sewing.
- Sew the leaf securely to the top edge of the pouch, positioning it so it looks like it's sprouting from the rind.
I-Cord Strap (Optional)
If you'd like to turn your pouch into a tiny bag, add a simple strap.
- With orange yarn, chain 30.
- Slip stitch in the 2nd chain from the hook and in each chain across.
- Fasten off, leaving tails on both ends.
- Sew the ends of the strap to opposite sides of the pouch's top edge.
And there you have it—your very own Sunny Citrus Cozy Pouch! This delightful project works up quickly and makes a wonderful handmade gift. Whether you use it to organize small essentials or simply display it as a cheerful decoration, it's sure to bring a smile to anyone's face. Happy crocheting!


