Sun-Kissed Meadow Throw Free Pattern
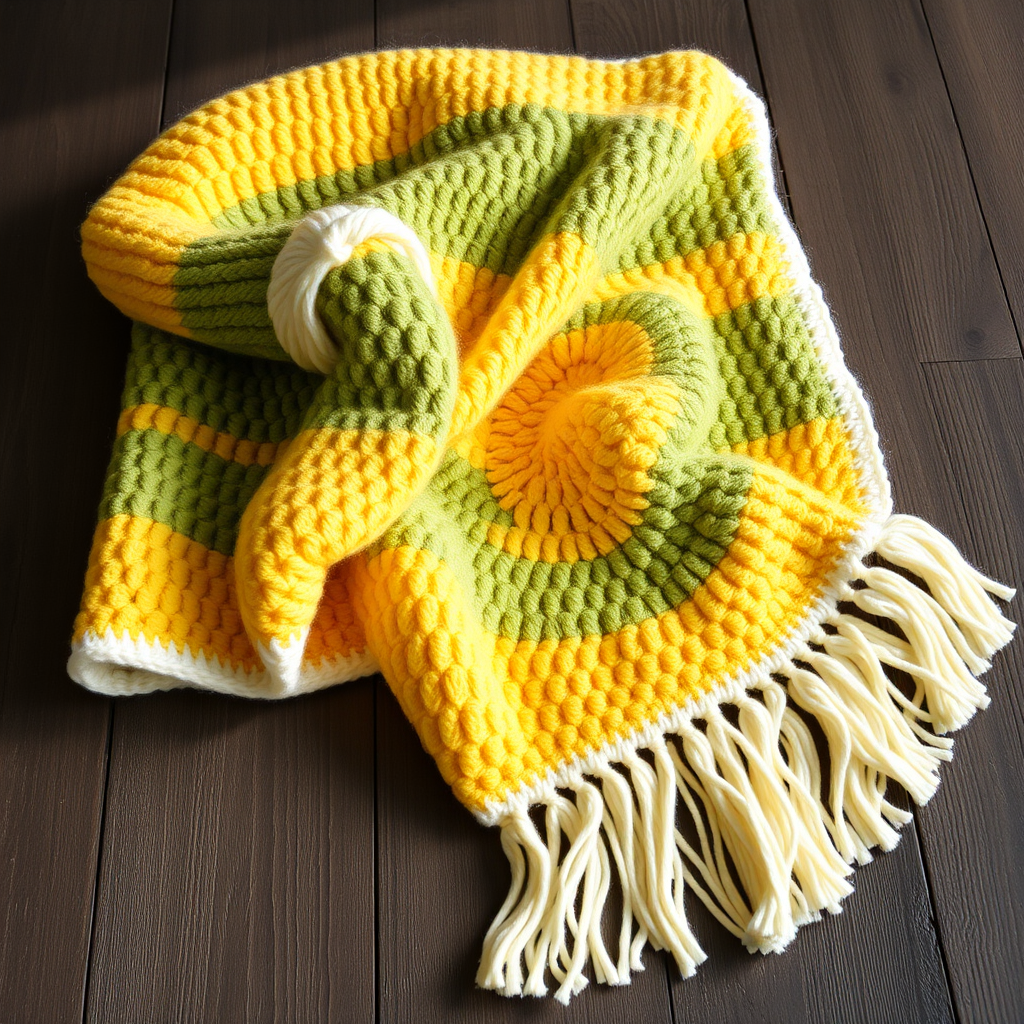
Bring the Outdoors In: The Sun-Kissed Meadow Throw
Imagine wrapping yourself in the golden warmth of a summer meadow, where sunlight filters through soft sage and mossy greens. That's the magic of the Sun-Kissed Meadow Throw—a stunning, textured crochet blanket that brings a serene, nature-inspired palette into your living space. This intermediate-level pattern is a joy to work up, featuring a beautiful gradient of five harmonious colors and a rich, woven-like texture created with front and back post stitches. The result is a cozy, handmade centerpiece that adds warmth and organic charm to any room. Whether you're an experienced crocheter looking for a relaxing project or a confident beginner ready for a new challenge, this throw is the perfect way to create a lasting heirloom piece.
Materials Needed
Before you begin, gather your supplies. This project uses simple, readily available materials to create a luxurious, high-quality finish.
- Yarn: Worsted weight cotton or cotton-blend yarn in 5 colors (approx. 1800 yards total):
- A: Sunny Yellow (approx. 360 yards)
- B: Buttercup (approx. 360 yards)
- C: Sage Green (approx. 360 yards)
- D: Moss Green (approx. 360 yards)
- E: Ivory (approx. 360 yards)
- Hook: H/8 (5.0 mm) crochet hook
- Other: Yarn needle for weaving in ends, scissors
Gauge & Finished Size
- Gauge: 14 stitches x 12 rows = 4 inches in pattern stitch. Always check your gauge to ensure your finished throw matches the intended dimensions.
- Finished Size: 45 inches wide x 60 inches long (without fringe).
Step-by-Step Instructions
This pattern is broken down into manageable sections. The "Meadow Stitch" is the heart of the design, creating a beautiful ribbed texture that mimics woven fabric. Take your time with the first few rows, and you'll quickly get into a relaxing rhythm.
Stitches & Abbreviations
- ch: chain
- sc: single crochet
- dc: double crochet
- fpdc: front post double crochet
- bpdc: back post double crochet
- sl st: slip stitch
Special Stitch: The Meadow Stitch (Multiple of 2 + 1)
This stitch pattern creates the beautiful, textured fabric of the throw. Practice on a small swatch first if you're new to post stitches.
- Row 1: Dc in 4th ch from hook (the skipped chs count as a dc), *ch 1, skip 1 ch, dc in next ch*; repeat from * to * across, turn.
- Row 2: Ch 3 (counts as first dc here and throughout), *fpdc around the next dc, ch 1, skip the ch-1 space*; repeat from * to * across, ending with a dc in the top of the turning ch from the previous row, turn.
- Row 3: Ch 3, *bpdc around the next fpdc, ch 1*; repeat from * to * across, ending with a dc in the top of the turning ch, turn.
- Repeat: Repeat Rows 2 and 3 for the pattern. This creates the alternating front and back post ribs.
Creating Your Throw
Foundation & Section 1 (Color A - Sunny Yellow)
- Foundation Chain: With Color A, ch 158 (a multiple of 2 + 1).
- Work the Pattern: Begin the Meadow Stitch pattern, starting with Row 1. Continue working Rows 2 and 3 until the section measures 12 inches from the start. Ensure you end with a Row 3 (a bpdc row) to create a clean edge for the color change.
Section 2 (Color B - Buttercup)
- Attach New Color: With the right side facing you, attach Color B with a sl st in the first stitch of the row.
- Work the Pattern: Ch 3, and begin working the Meadow Stitch pattern again, starting with Row 2. Continue for 12 inches, ending with a Row 3.
Section 3 (Color C - Sage Green)
- Attach New Color: Attach Color C in the same manner as before.
- Work the Pattern: Work the Meadow Stitch pattern for 12 inches, ending with a Row 3.
Section 4 (Color D - Moss Green)
- Attach New Color: Attach Color D.
- Work the Pattern: Work the Meadow Stitch pattern for 12 inches, ending with a Row 3.
Section 5 (Color E - Ivory)
- Attach New Color: Attach Color E.
- Work the Pattern: Work the Meadow Stitch pattern for the final 12 inches, ending with a Row 3. Fasten off and weave in all loose ends securely.
Finishing Touches
Border
- With Color E, attach your yarn to any corner of the throw.
- Single Crochet Border: Sc evenly around the entire perimeter of the throw. In each corner, work 3 sc in the same stitch to ensure the corners lie flat and are nicely turned.
- When you return to your starting corner, join with a sl st to the first sc. Fasten off and weave in the end.
Adding the Fringe
The fringe is the perfect final touch, adding movement and a bohemian feel to your throw.
- Cut Strands: Cut 12-inch lengths of yarn from each of your five colors. You'll need enough to place fringe every 2-3 stitches along the two short edges (the top and bottom of the throw).
- Create Fringe Clusters: For each fringe, take 3 strands of yarn (you can mix colors or use a single color per fringe for a more structured look). Fold the strands in half to create a loop.
- Attach Fringe: Insert your crochet hook from the back to the front through an edge stitch. Pull the folded loop of yarn through the stitch. Then, pull the loose ends of the yarn through the loop and tighten gently to secure the fringe to the edge.
- Repeat: Continue attaching fringe clusters evenly along both short edges.
- Trim: Once all fringe is attached, lay the throw flat and trim the fringe ends evenly for a polished, professional look.
Your Sun-Kissed Meadow Throw is now complete! Lay it over a sofa, drape it on the end of a bed, or keep it folded in a basket for those cozy evenings. The beautiful gradient and rich texture make it a true statement piece that you'll cherish for years to come. Happy crocheting!



