Starlight Mosaic C2C Blanket Free Pattern – Cozy Leftover Yarn Scrap Stashbuster
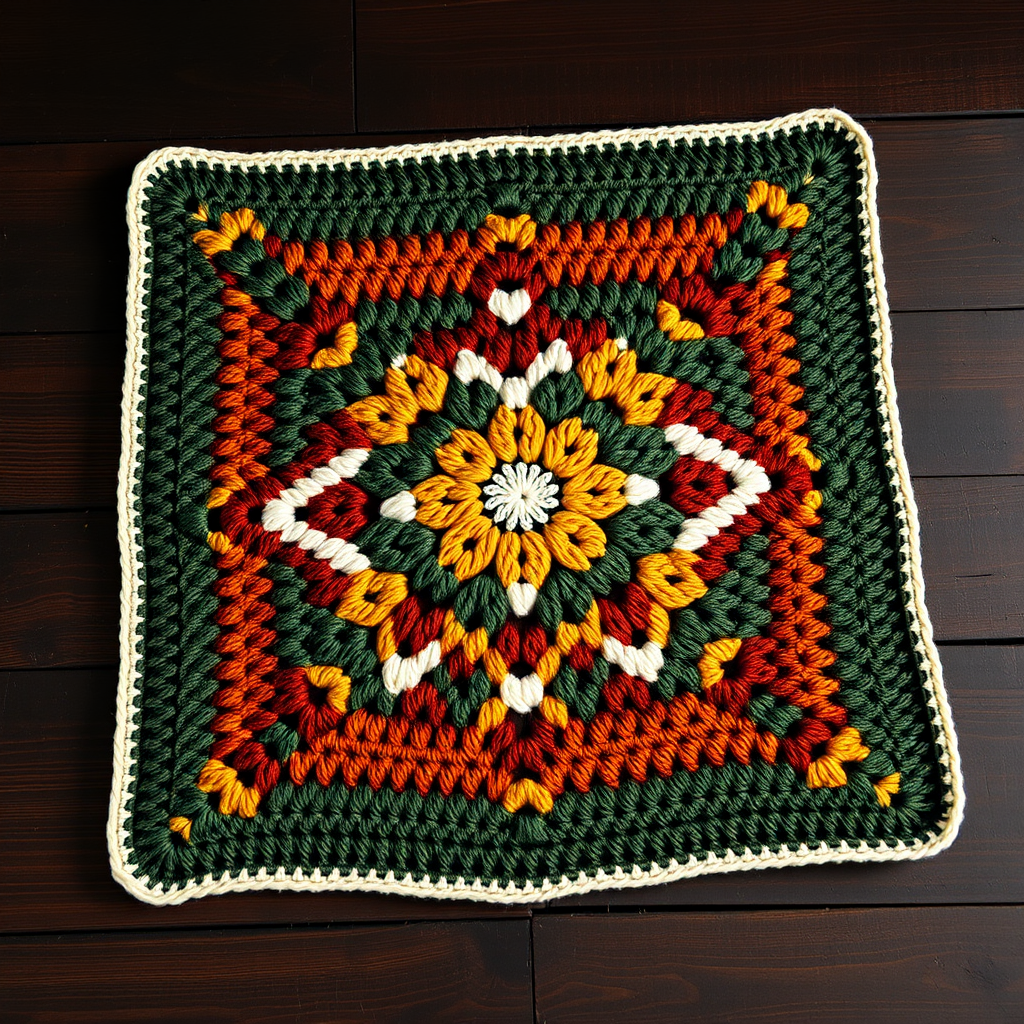
Turn Your Yarn Scraps into a Stunning Geometric Masterpiece
Are you drowning in a sea of leftover yarn but craving a project that feels fresh, modern, and utterly satisfying? Meet the Starlight Mosaic C2C Blanket—a corner-to-corner crochet pattern that transforms your scrap stash into a luminous, geometric work of art. Using only simple double crochet clusters, this pattern builds a breathtaking diamond-star motif that radiates warmth and color. It's the ultimate stashbuster: cozy, handmade, and surprisingly beginner-friendly once you grasp the rhythm of C2C.
This pattern is perfect for those evenings when you want to mindlessly crochet while watching TV, yet still produce something that looks like it took hours of complex charting. The mosaic effect is achieved purely through color placement, not intricate stitches. Let's dive into how you can create this 50-inch square beauty for your couch or bed.
Materials Needed: Gather Your Stash
Before you begin, ensure you have the following supplies. This pattern is designed to use up those partial skeins you've been hoarding—so raid your yarn basket!
- Yarn: Worsted weight yarn in 4 colors. Exact amounts: Color A (400g), Color B (350g), Color C (300g), Color D (250g). The sample uses a warm, earthy palette: Deep Forest Green (A), Burnt Orange (B), Mustard Yellow (C), and Cream (D).
- Hook: 5.5mm (I-9) crochet hook. This size ensures a dense, warm fabric that holds its shape.
- Gauge: 4 C2C blocks = 4 inches (10 cm) square. Don't stress the gauge too much—as long as your fabric is not stiff or holey, you're good.
- Extras: Yarn needle for weaving in ends, scissors, and optionally blocking mats and pins.
Step-by-Step Instructions: The Complete C2C Pattern
This blanket is worked diagonally from one corner to the opposite corner. The "block" is the fundamental unit: a ch-3, 3-dc cluster. You will increase on each row until you reach the widest point (Row 50), then decrease back down to a single block. Follow the color chart meticulously to create the mosaic star.
Understanding the C2C Block
Every block you make is identical in construction. When you start a new row, you begin with a ch-6 (which counts as the first dc and the ch-3 turning space). For every subsequent block in that row, you will slip stitch into the ch-3 space of the previous row's block, then ch 3 and work 3 dc into that same space. That's it!
Foundation & Increasing Rows (Rows 1-50)
Foundation Row 1: With Color A, ch 6. Dc in the 4th ch from the hook, dc in the next 2 ch. You now have 1 block.
Row 2: Ch 6, dc in the 4th ch from hook, dc in the next 2 ch. Turn your work. Sl st into the ch-3 space of the previous block (the space created by the ch-3 at the start of the row below). Ch 3, 3 dc in the same space. You now have 2 blocks.
Row 3: Ch 6, dc in the 4th ch from hook, dc in the next 2 ch. Turn. *Sl st into the next ch-3 space, ch 3, 3 dc in the same space.* Repeat from * across the row. You now have 3 blocks.
Rows 4-50: Continue increasing in this exact manner, adding 1 block each row. Important: Always start the row with the ch-6 block, then work the sl-st/ch-3/3-dc blocks across. Follow the color chart below to switch yarn colors at the end of each row. When changing colors, simply fasten off the old color and join the new color with a slip knot to the loop on your hook before starting the next row.
Color Chart: The Heart of the Mosaic
This chart dictates which color you use for each row. Each row number corresponds to the number of blocks in that row. Follow it strictly for the mosaic effect.
- Rows 1-5: Color A
- Rows 6-8: Color B
- Rows 9-11: Color A
- Rows 12-14: Color C
- Rows 15-17: Color B
- Rows 18-20: Color D
- Rows 21-23: Color C
- Rows 24-26: Color A
- Rows 27-29: Color D
- Rows 30-32: Color B
- Rows 33-35: Color C
- Rows 36-38: Color A
- Rows 39-41: Color D
- Rows 42-44: Color B
- Rows 45-47: Color C
- Rows 48-50: Color A
Reaching the Widest Point
After completing Row 50, you will have 50 blocks across the diagonal. This is the widest point of your square. Your blanket should look like a large triangle. Now, you will begin decreasing on each row to form the second half of the square.
Decreasing Rows (Rows 51-100)
Decrease Row 51: To decrease, you will not start with a ch-6. Instead, slip stitch across the top of the first block. Specifically, make 3 sl sts into the ch-3 space of the first block, then sl st into the next ch-3 space. Now, ch 3 and 3 dc in that same space. Continue across the row with *sl st into the next ch-3 space, ch 3, 3 dc in the same space* to the end of the row. You will have 49 blocks.
Rows 52-100: Continue decreasing 1 block each row in this same manner. Critical: Follow the color chart in reverse. That means Row 51 uses the color for Row 50 (Color A), Row 52 uses the color for Row 49 (Color C), and so on, until you reach Row 100, which uses the color for Row 1 (Color A).
Finishing Touches
Once you have decreased down to a single block, fasten off your yarn. Use your yarn needle to weave in all loose ends securely—this is essential for a professional finish, especially with a mosaic pattern.
Blocking: Gently block the blanket to even out the stitches and square up the corners. Lay it flat, pin the edges, and mist with water until damp. Allow it to dry completely.
Optional Border: For a polished edge, attach Color A to any corner and work a single crochet border around the entire perimeter. Work 1 sc in each block edge and 3 sc in each corner to keep the corners flat. This will frame your mosaic beautifully.
And there you have it—a stunning, cozy, and eco-friendly Starlight Mosaic C2C Blanket. This pattern is a fantastic way to use up scraps while creating a heirloom-quality piece. The rhythm of the C2C stitch is meditative, and watching the star emerge row by row is deeply rewarding. Happy crocheting!



