Spiral Shell Scrubby Free Knitting Pattern – Oceanic Texture
Spiral Shell Scrubby Free Knitting Pattern – Oceanic Texture
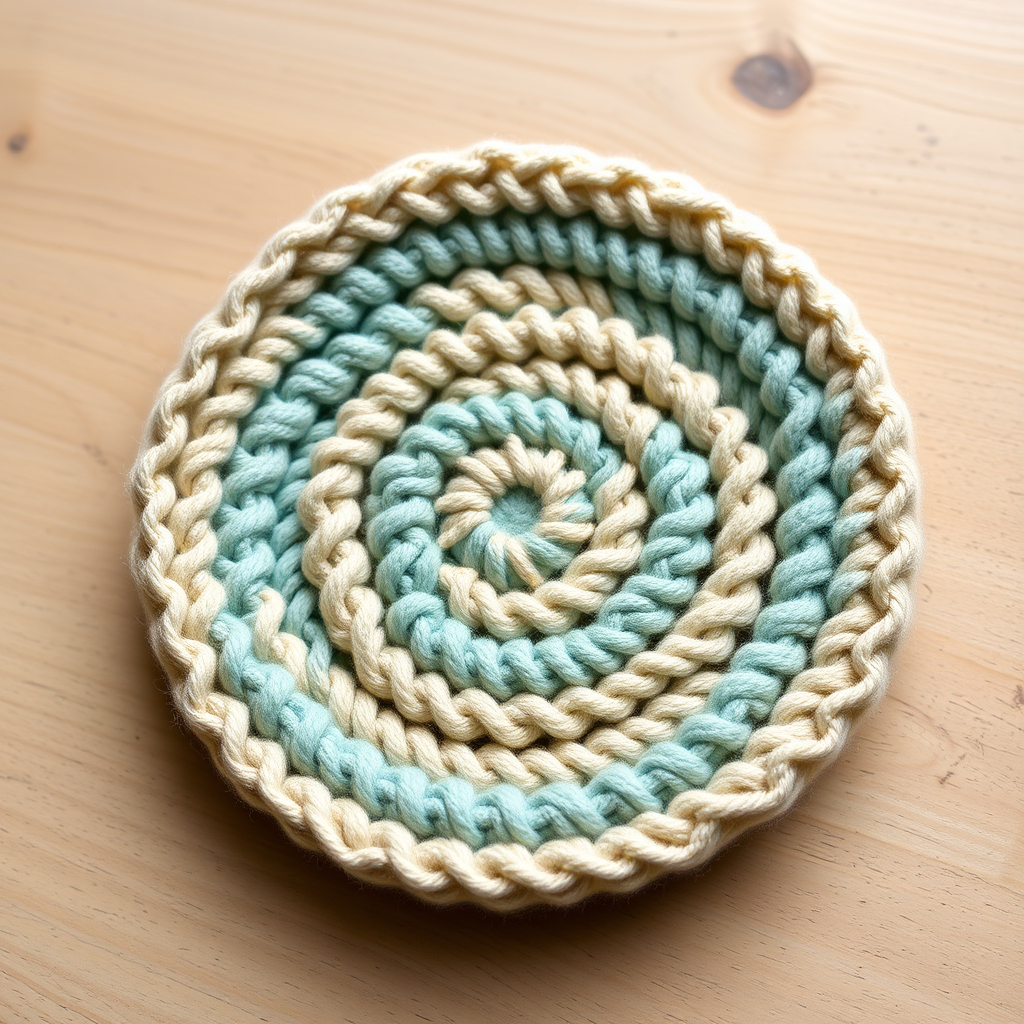
Dive into a tactile knitting adventure with this spiral shell scrubby, featuring a mesmerizing coiled texture that exfoliates gently. Knit in a single piece, this pattern is perfect for adding a handmade, ocean-inspired touch to your kitchen or bath. The dense, ridged spiral mimics the natural beauty of a nautilus shell while providing an effective, gentle scrubbing surface. Whether you're a seasoned knitter looking for a quick project or a beginner eager to learn new techniques, this pattern offers a satisfying and beautiful result.
This free knitting pattern is beginner-friendly and works up quickly using worsted weight cotton yarn. The clever construction—increasing on one side and decreasing on the other—creates a continuous, flat spiral that is then seamed into a circular scrubby. The result is a stunning, functional piece that makes a wonderful gift or a lovely addition to your own home.
Materials Needed
Before you begin, gather the following materials to ensure a smooth and enjoyable knitting experience:
- Yarn: Worsted weight cotton yarn (e.g., Lily Sugar'n Cream) in two contrasting colors:
- Main Color (MC): Sea Glass Teal
- Contrast Color (CC): Sandy Beige
- Needles: US 7 (4.5 mm) knitting needles
- Gauge: 20 stitches and 28 rows = 4 inches in stockinette stitch (blocked). Gauge is important for achieving the correct size and density of the scrubby.
- Extras: Yarn needle for weaving in ends and seaming, scissors.
Step-by-Step Instructions
This pattern is worked flat, back and forth, to create a spiral that is then seamed into a circular scrubby. The spiral is formed by increasing stitches on one side and decreasing on the other, creating a continuous coiled shape. Follow these detailed instructions carefully, and you'll have a beautiful spiral scrubby in no time.
Abbreviations
- K = knit
- P = purl
- K2tog = knit two stitches together (decrease)
- Kfb = knit into front and back of the same stitch (increase)
- St(s) = stitch(es)
- MC = Main Color
- CC = Contrast Color
- RS = Right Side
- WS = Wrong Side
Setup: Casting On and Initial Increases
With MC, cast on 10 stitches.
Row 1 (RS): Kfb in first stitch, knit to end. (11 sts)
Row 2 (WS): Purl all stitches.
Row 3: Kfb in first stitch, knit to end. (12 sts)
Row 4: Purl all stitches.
Continue Increasing to Form the Spiral's Core
Continue increasing on the right side (RS) only, while working even on the wrong side (WS) until you have 30 stitches.
Row 5: Kfb in first stitch, knit to end. (13 sts)
Row 6: Purl all stitches.
Repeat Rows 5-6, adding one stitch on each RS row, until you have 30 stitches total. This creates the expanding inner section of the spiral.
Begin the Spiral Shaping
Now that you have 30 stitches, you will begin the spiral shaping. This involves increasing at the beginning of the row and decreasing at the end, which keeps the stitch count constant while curving the work.
Row 31 (RS): Kfb in first stitch, knit to last 2 stitches, K2tog. (30 sts – count stays the same)
Row 32 (WS): Purl all stitches.
Repeat Rows 31-32 for 20 more rows (until the spiral has made about one full turn).
Adding the Contrast Color
To create the beautiful striped effect, you will now switch to your Contrast Color (CC).
Switch to CC: Continue repeating Rows 31-32 with CC for another 20 rows.
Switch back to MC: Repeat Rows 31-32 with MC for 20 rows.
Continue alternating colors every 20 rows until the spiral has made about 3 full turns total. This will create a striking, multi-banded spiral.
Shaping the Outer Edge (Decrease Side)
Once your spiral has reached the desired number of turns, you will begin decreasing on both sides to taper the outer edge and prepare for finishing.
Next Row (RS): K2tog, knit to last 2 stitches, K2tog. (28 sts)
Next Row (WS): Purl all stitches.
Repeat these two rows until you have 10 stitches left. This will create a neat, rounded outer edge.
Final Row and Gathering
Now you will close the end of the spiral.
Final Row (RS): K2tog across all stitches (5 sts). Cut yarn, leaving a long tail (at least 12 inches). Thread tail through remaining stitches and pull tight to gather.
Finishing: Seaming and Blocking
The final step is to transform your flat spiral into a circular scrubby.
- Sew the gathered end to the center of the spiral (the cast-on edge) using the long tail. This creates the circular, nautilus-like shape. Make sure to secure it firmly.
- Weave in all ends using a yarn needle to ensure a clean, professional finish.
- Block lightly to flatten and set the spiral shape. Wet blocking or steam blocking works well with cotton yarn. Lay flat to dry.
Your Spiral Shell Scrubby is now complete! This beautiful and functional piece is perfect for washing dishes, exfoliating in the bath, or as a thoughtful handmade gift. The combination of the textured spiral and the contrasting colors creates a stunning visual effect that is sure to be admired. Enjoy your new ocean-inspired creation!


