Serene Sloth Snuggle Sack Free Knitting Pattern – Cozy Cocoon for Little Ones
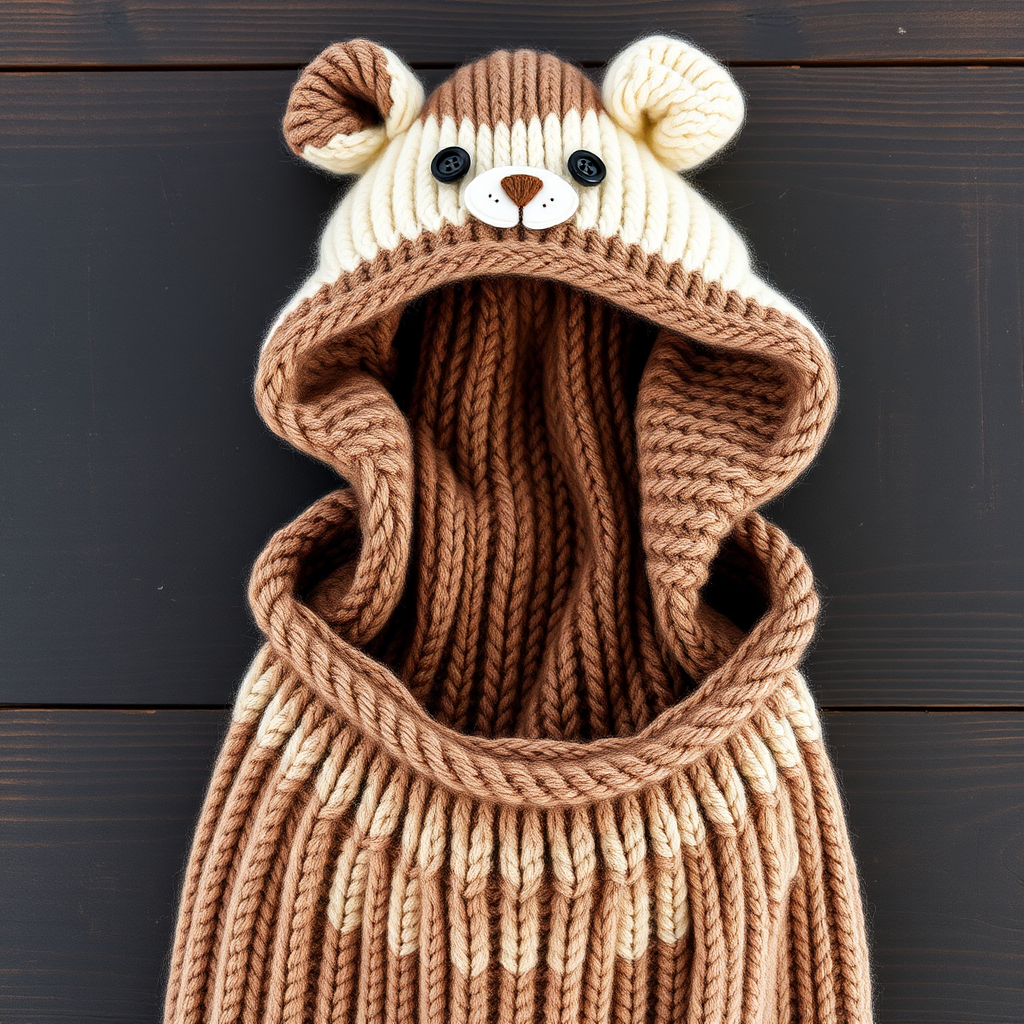
Wrap Your Little One in Cozy Comfort: The Serene Sloth Snuggle Sack
There's something magical about wrapping a baby in a handmade gift—the love, the time, and the care that goes into every stitch. Today, I'm thrilled to share a pattern that combines the practicality of a warm sleeping sack with the irresistible charm of one of nature's most beloved creatures: the sloth. The Serene Sloth Snuggle Sack is a hooded cocoon designed to keep your little one toasty during chilly afternoons, nap times, or as a stunning baby shower centerpiece gift.
This pattern features a smooth, textured body in a warm taupe, a soft cream hood, and adorable dark brown floppy ears. The face is brought to life with embroidered patches and button eyes, creating a gentle, serene expression that will melt hearts. Whether you're a seasoned knitter or a confident beginner looking for a rewarding project, this snuggle sack is a joy to create and a treasure to give.
Why You'll Love This Pattern
- Unique Design: A whimsical sloth face that stands out from typical baby blankets.
- Practical & Cozy: Functions as a wearable blanket, perfect for stroller walks or cuddling at home.
- Customizable Sizes: Includes instructions for 0-6 months and 6-12 months.
- Clear Instructions: Step-by-step guidance that's easy to follow, even for newer knitters.
Materials Needed
Before you cast on, gather your supplies. Here's everything you'll need to bring this sloth to life:
| Item | Specification |
|---|---|
| Yarn | Worsted weight yarn in warm taupe (main color), cream (hood), and dark brown (ears/face). Approx. 600g total. |
| Needles | US 8 (5mm) circular needles, 24-inch length (for body). Double-pointed needles (DPNs) in same size for hood. |
| Gauge | 18 stitches and 24 rows = 4 inches in stockinette stitch. Always check your gauge to ensure correct sizing! |
| Notions | Stitch markers, tapestry needle for weaving ends, scissors, and 2 safety eyes or buttons (ensure they are baby-safe). |
Step-by-Step Instructions
Let's dive into the pattern! This is broken down into manageable sections. Read through each part before starting to get a feel for the flow.
Sizes & Abbreviations
Sizes: 0-6 months (6-12 months). Instructions for the larger size are in parentheses.
Abbreviations:
- K = Knit
- P = Purl
- K2tog = Knit two together (decrease)
- P2tog = Purl two together (decrease)
- M1 = Make one (increase)
- St st = Stockinette stitch (knit on right side, purl on wrong side)
- Garter st = Knit every row
Part 1: Knitting the Body of the Snuggle Sack
The body is worked in the round from the top down, creating a seamless cocoon.
- Cast On & Join: With your taupe yarn, cast on 80 (90) stitches. Place a stitch marker at the beginning of the round. Carefully join in the round, ensuring your stitches are not twisted.
- Ribbed Neckline: Work in a K2, P2 ribbing pattern for 2 inches. This will create a stretchy, snug fit around the baby's chest.
- Main Body: Switch to stockinette stitch (knit every round). Work even until the piece measures 12 (14) inches from the cast-on edge. This is the main length of the sack.
- Shaping the Bottom: This is where we create the rounded bottom of the cocoon.
- Place a marker after every 20 (22) stitches. You should have 4 markers total.
- Decrease Round: *K2tog, knit to 2 stitches before the next marker, K2tog, slip marker*; repeat from * to * around. You will decrease 8 stitches total in this round.
- Even Round: Knit all stitches.
- Repeat these two rounds (decrease and even) until you have 40 (44) stitches remaining on your needles.
- Finishing the Body: Cut your yarn, leaving a long tail (about 12 inches). Thread the tail onto a tapestry needle. Slide the needle through the remaining stitches on your knitting needle, removing them from the needle. Pull the yarn tight to gather the bottom closed. Secure with a knot and weave in the end.
Part 2: Creating the Hood
Now we'll pick up stitches from the cast-on edge to create the hood.
- Pick Up Stitches: With your cream yarn and circular needle, pick up and knit 40 (44) stitches evenly around the cast-on edge of the body. This is the neck opening.
- Work the Hood: Turn your work and work back and forth in rows (not in the round) in stockinette stitch. Continue until the hood measures 6 (7) inches from the picked-up edge.
- Shape the Top of the Hood:
- Decrease Row (Right Side): K2tog, knit to the last 2 stitches, K2tog.
- Even Row (Wrong Side): Purl all stitches.
- Repeat these two rows until you have 20 (22) stitches remaining. Bind off loosely.
- Seam the Hood: Fold the hood in half with the right sides together. Use your tapestry needle and a length of cream yarn to sew the top seam closed. Weave in the ends.
Part 3: Knitting the Ears (Make 2)
These floppy ears add the perfect sloth charm.
- Cast On: With your dark brown yarn, cast on 10 stitches.
- Work the Ear: Work in stockinette stitch (knit on RS, purl on WS) for 2 inches.
- Shape the Ear: On the next right-side row, K2tog across the row. You will have 5 stitches left.
- Finish: Cut the yarn, leaving a tail. Thread the tail through the remaining 5 stitches, pull tight to gather, and secure. This creates a rounded, cupped ear shape.
- Attach: Use the yarn tails to sew the ears securely to the top corners of the hood. Position them so they flop forward slightly for that classic sloth look.
Part 4: Adding the Face Details
This is where your sloth comes to life! Take your time with the embroidery for a polished look.
- Eye Patches: With your dark brown yarn and a tapestry needle, embroider two oval patches on the front of the hood where the eyes will be. Use a satin stitch (working parallel stitches close together) to fill in the ovals. Place them about 1-2 inches apart, depending on the size.
- Eyes: Attach your two button eyes or safety eyes in the center of each brown oval patch. Safety note: If making this for a baby, always use safety eyes that are securely fastened, or embroider the eyes instead for the safest option.
- Nose & Mouth: Using dark brown yarn, embroider a small, rounded triangle for the nose just below and between the eye patches. Use a backstitch to create a gentle, smiling mouth line extending from the bottom of the nose.
Part 5: Finishing Touches
- Weave in Ends: Carefully weave in all remaining yarn ends on the inside of the sack using your tapestry needle. This ensures a clean, professional finish and prevents unraveling.
- Optional Ribbon Tie: For a snugger fit around the neck, you can thread a soft ribbon or an i-cord through the ribbed neckline. This is a lovely, functional detail.
And there you have it—your very own Serene Sloth Snuggle Sack! This project is more than just a knit; it's a hug in yarn form. The combination of the textured body, the cozy hood, and the adorable face makes it a standout piece that will be cherished for years. I'd love to see your finished sloths! Share your photos in the comments below or tag me on social media. Happy knitting!


