Rustic Charm Farmhouse Kitchen Towel Holder Free Pattern
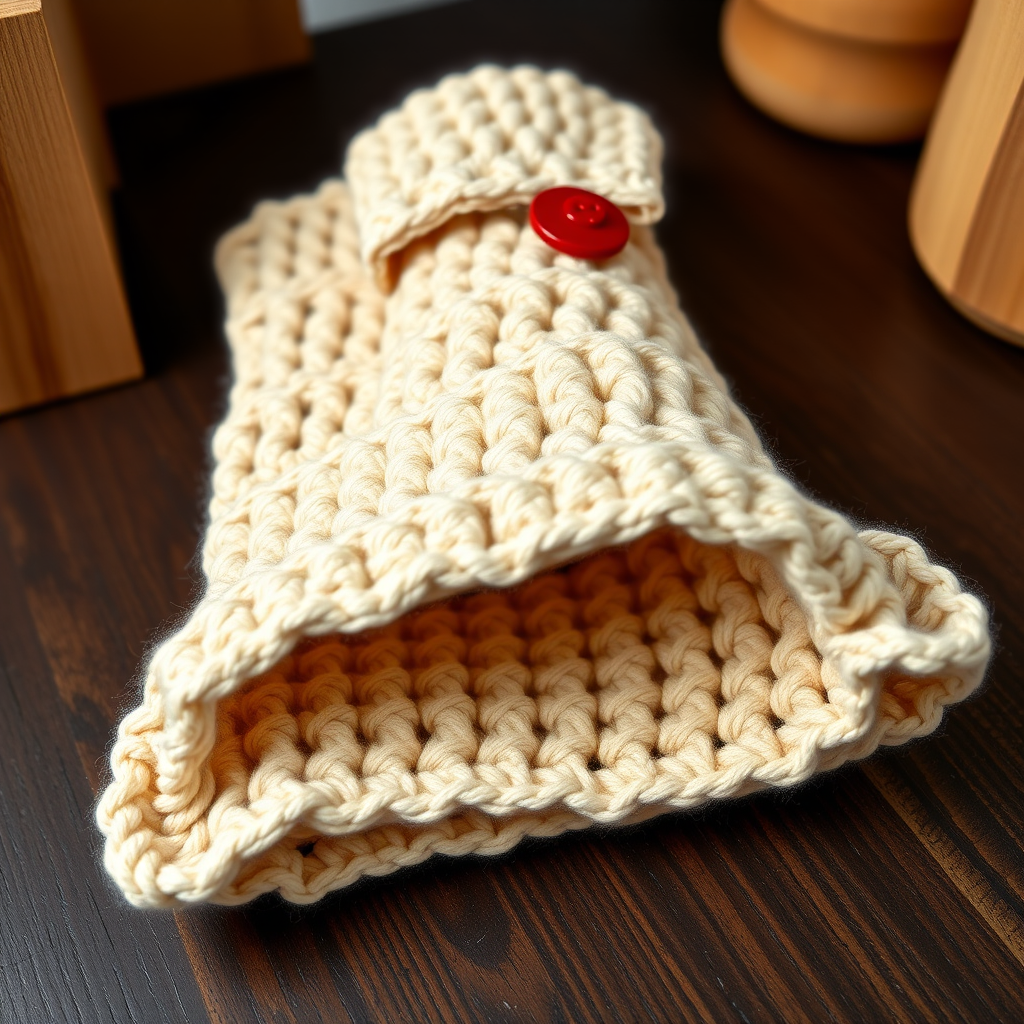
Rustic Charm Farmhouse Kitchen Towel Holder Free Crochet Pattern
Add a touch of rustic farmhouse charm to your kitchen with this beautifully textured crochet towel holder. This sturdy and stylish design keeps your towel within easy reach while adding a cozy, handmade touch to your decor. The combination of warm cream cotton yarn and a rustic red button creates a timeless, country-inspired look that will complement any farmhouse aesthetic. Whether you're an experienced crocheter or just starting out, this pattern is straightforward and rewarding to make.
Materials Needed
Before you begin, gather the following supplies to ensure a smooth crafting experience:
- Yarn: Worsted weight cotton yarn (e.g., Lily Sugar'n Cream) in two colors:
- Main Color (MC) – Cream (approximately 1 skein)
- Contrast Color (CC) – Rustic Red (small amount for optional border and button accent)
- Hook: G/6 (4.0 mm) crochet hook
- Other: Yarn needle for weaving in ends, stitch marker, scissors, and one large rustic red button (approximately 1 inch in diameter)
Gauge: 16 sc x 20 rows = 4 inches (10 cm) in single crochet. Always check your gauge to ensure the finished size matches the pattern.
Step-by-Step Instructions
This pattern is worked in continuous rounds (spiral) unless otherwise noted. Use a stitch marker to keep track of your rounds. The finished size is approximately 3 inches wide and 12 inches long (excluding the ring).
Abbreviations
- ch = chain
- sc = single crochet
- hdc = half double crochet
- dc = double crochet
- sl st = slip stitch
- st(s) = stitch(es)
- rnd(s) = round(s)
Part 1: Crochet the Ring
The ring is the top loop that will hold your towel holder in place. Follow these steps carefully:
- With MC, chain 20 stitches.
- Slip stitch to the first chain to form a ring. Make sure the chain isn't twisted before joining.
- Work 30 single crochet stitches evenly around the ring. To do this, insert your hook into the center of the ring, yarn over, pull up a loop, yarn over, and pull through both loops on the hook. Repeat until you have 30 sc around the entire ring.
- Join with a slip stitch to the first single crochet.
- Fasten off and weave in the ends securely with your yarn needle.
Part 2: Create the Main Body (Circular Base)
The main body starts with a flat circle that will gradually become the rectangular towel holder. Work in continuous rounds without joining unless specified.
- Rnd 1: With MC, make a magic ring. Chain 1, then work 6 single crochet into the ring. Pull the tail to tighten the ring closed. (6 sts)
- Rnd 2: Work 2 single crochet in each stitch around. (12 sts)
- Rnd 3: *Single crochet in the next stitch, 2 single crochet in the next stitch* repeat around. (18 sts)
- Rnd 4: *Single crochet in the next 2 stitches, 2 single crochet in the next stitch* repeat around. (24 sts)
- Rnd 5: *Single crochet in the next 3 stitches, 2 single crochet in the next stitch* repeat around. (30 sts)
- Rnd 6: *Single crochet in the next 4 stitches, 2 single crochet in the next stitch* repeat around. (36 sts)
- Rnd 7: *Single crochet in the next 5 stitches, 2 single crochet in the next stitch* repeat around. (42 sts)
- Rnd 8: *Single crochet in the next 6 stitches, 2 single crochet in the next stitch* repeat around. (48 sts)
- Rnd 9: *Single crochet in the next 7 stitches, 2 single crochet in the next stitch* repeat around. (54 sts)
- Rnd 10: *Single crochet in the next 8 stitches, 2 single crochet in the next stitch* repeat around. (60 sts)
- Rnd 11-20: Single crochet in each stitch around. (60 sts each round)
After Round 20, you should have a flat, circular base. Do not fasten off; you'll continue directly into the texture pattern.
Part 3: Work the Texture Pattern (Rows)
Now you'll transition from rounds to rows to create the rectangular body with a beautiful waffle-like texture. This is where the magic happens!
- Row 1: Chain 1, turn your work. Single crochet in the first 10 stitches. *Chain 2, skip 2 stitches, single crochet in the next 8 stitches* repeat across until 10 stitches remain, then single crochet in the last 10 stitches. You will have 5 chain-2 spaces.
- Row 2: Chain 1, turn. Single crochet in the first 10 stitches. *Work 2 double crochet in the chain-2 space, single crochet in the next 8 stitches* repeat across, ending with single crochet in the last 10 stitches.
- Row 3: Chain 1, turn. Single crochet in the first 10 stitches. *Chain 2, skip the 2 double crochet, single crochet in the next 8 stitches* repeat across, ending with single crochet in the last 10 stitches.
- Row 4: Chain 1, turn. Single crochet in the first 10 stitches. *Work 2 double crochet in the chain-2 space, single crochet in the next 8 stitches* repeat across, ending with single crochet in the last 10 stitches.
- Repeat Rows 3 and 4 until the body measures approximately 10 inches from the beginning, always ending with a Row 4 (the row with double crochet clusters).
This alternating pattern creates the subtle waffle texture that gives the towel holder its rustic charm.
Part 4: Create the Buttonhole Flap
The flap folds over the ring and secures with the button. Follow these steps:
- Next Row: Chain 1, turn. Single crochet in the first 10 stitches, chain 3, skip 3 stitches, then single crochet in the remaining stitches across. This creates the buttonhole opening.
- Next Row: Chain 1, turn. Single crochet in each stitch across, working 3 single crochet in the chain-3 space.
- Next Row: Chain 1, turn. Single crochet in each stitch across. Fasten off and weave in all ends with your yarn needle.
Part 5: Finishing Touches
- Sew the large rustic red button onto the center of the crocheted ring. Make sure it's securely attached, as it will bear the weight of the towel.
- Fold the flap over the ring and button it to secure. The towel holder is now ready to use!
- Weave in any remaining loose ends.
Optional Decorative Border
For an extra pop of color and a more finished look, add a decorative border using your Contrast Color (CC) yarn:
- With CC, attach yarn to any edge of the towel holder.
- Work a single crochet or slip stitch evenly around the entire perimeter of the towel holder, including the flap and the ring area.
- When you reach the starting point, join with a slip stitch, fasten off, and weave in the ends.
Tips for Success
- Use a stitch marker to keep track of your rounds, especially when working in the spiral.
- Keep your tension consistent for a uniform texture. Cotton yarn doesn't stretch much, so a relaxed grip will make crocheting easier.
- If you prefer a longer or shorter towel holder, simply adjust the number of rows in the texture pattern section.
- Wash your finished towel holder gently by hand and lay flat to dry to maintain its shape.
This rustic farmhouse towel holder is not only functional but also a beautiful handmade addition to your kitchen. It makes a wonderful gift for housewarmings, weddings, or any occasion. Enjoy the process, and don't forget to show off your creation—it's sure to be a conversation starter!


