Rosewood Ripple Shawl Free Pattern – Textured Lace Knit Wrap
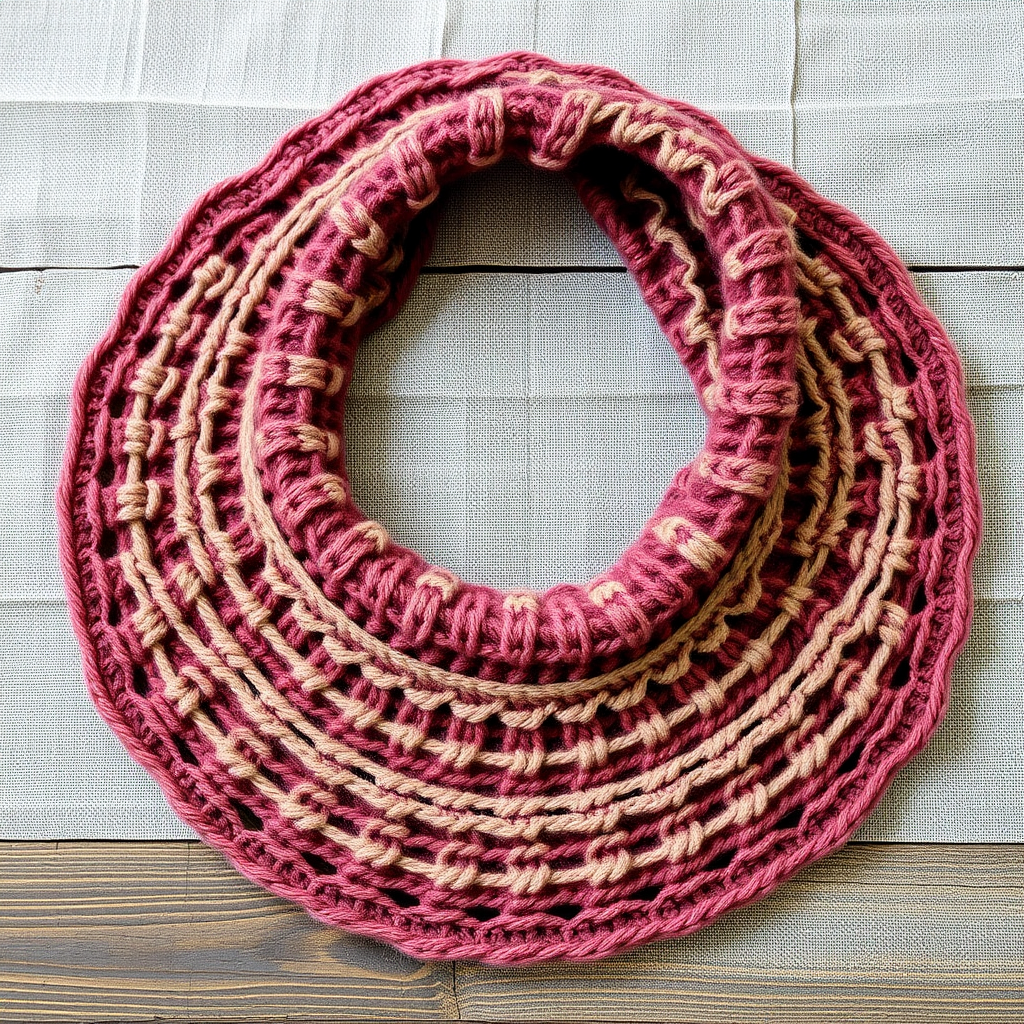
The Rosewood Ripple Shawl: A Beginner-Friendly Textured Lace Knit
There are certain knitting projects that feel like a warm embrace—and the Rosewood Ripple Shawl is exactly that. This crescent-shaped wrap is a modern interpretation of classic lace, featuring a subtle, organic wave texture that mimics the bark and petals of a rosewood tree. Worked in two complementary earthy tones—dusty rose and warm taupe—this shawl is both sophisticated and inviting. Whether you're looking for a cozy layer for cool evenings or a thoughtful handmade gift, this pattern delivers. Best of all, it's beginner-friendly, using simple knit and purl stitches, yarn overs, and basic decreases to create a stunning ripple effect.
In this comprehensive guide, I'll walk you through every step, from gathering your materials to binding off and blocking. By the end, you'll have a beautiful, drapey shawl that you'll be proud to wear or gift.
Materials Needed
Before you cast on, gather the following supplies. Having everything ready will make your knitting experience smooth and enjoyable.
Yarn
- Worsted weight yarn in two complementary shades:
- Main Color (MC): Dusty rose (approx. 600 yards)
- Contrast Color (CC): Warm taupe (approx. 300 yards)
Tip: Choose a soft, breathable yarn like a merino wool blend or a cotton-acrylic mix for the best drape and comfort.
Needles
- US 8 (5.0 mm) circular knitting needle, 32 inches or longer. The long cord is essential to accommodate the growing number of stitches as the shawl expands.
Gauge
- 18 stitches and 24 rows = 4 inches in stockinette stitch (blocked).
Note: Gauge is important for achieving the correct size and drape. If your gauge is off, adjust your needle size accordingly.
Other Supplies
- Stitch markers (at least 2)
- Tapestry needle for weaving in ends
- Blocking mats and pins (for finishing)
Step-by-Step Instructions
This shawl is worked from the top center outwards in a crescent shape. The pattern combines knit, purl, yarn overs, and decreases to create the rippling lace effect. Please read through all instructions before beginning.
Abbreviations
- k = knit
- p = purl
- yo = yarn over
- k2tog = knit two together (right-leaning decrease)
- ssk = slip, slip, knit (left-leaning decrease)
- pm = place marker
- sm = slip marker
- RS = right side
- WS = wrong side
Setup Section
With MC, cast on 5 stitches.
- Row 1 (RS): k2, yo, k1, yo, k2 (7 stitches)
- Row 2 (WS): k2, p3, k2 (7 stitches)
- Row 3 (RS): k2, yo, k3, yo, k2 (9 stitches)
- Row 4 (WS): k2, p5, k2 (9 stitches)
Increase Section (worked in MC)
This section establishes the crescent shape by increasing 2 stitches every RS row.
- Row 5 (RS): k2, yo, k to last 2 stitches, yo, k2 (11 stitches)
- Row 6 (WS): k2, p to last 2 stitches, k2 (11 stitches)
Repeat Rows 5-6 until you have 51 stitches on the needle, ending with a WS row.
Important: Place a marker after the first 2 stitches and before the last 2 stitches to mark the increase points. This will help you keep track of your edge stitches as the pattern progresses.
Ripple Lace Pattern (worked in MC and CC)
Pattern Note: The ripple pattern is a multiple of 6 + 1, plus 4 edge stitches (2 on each side). The edge stitches are always knit on the RS and purled on the WS, creating a neat, stable border.
Row 1 (RS, MC): k2, *yo, k2tog, k1, ssk, yo, k1; repeat from * to last 2 stitches, k2.
Row 2 (WS, MC): k2, p to last 2 stitches, k2.
Row 3 (RS, MC): k2, *k1, yo, k2tog, ssk, yo, k1; repeat from * to last 2 stitches, k2.
Row 4 (WS, MC): k2, p to last 2 stitches, k2.
Row 5 (RS, CC): k2, *yo, k2tog, k1, ssk, yo, k1; repeat from * to last 2 stitches, k2.
Row 6 (WS, CC): k2, p to last 2 stitches, k2.
Row 7 (RS, CC): k2, *k1, yo, k2tog, ssk, yo, k1; repeat from * to last 2 stitches, k2.
Row 8 (WS, CC): k2, p to last 2 stitches, k2.
Repeat Rows 1-8, alternating MC and CC every 4 rows (i.e., Rows 1-4 in MC, Rows 5-8 in CC), until the shawl measures approximately 24 inches from the cast-on edge, or your desired length. End with a WS row.
Pro Tip: The yarn overs paired with k2tog and ssk create the eyelet ripples. The k2tog leans right, and the ssk leans left, which together form the gentle wave pattern. Keep your tension even for the best results.
Edging (worked in MC)
This delicate eyelet border adds a beautiful finishing touch.
- Row 1 (RS): k2, *yo, k2tog; repeat from * to last 2 stitches, k2.
- Row 2 (WS): k2, p to last 2 stitches, k2.
- Row 3 (RS): k2, *yo, k2tog; repeat from * to last 2 stitches, k2.
- Row 4 (WS): k2, p to last 2 stitches, k2.
Bind off loosely in pattern on the RS. To bind off in pattern, knit the first stitch, then knit the next stitch, and pass the first stitch over the second. Continue this way, knitting each stitch as you go, until all stitches are bound off. Be careful not to bind off too tightly, as this will affect the drape of the shawl.
Finishing
Weave in all ends using a tapestry needle. Take your time to weave in ends securely, but avoid pulling too tightly, which can pucker the fabric.
Blocking: This is a crucial step for lace knitting. Soak the shawl in lukewarm water with a gentle wool wash for about 20 minutes. Gently squeeze out excess water (do not wring). Lay the shawl flat on blocking mats and pin it out to the desired shape, opening up the lace eyelets and setting the ripple waves. Allow it to dry completely before unpinning.
Final Thoughts
The Rosewood Ripple Shawl is a rewarding project that teaches you the beauty of combining simple stitches to create something truly special. The alternating color bands and the organic ripple texture make it a standout piece in any wardrobe. Whether you're knitting it for yourself or as a gift, the process is as enjoyable as the finished product.
Happy knitting, and may your shawl bring you warmth and joy!


