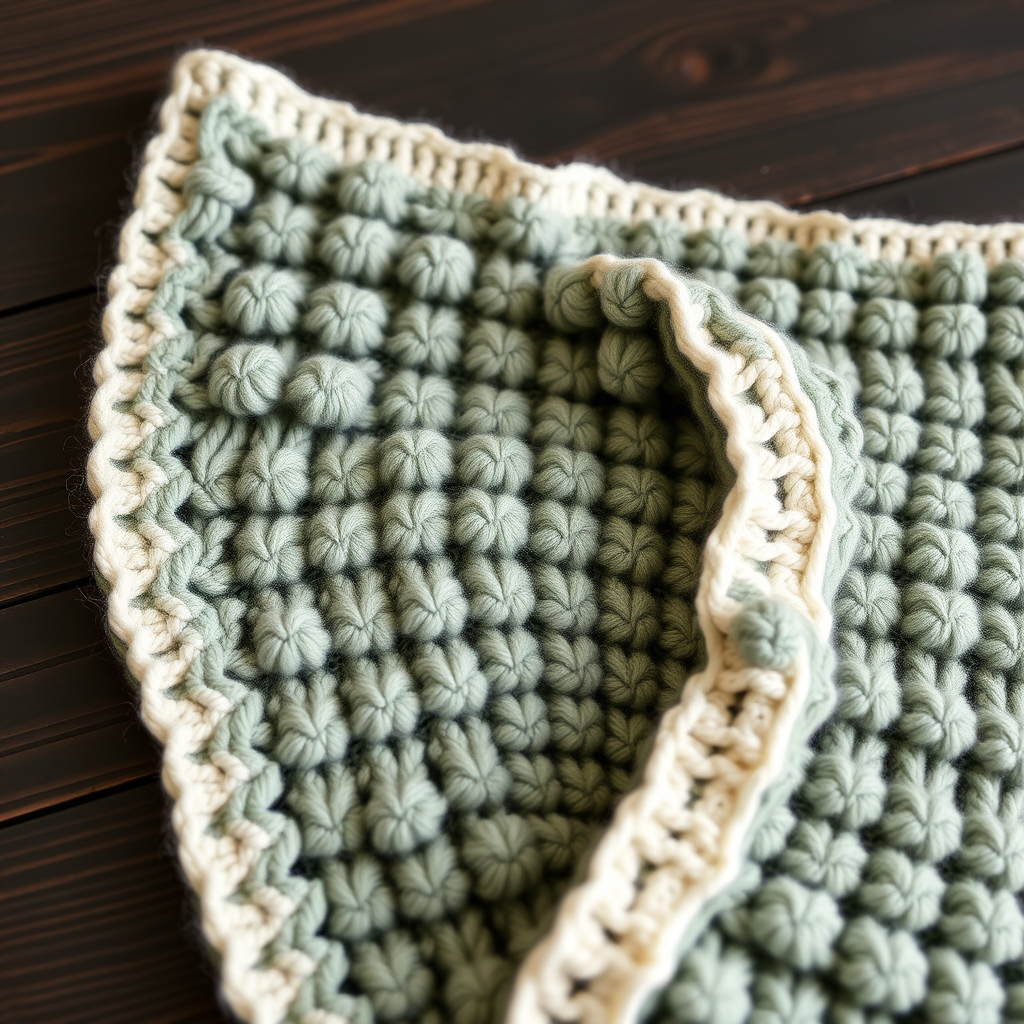
Rad Rayon Infant Donegal Blanket Free Pattern – Textured Knitted Baby Throw

Rad Rayon Infant Donegal Blanket: A Beginner-Friendly Textured Knit
There's something truly special about wrapping a new baby in a handcrafted blanket. The Rad Rayon Infant Donegal Blanket is a stunning, heirloom-quality piece that combines the soft, cloud-like warmth of rayon yarn with a modern, textured pattern inspired by traditional Donegal tweed. The subtle speckles in the yarn mimic the flecks of classic Irish tweed, giving this baby throw a sophisticated, dimensional look that's as beautiful displayed in a nursery as it is snuggled around a little one.
This free knitting pattern is perfect for confident beginners looking to stretch their skills. The pattern uses simple slipped stitches and basic lace eyelets to create a woven, textured fabric that looks far more complex than it actually is. With clear instructions and a rhythmic stitch repeat, you'll find this project both relaxing and rewarding. Let's dive into everything you need to create this cozy, textured baby blanket at home.
Materials Needed
Before you begin, gather the following supplies. This project requires minimal materials, making it an affordable and accessible knit.
Yarn
- Lion Brand Comfy Cotton Blend (or any worsted-weight rayon/cotton blend) in 'Linen' (Main Color / MC) – 2 skeins
- Lion Brand Comfy Cotton Blend in 'Sand' (Contrast Color / CC) – 1 skein
Note: The 'Linen' shade provides the warm, creamy beige base, while the 'Sand' adds subtle depth. The rayon content gives the blanket its soft, drapey feel and subtle sheen.
Needles & Notions
- US 8 (5.0 mm) knitting needles – straight or circular (circular recommended for larger projects, but straight works fine for this size)
- Yarn needle for weaving in ends
- Scissors
- Stitch markers (optional, but helpful for tracking pattern repeats)
- Blocking mats and pins (for finishing)
Gauge
18 stitches and 24 rows = 4 inches (10 cm) in stockinette stitch. Always knit a gauge swatch before starting to ensure your finished blanket matches the intended dimensions. If your gauge is off, adjust your needle size accordingly.
Step-by-Step Instructions
This blanket is worked in one piece from the bottom up, making it a seamless project. The pattern is broken into three sections: the garter stitch border, the textured main body, and the finishing border. Follow along carefully, and you'll have a beautiful, heirloom-quality blanket in no time.
Finished Size
Approximately 30" x 36" (76 x 91 cm) – the perfect size for a baby blanket or stroller throw.
Abbreviations
- CO: Cast on
- K: Knit
- P: Purl
- K2tog: Knit two stitches together (decrease)
- YO: Yarn over (increase)
- Sl1: Slip one stitch purlwise (as if to purl)
- MC: Main Color ('Linen')
- CC: Contrast Color ('Sand')
- RS: Right side of work
- WS: Wrong side of work
Pattern Notes
- The blanket is worked flat, back and forth in rows.
- The 'Rad Rayon' texture is created by alternating slipped-stitch stripes with simple lace eyelets, giving a dimensional, woven look.
- The Donegal effect comes from the subtle color changes in the rayon yarn, which mimics the flecks of traditional Donegal tweed.
- Always keep the first and last 6 stitches in garter stitch (knit every row) to create a neat, non-curling border.
- When slipping stitches, always slip them purlwise with the yarn in front (wyif) unless otherwise stated.
Getting Started: The Bottom Border
Using MC ('Linen'):
- CO 120 stitches loosely. A long-tail cast-on works beautifully here.
- Rows 1-6: Knit all stitches. This creates a garter stitch border that will frame the blanket and prevent curling.
The Textured Main Body
Now you'll begin the main pattern. The stitch repeat is worked between the 6-stitch garter borders on each side. The pattern is a 4-stitch repeat, so 120 stitches minus 12 border stitches (6 on each side) = 108 stitches, which divides evenly by 4 (27 repeats).
Row 7 (RS): K6 (border), *K1, P1, repeat from * until last 6 stitches, K6 (border).
This establishes a ribbed base row.
Row 8 (WS): K6, *P1, K1, repeat from * until last 6 stitches, K6.
Completes the ribbed section.
Row 9 (RS): K6, *Sl1 wyif, K3, repeat from * until last 6 stitches, K6.
Slip the first stitch of the repeat with the yarn in front, then knit the next three stitches.
Row 10 (WS): K6, *P3, Sl1 wyif, repeat from * until last 6 stitches, K6.
Purl three stitches, then slip the next stitch with the yarn in front. This creates a horizontal slipped-stitch bar on the right side.
Row 11 (RS): K6, *K1, YO, K2tog, K1, repeat from * until last 6 stitches, K6.
Knit one, yarn over (bring yarn to front, then over the needle to the back), knit two together, knit one. This creates a small eyelet hole.
Row 12 (WS): K6, *P4, repeat from * until last 6 stitches, K6.
Purl all four stitches of the repeat. The yarn overs from the previous row are worked as regular stitches.
Row 13 (RS): K6, *K2, Sl1 wyif, K1, repeat from * until last 6 stitches, K6.
Knit two, slip one with yarn in front, knit one.
Row 14 (WS): K6, *P1, Sl1 wyif, P2, repeat from * until last 6 stitches, K6.
Purl one, slip one with yarn in front, purl two. This staggers the slipped stitches for a woven effect.
Row 15 (RS): K6, *K2tog, YO, K2, repeat from * until last 6 stitches, K6.
Knit two together, yarn over, knit two. This creates another eyelet, offset from the first.
Row 16 (WS): K6, *P4, repeat from * until last 6 stitches, K6.
Purl all four stitches.
Repeat Rows 7-16 until the piece measures approximately 34 inches (86 cm) from the cast-on edge, ending with a Row 16 (WS). This ensures you finish at a clean point in the pattern.
Finishing Border
Using MC ('Linen'):
- Rows 1-6: Knit all stitches. This mirrors the bottom border and completes the frame.
- Bind off all stitches loosely. A stretchy bind-off (such as the knit-two-together bind-off or a standard bind-off using a larger needle) is recommended to prevent the edge from pulling in.
Finishing Touches
- Weave in all ends using a yarn needle. Be sure to weave them in securely on the wrong side of the blanket, following the path of the stitches to keep them invisible.
- Block the blanket gently. Wet blocking is ideal for rayon/cotton blends. Soak the blanket in lukewarm water with a mild wool wash, gently squeeze out excess water (never wring), and lay flat on blocking mats. Pin to the finished measurements of 30" x 36" and allow to dry completely. This will even out the stitches and enhance the lace pattern.
Tips for Success
- Count your stitches after each repeat of Rows 7-16 to ensure you haven't accidentally dropped or added a stitch. The stitch count should remain constant at 120 throughout.
- Use stitch markers to separate the 6-stitch borders from the main pattern. Place one marker after the first 6 stitches and another before the last 6 stitches. This will help you keep track of where the border ends and the pattern begins.
- Keep your tension consistent. The slipped stitches can easily become loose if you're not careful. Try to maintain an even tension throughout.
- Don't be afraid to rip back. If you make a mistake, it's easier to fix it right away than to try to fudge it later. The pattern is forgiving, but a clean start is always best.
This Rad Rayon Infant Donegal Blanket is a joy to knit and a treasure to give. The combination of soft rayon, textured stitches, and the subtle Donegal-inspired flecks creates a piece that feels both modern and timeless. Whether you're knitting for your own little one or as a heartfelt gift, this blanket is sure to be cherished for years to come. Happy knitting!