Mummy's Little Helper Kitchen Towel Free Pattern
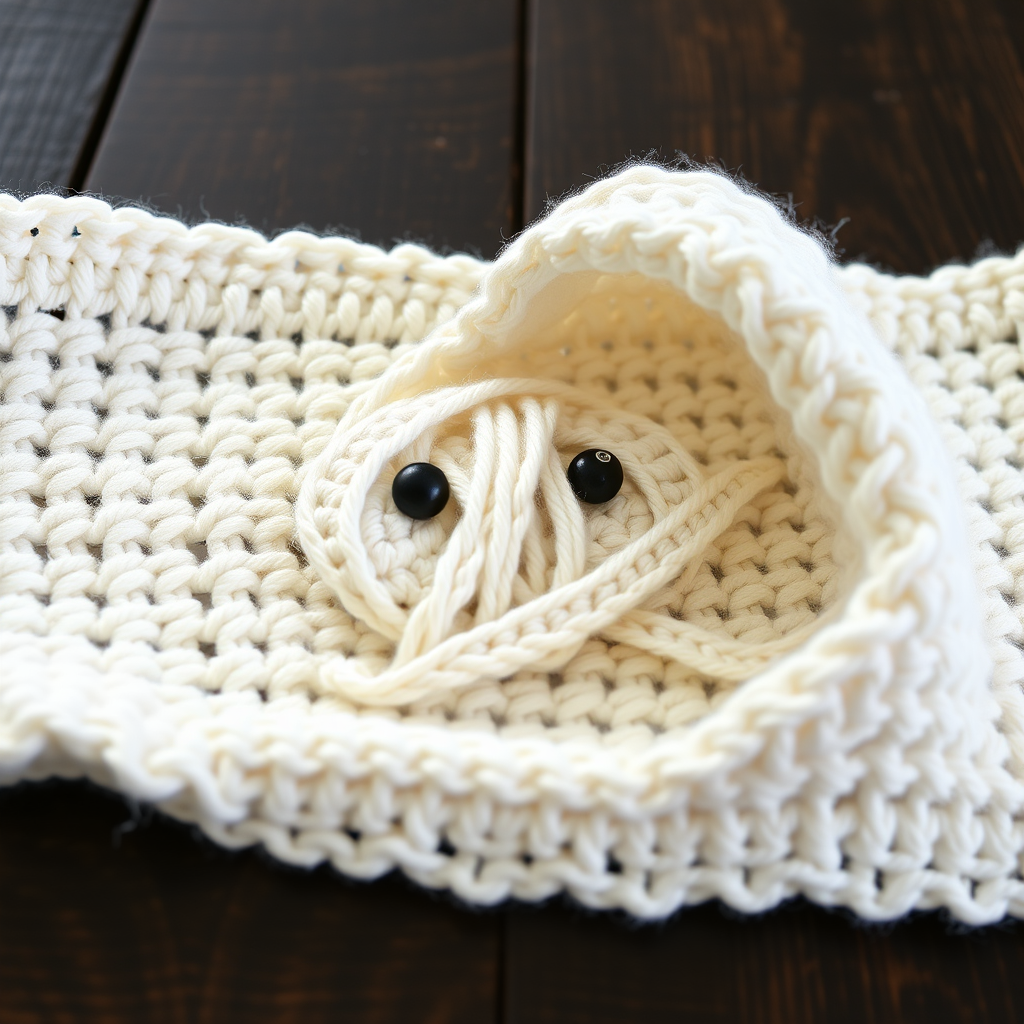
Mummy's Little Helper Kitchen Towel: A Spooky-Cute Crochet Project
Bring a touch of playful Halloween charm to your kitchen with this adorable crocheted mummy towel! This quick and fun project is perfect for beginners and experienced crocheters alike. The pattern features a simple, textured towel body with a cute mummy face and wrapped bandages that will make you smile every time you reach for it. It's a fantastic handmade gift idea or a festive addition to your own home decor. Let's get started on this spooktacular creation!
Materials Needed
Before you begin, gather the following materials. This project uses two different hook sizes to achieve the perfect texture and proportions.
- Yarn: Worsted weight cotton yarn in white (for the towel, face, and bandages), black (for the eyes), and a small amount of red (optional, for a stitched mouth detail).
- Crochet Hooks: G/6 (4.0 mm) hook for the towel body, and H/8 (5.0 mm) hook for the mummy face and details.
- Other Tools: Yarn needle for weaving in ends and sewing pieces together, scissors.
Gauge: 14 sc x 16 rows = 4 inches in single crochet with G hook. (Gauge is important for the towel size, but don't stress too much—as long as your stitches are consistent, your towel will look great!)
Step-by-Step Instructions
Follow these detailed instructions to create your very own mummy kitchen towel. Take your time and enjoy the process!
Part 1: Crocheting the Towel Body (with G hook)
This creates a sturdy, absorbent rectangle perfect for drying dishes.
- Foundation Row: Chain (ch) 31. Single crochet (sc) in the 2nd chain from the hook and in each chain across. You should have 30 single crochet stitches.
- Row 2: Chain 1, turn your work. Single crochet in each stitch across. (30 sc)
- Rows 3-40: Repeat Row 2. This means you will chain 1, turn, and single crochet in each of the 30 stitches for a total of 40 rows. Your towel should be a nice, square-ish rectangle.
- Finishing: After Row 40, fasten off your yarn, leaving a tail. Weave in this end securely with your yarn needle.
Part 2: Crocheting the Mummy Face (with H hook)
This creates the flat, oval-shaped face that will be the star of the show.
- Round 1: With the white yarn, make a magic ring. Chain 1, then work 6 single crochet (sc) into the ring. Pull the tail tight to close the ring. (6 sc)
- Round 2: Work 2 single crochet (sc) in each stitch around. (12 sc)
- Round 3: *Work 2 sc in the next stitch, sc in the next stitch.* Repeat from * to * around. (18 sc)
- Round 4: *Work 2 sc in the next stitch, sc in the next 2 stitches.* Repeat from * to * around. (24 sc)
- Round 5: *Work 2 sc in the next stitch, sc in the next 3 stitches.* Repeat from * to * around. (30 sc)
- Rounds 6-8: Work 1 sc in each stitch around for these three rounds. (30 sc)
- Finishing: Fasten off, leaving a long tail (about 12-18 inches) for sewing the face onto the towel.
Part 3: Crocheting the Mummy Bandages
These strips will be wrapped across the face to create the classic mummy look.
- Make 3 strips: With white yarn, chain (ch) 20.
- Row 1: Single crochet (sc) in the 2nd chain from the hook and in each chain across. (19 sc)
- Finishing: Fasten off. Repeat this process to make a total of 3 identical strips.
Part 4: Crocheting the Eyes
These simple black circles will give your mummy its cute, expressive face.
- Make 2: With black yarn, make a magic ring.
- Round 1: Chain 1, work 6 single crochet (sc) into the ring. Pull tight to close.
- Finishing: Join with a slip stitch (sl st) to the first sc. Fasten off, leaving a tail for sewing.
Part 5: Assembly
Now for the fun part—bringing your mummy to life!
- Position the Face: Lay your towel flat. Place the mummy face in the center of the towel, about 2 inches down from the top edge. This placement looks balanced and gives you room to fold or hang the towel.
- Sew the Face: Thread your yarn needle with the long tail from the face. Sew the face securely onto the towel using a whip stitch or running stitch around the edge. Make sure it's attached firmly.
- Attach the Eyes: Position the two black eyes on the face, placing them about 1 inch apart and slightly above the center. Sew each eye on securely with its tail.
- Add the Bandages: This is where the mummy look comes together! Take your three white strips and arrange them across the face:
- Place one strip horizontally across the forehead area.
- Place the second strip diagonally across the eyes (this is a classic mummy pose).
- Place the third strip across the mouth area, either horizontally or diagonally in the opposite direction.
- Optional Detail: For an extra touch, use the red yarn to embroider a small, simple cross-stitch or straight stitch for a mouth, or add a few "stitches" on the bandages for a Frankenstein-mummy mashup.
- Final Weave: Weave in all remaining yarn ends securely on the back of the towel to ensure everything is neat and durable.
And there you have it—your very own Mummy's Little Helper Kitchen Towel! This project is a fantastic way to add a handmade, festive touch to your home. It also makes a wonderful, thoughtful gift for Halloween parties or hostesses. Happy crocheting!


