Misty Meadow Bunny Amigurumi Free Pattern
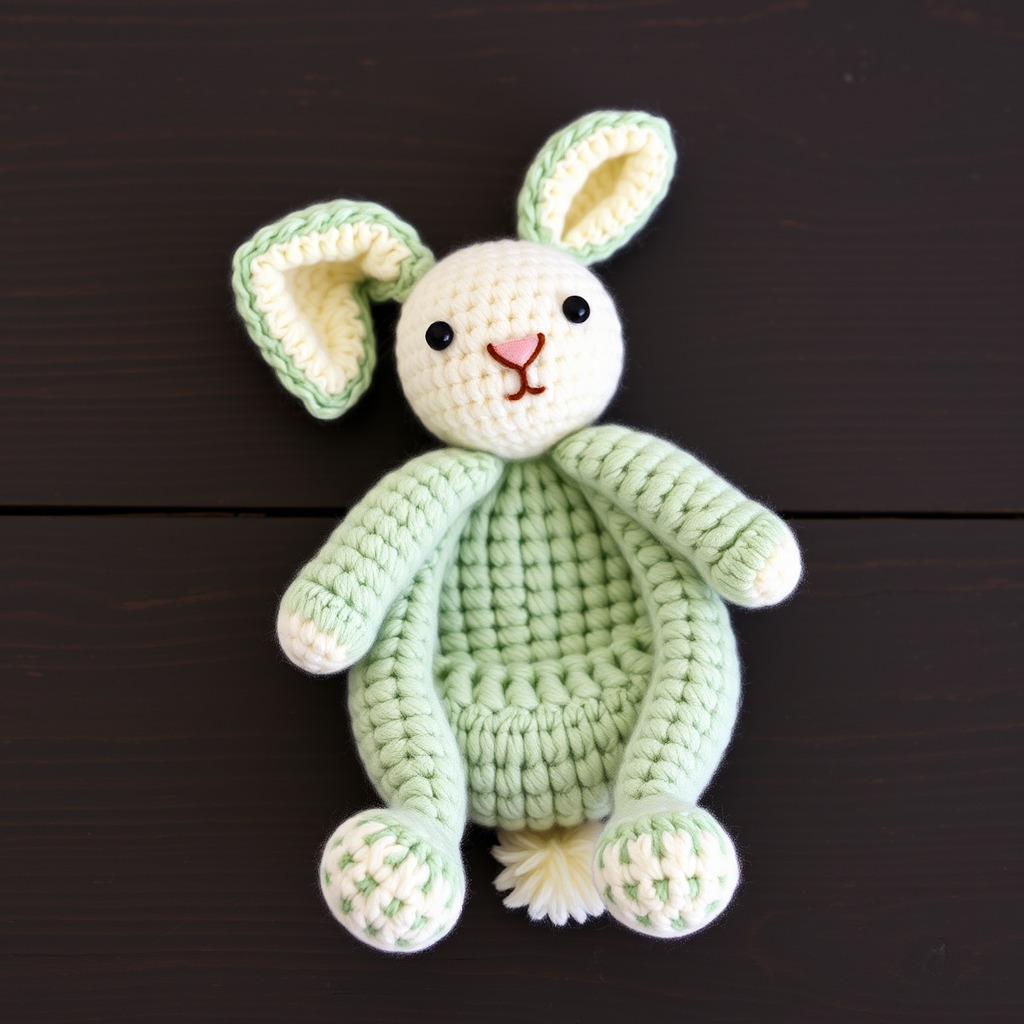
Misty Meadow Bunny Amigurumi: A Free Beginner Crochet Pattern
Welcome to a world of whimsy and handmade charm! Today, we are crafting the Misty Meadow Bunny, a cuddly amigurumi companion that captures the soft haze of a morning meadow. This pattern is designed with beginners in mind, using simple single crochet stitches, increases, and decreases to shape a sweet, long-eared friend. With a gradient color scheme of light sage green and soft cream, this bunny is as beautiful to look at as it is to hold. Let’s pick up our hooks and bring this little meadow dweller to life!
Materials Needed
Before we dive into the stitches, let’s gather our supplies. This project requires minimal materials, making it perfect for a spontaneous crafting session.
- Yarn: Worsted weight (Category 4) yarn in two shades:
- Light Sage Green (for the body and legs)
- Soft Cream (for the head, ears, arms, and tail)
- A small amount of Dark Brown (for facial embroidery)
- Hook: 3.5 mm (E/4) crochet hook
- Other Tools: Stitch marker, yarn needle, scissors, and polyester fiberfill stuffing.
Gauge: Gauge is not critical for this project, but aim for a tight tension (approximately 4 sc = 1 inch) to prevent the stuffing from showing through.
Step-by-Step Instructions
This pattern is worked in continuous rounds unless otherwise noted. Always use a stitch marker to keep track of the beginning of each round. Let’s begin with the head.
Head (Make 1)
Using Cream yarn.
- R1: Make a magic ring, work 6 sc into the ring. (6 sts)
- R2: Work 2 sc in each stitch around. (12 sts)
- R3: *Sc in the next st, 2 sc in the next st*; repeat from * to * around. (18 sts)
- R4: *Sc in the next 2 sts, 2 sc in the next st*; repeat around. (24 sts)
- R5: *Sc in the next 3 sts, 2 sc in the next st*; repeat around. (30 sts)
- R6-10: Sc in each stitch around for 5 rounds. (30 sts)
- R11: *Sc in the next 3 sts, sc2tog*; repeat around. (24 sts)
- R12: *Sc in the next 2 sts, sc2tog*; repeat around. (18 sts)
- Begin stuffing the head firmly with fiberfill.
- R13: *Sc in the next st, sc2tog*; repeat around. (12 sts)
- R14: Sc2tog around. (6 sts)
- Fasten off, leaving a long tail. Thread the tail through a yarn needle, weave it through the front loops of the remaining 6 stitches, and pull tight to close the hole. Hide the tail inside the head.
Body (Make 1)
Using Sage Green yarn.
- R1: Magic ring, 6 sc in ring. (6 sts)
- R2: 2 sc in each stitch around. (12 sts)
- R3: *Sc in the next st, 2 sc in the next st*; repeat around. (18 sts)
- R4: *Sc in the next 2 sts, 2 sc in the next st*; repeat around. (24 sts)
- R5-8: Sc in each stitch around for 4 rounds. (24 sts)
- R9: *Sc in the next 2 sts, sc2tog*; repeat around. (18 sts)
- R10: Sc in each stitch around. (18 sts)
- Stuff the body firmly with fiberfill.
- R11: *Sc in the next st, sc2tog*; repeat around. (12 sts)
- R12: Sc2tog around. (6 sts)
- Fasten off, leaving a long tail for sewing. Weave the tail through the front loops of the remaining stitches and pull tight to close. Do not cut the tail; you will use it to attach the body to the head.
Ears (Make 2)
Using Cream yarn.
- R1: Magic ring, 6 sc in ring. (6 sts)
- R2: Sc in each stitch around. (6 sts)
- R3: *Sc in the next st, 2 sc in the next st*; repeat around. (9 sts)
- R4-6: Sc in each stitch around for 3 rounds. (9 sts)
- R7: *Sc in the next 2 sts, sc2tog*; repeat around. (7 sts)
- R8: Sc in each stitch around. (7 sts)
- Fasten off, leaving a long tail. Flatten the ear flat and sew the bottom edge closed with a few whip stitches. Set aside.
Arms (Make 2)
Using Cream yarn.
- R1: Magic ring, 6 sc in ring. (6 sts)
- R2-4: Sc in each stitch around for 3 rounds. (6 sts)
- Stuff the arm lightly—just enough to give it shape.
- R5: Sc2tog around. (3 sts)
- Fasten off, leaving a long tail. Sew the opening closed with a couple of stitches.
Legs (Make 2)
Using Sage Green yarn.
- R1: Magic ring, 6 sc in ring. (6 sts)
- R2: *Sc in the next st, 2 sc in the next st*; repeat around. (9 sts)
- R3-4: Sc in each stitch around for 2 rounds. (9 sts)
- Stuff the leg lightly.
- R5: *Sc in the next st, sc2tog*; repeat around. (6 sts)
- Fasten off, leaving a long tail. Sew the opening closed.
Tail (Make 1)
Using Cream yarn.
- R1: Magic ring, 6 sc in ring. (6 sts)
- R2: 2 sc in each stitch around. (12 sts)
- R3: Sc in each stitch around. (12 sts)
- R4: Sc2tog around. (6 sts)
- Fasten off, leaving a long tail. Stuff lightly and sew to the back of the body.
Assembly and Finishing Touches
Now that all the pieces are ready, it’s time to bring your Misty Meadow Bunny together. Follow these steps carefully for a professional finish.
- Attach Head to Body: Using the long tail from the body, sew the head to the top of the body. Ensure it is centered and secure with a few firm stitches.
- Attach Ears: Position the ears on the top of the head, about 4-5 stitches apart. Flatten the base of the ear slightly and sew them on securely using the long tails.
- Attach Arms: Sew the arms to the sides of the body, positioning them just below the neck seam. This gives the bunny a natural, huggable pose.
- Attach Legs: Sew the legs to the bottom front of the body. Position them so the bunny can sit upright comfortably.
- Attach Tail: Sew the tail to the back of the body at the bottom, directly opposite the front legs.
- Embroider the Face: Using the dark brown yarn and a yarn needle, create the facial features:
- Eyes: Embroider two small eyes using French knots or a few straight stitches. Place them about 6 stitches apart and 4 rounds down from the top of the head.
- Nose and Mouth: Embroider a small 'Y' shape for the nose and mouth, centered below the eyes.
- Weave in Ends: Carefully weave in all remaining yarn tails inside the bunny to hide them.
Congratulations! You’ve just completed your very own Misty Meadow Bunny. Standing about 6 inches tall, this soft, gradient companion is perfect for gifting, decorating, or simply cuddling. The dense, plush texture and sweet embroidered face make it a timeless keepsake. We hope you enjoyed this pattern—happy crafting!


