Meadow Whisper Crochet Bunny Applique Free Pattern
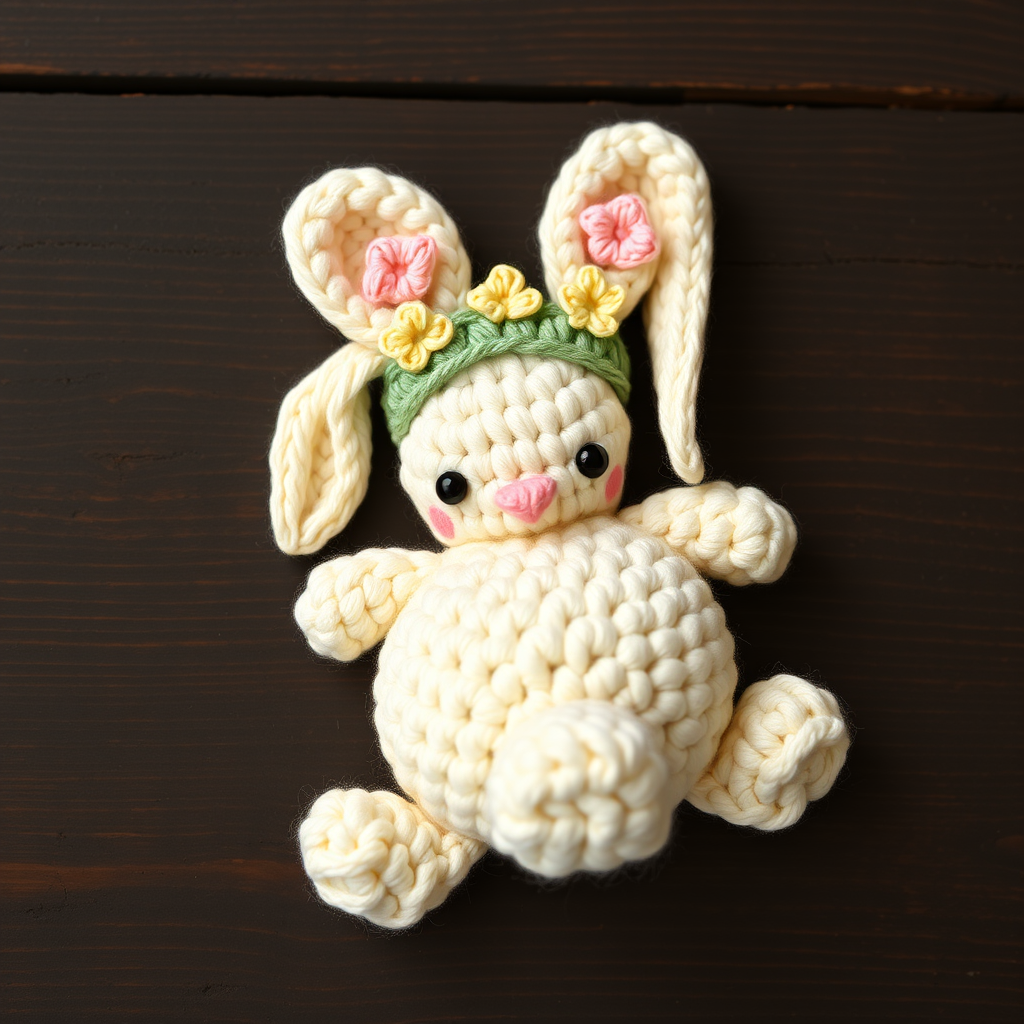
Meadow Whisper Crochet Bunny Applique: A Free Spring Pattern
Bring a touch of meadow magic to your next project with this adorable Meadow Whisper Crochet Bunny Applique. This charming, textured bunny features floppy ears and a delicate floral crown, making it the perfect embellishment for baby blankets, tote bags, spring garments, or even framed wall art. Using soft pastel yarns and simple stitches, this quick and easy project is ideal for both beginners and seasoned crocheters looking for a delightful, dimensional piece. Let's hop right in and create something beautiful!
Materials Needed
Before you begin, gather the following supplies. This project is wonderfully portable and requires minimal materials.
- Yarn: Worsted weight cotton or acrylic yarn in the following colors:
- Cream (for the bunny body)
- Blush Pink (for inner ears and cheeks)
- Sage Green (for the floral crown)
- Butter Yellow (for the tiny flowers)
- Black (for embroidery details)
- Crochet Hook: 3.5mm (E) crochet hook
- Stitch Marker: To keep track of your rounds
- Yarn Needle: For sewing pieces together and weaving in ends
- Stuffing: Polyester fiberfill or similar for a plump body
- Scissors: For cutting yarn
Note: Gauge is not critical for this project; however, aim for a tight, firm fabric to prevent the stuffing from showing through.
Step-by-Step Instructions
This pattern is worked in continuous rounds unless otherwise stated. Use a stitch marker to keep track of your rounds. Let's begin with the bunny's body.
Bunny Body (Make 2 pieces: front and back)
We will create two identical pieces and then join them together. This creates a dimensional, plump applique.
- Round 1: With cream yarn, make a magic ring, work 6 single crochet (sc) into the ring. (6 stitches)
- Round 2: Work 2 sc in each stitch around. (12 stitches)
- Round 3: *Sc in next stitch, 2 sc in next stitch* repeat around. (18 stitches)
- Round 4: *Sc in next 2 stitches, 2 sc in next stitch* repeat around. (24 stitches)
- Round 5: *Sc in next 3 stitches, 2 sc in next stitch* repeat around. (30 stitches)
- Rounds 6-8: Sc in each stitch around. (30 stitches)
- Round 9: *Sc in next 3 stitches, sc2tog (single crochet two together)* repeat around. (24 stitches)
- Round 10: *Sc in next 2 stitches, sc2tog* repeat around. (18 stitches)
- Round 11: *Sc in next stitch, sc2tog* repeat around. (12 stitches)
- Fasten off the first piece, leaving a long tail for sewing.
- Make the second piece but do not fasten off. Instead, place the two pieces together with wrong sides facing each other.
- Joining: Working through both layers, sc around the edge. Stuff lightly as you go to create a plump shape. When you reach the bottom, work a few sc to close the opening completely. Fasten off and weave in the ends.
Ears (Make 2)
These floppy ears add so much charm! We'll work them in rows.
- With cream yarn, chain (ch) 8.
- Row 1: Sc in the 2nd ch from the hook and in each ch across. (7 stitches)
- Row 2: Ch 1, turn, sc in each stitch across. (7 stitches)
- Row 3: Ch 1, turn, sc2tog, sc in next 3 stitches, sc2tog. (5 stitches)
- Row 4: Ch 1, turn, sc in each stitch across. (5 stitches)
- Row 5: Ch 1, turn, sc2tog, sc in next stitch, sc2tog. (3 stitches)
- Row 6: Ch 1, turn, sc in each stitch across. (3 stitches)
- Fasten off, leaving a long tail for sewing. Sew the ears to the top of the bunny body, positioning them slightly apart so they flop gently to the sides.
Floral Crown
This delicate crown is what makes this bunny truly special. We'll create the base ring and then add tiny flowers.
- Base Ring: With sage green yarn, ch 20, join with a slip stitch (sl st) to form a ring. Ch 1, sc in each ch around, join with a sl st. Fasten off.
- Tiny Flowers (Make 5): With butter yellow yarn, make a magic ring. (Ch 2, 3 double crochet (dc) in ring, ch 2, sl st in ring) repeat 3 times. Pull the ring tight to close. Fasten off.
- Assembly: Sew the 5 tiny flowers evenly spaced onto the green ring. Place the crown on the bunny's head, just above the ears, and sew it securely in place.
Assembly and Finishing Touches
Now for the fun part—bringing your bunny to life!
- Face: Using black yarn, embroider two small French knots for the eyes. Create a tiny 'Y' shape for the nose using the same black yarn or a small stitch.
- Blush: Add a small blush of pink yarn on each cheek using a few straight stitches. This adds a sweet, subtle detail.
- Weave in Ends: Carefully weave in all remaining yarn ends to ensure a clean, professional finish.
Your Meadow Whisper Crochet Bunny Applique is now complete! This delightful piece is ready to be sewn onto a baby blanket, a tote bag, or even framed as a tiny piece of art. The soft pastel palette and textured stitches make it a timeless addition to any spring project. Happy crocheting!


