Meadow Mist Cocoon Shrug Free Pattern
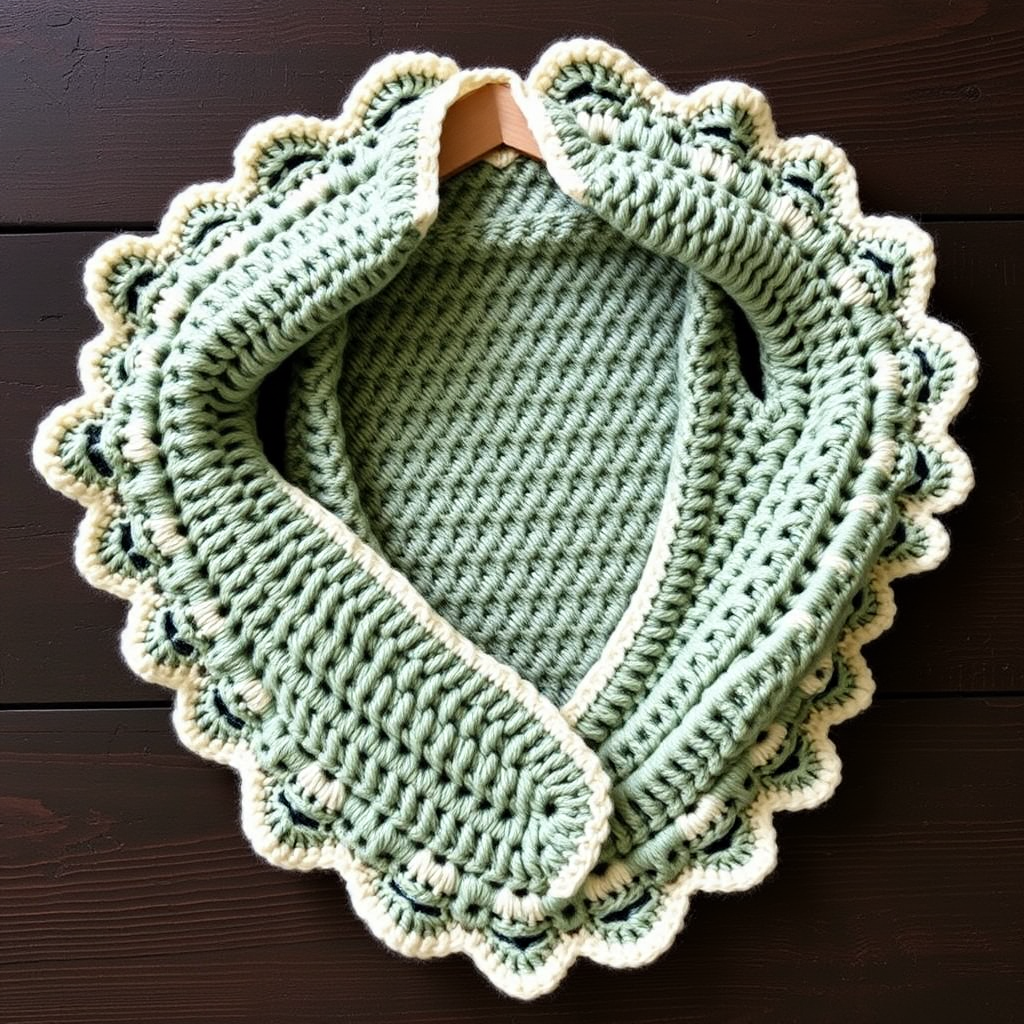
Wrap Yourself in Comfort: The Meadow Mist Cocoon Shrug Free Crochet Pattern
Are you looking for a cozy, stylish layering piece that's both modern and beginner-friendly? Look no further than the Meadow Mist Cocoon Shrug! This beautiful pattern puts a fresh spin on the classic ruana, featuring a smooth, dense single crochet body and a delicate fan stitch border that adds a touch of elegance. Whether you're curling up with a book or heading out for a cool evening, this shrug is the perfect companion. Best of all, it's a free pattern that's simple enough for beginners to tackle with confidence.
This project uses two complementary colors of soft DK weight yarn to create a serene, minimalist aesthetic. The cocoon shape is worked flat in two panels, then seamed at the shoulders, leaving a comfortable neck opening and open armholes for easy draping. The result is a versatile, drapey layer that looks effortlessly chic. Let's dive into everything you need to create your own Meadow Mist Cocoon Shrug!
Materials Needed
Before you begin, gather the following materials to ensure a smooth and enjoyable crochet experience:
- Yarn: DK weight (3) yarn in two complementary colors:
- Main Color (MC): 600-800 yards (e.g., sage green)
- Contrast Color (CC): 200-300 yards (e.g., cream)
- Crochet Hook: 5.0 mm (H/8) crochet hook
- Other Tools: Yarn needle for weaving in ends, scissors, and stitch markers (optional but helpful).
Gauge: 15 stitches x 11 rows = 10 cm x 10 cm (4 in x 4 in) in single crochet, unblocked. Be sure to check your gauge to ensure your shrug fits as intended!
Step-by-Step Instructions
This pattern is worked flat in two panels, then seamed at the shoulders to create the cocoon shape. The fan stitch border is added last. Follow these detailed instructions carefully, and you'll have a beautiful shrug in no time.
Panel 1 (Front/Back - Make 2)
You will make two identical panels. These will form the front and back of your shrug.
Foundation Row: With your Main Color (MC), chain 81 (91, 101, 111) for sizes S/M (M/L, L/XL, XL/XXL).
Tip: The number of chains determines the width of your shrug. Choose the size that best matches your measurements.
Row 1: Single crochet (sc) in the 2nd chain from your hook and in each chain across. Turn your work. (You should have 80, 90, 100, or 110 sc stitches, depending on your size.)
Row 2: Chain 1 (this counts as your turning chain), single crochet (sc) in each stitch across. Turn.
Rows 3-50 (52, 54, 56): Repeat Row 2 until your piece measures approximately 45 (47, 49, 51) cm, which is about 18 (18.5, 19.5, 20) inches from your foundation chain. Fasten off and weave in the yarn end.
Important: Keep your tension consistent throughout. The single crochet fabric should be smooth and even.
Panel 2
Repeat the exact same instructions as Panel 1 to create your second panel. Once complete, you should have two identical rectangles.
Seaming the Panels
Now it's time to join the panels to create the cocoon shape.
- Lay both panels flat, one on top of the other, with the right sides facing each other (the wrong sides should be on the outside).
- Align the edges carefully. You will seam the top of each side to form the shoulder seams.
- Seam the top 15 (17, 19, 21) cm (6 (6.5, 7.5, 8.5) inches) of each side. Use a whip stitch or slip stitch to join the panels together.
- Leave the center open for the neck opening. This opening should be in the middle of the top edge.
- The bottom edges of the panels remain open. These openings will serve as your armholes.
Double-check your seaming: you should have two shoulder seams, a neck opening in the center, and two open sides for your arms.
Fan Stitch Border
This beautiful scalloped border adds the perfect finishing touch to your shrug.
Round 1: With the right side of your work facing you, attach your Contrast Color (CC) yarn at one bottom corner of the front panel using a slip stitch. Chain 1, then single crochet (sc) evenly around the entire outer edge of the cocoon. This includes the bottom edges, the side edges, and the neck opening. Join with a slip stitch to your first sc. (The number of sc stitches will vary depending on your size and tension.)
Round 2: Chain 1, single crochet (sc) in the same stitch. *Skip 2 stitches, then work 5 double crochet (dc) in the next stitch (this creates your "fan"), skip 2 stitches, sc in the next stitch.* Repeat from * to * all the way around the entire edge. Join with a slip stitch to your first sc.
Tip: If your stitch count doesn't work out perfectly, don't worry! You can adjust by skipping 1 or 3 stitches occasionally to make the fans fit evenly around the edge.
Round 3: Chain 1, single crochet (sc) in the same stitch. *Chain 3, sc in the center dc of the next fan (the 3rd double crochet).* Repeat from * to * around the entire edge. Join with a slip stitch to your first sc. Fasten off and weave in your yarn end.
Finishing Touches
Your Meadow Mist Cocoon Shrug is almost complete! Follow these final steps:
- Weave in all ends: Use your yarn needle to carefully weave in any loose yarn ends from your color changes and seams.
- Block gently: If desired, you can block your shrug to shape. This helps even out your stitches and gives the border a more defined, lacy look. Follow the care instructions on your yarn label.
And there you have it—a beautiful, cozy Meadow Mist Cocoon Shrug that you made yourself! This versatile piece is perfect for layering over your favorite outfits. The soft, drapey fabric and delicate fan stitch border make it a truly special addition to any wardrobe. Happy crocheting!



