Marina Beach Tote Free Pattern – Textured Knit Carryall with Rope Handles
Introducing the Marina Beach Tote: Your New Favorite Handmade Carryall
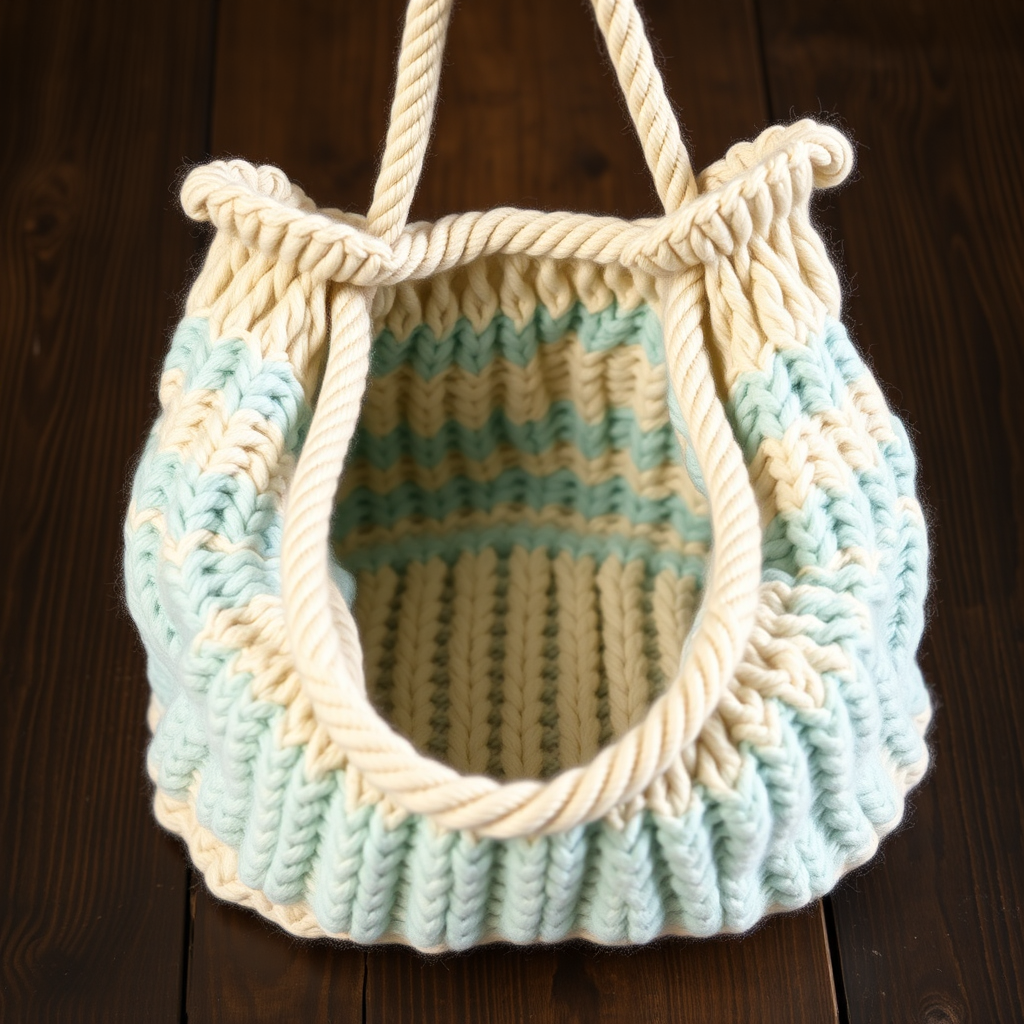
Imagine the feeling of warm sand between your toes, the sound of gentle waves, and the sun on your skin. Now, imagine carrying that feeling with you everywhere you go. The Marina Beach Tote is more than just a bag—it's a wearable piece of coastal serenity, crafted with love and intention. This generously sized, textured knit carryall features a subtle, undulating wave stitch that mimics the rhythm of the ocean, paired with sturdy, natural rope handles for a touch of seaside charm.
Whether you're heading to the farmer's market, planning a beach day, or simply running everyday errands, this tote is the perfect handmade companion. It's spacious enough to hold your essentials (and then some), while the thick cotton yarn ensures durability and structure. Best of all, this free pattern is beginner-friendly, breaking down the beautiful wave texture into simple increases and decreases that anyone can master. Let's dive in and create something beautiful together!
Materials Needed: Gathering Your Coastal Toolkit
Before we cast on, let's make sure you have everything you need. The beauty of this project lies in its simplicity—just a few quality materials come together to create something truly special.
Yarn & Colors
- Main Color (MC) – Sea Glass (light aqua): Approximately 500g of worsted weight cotton yarn. We recommend Lion Brand 24/7 Cotton for its excellent stitch definition and durability.
- Contrast Color (CC) – Driftwood (natural beige): Approximately 200g of the same yarn weight and brand. This will form the elegant top band and secure your handles.
Tools & Notions
- Knitting Needles: US 7 (4.5 mm) needles—either straight or circular, whichever you prefer for flat knitting.
- Tapestry Needle: For weaving in ends and seaming the panels together.
- Cotton Rope: Two lengths of sturdy cotton rope, each 24 inches long (about 1/2 inch thick works beautifully).
- Optional: Cotton canvas fabric for a lining, if you'd like extra durability.
Gauge
To ensure your tote comes out the perfect size, take a moment to check your gauge: 20 stitches and 28 rows = 4 inches in stockinette stitch (after blocking). This is crucial for achieving the finished dimensions of approximately 15 inches wide by 18 inches tall.
Step-by-Step Instructions: Knitting Your Marina Tote
This tote is knit flat in two identical panels, which are then seamed together. The wave stitch pattern is surprisingly simple, created with basic increases and decreases. Let's break it down step by step.
Understanding Your Stitch Abbreviations
- K = knit
- P = purl
- K2tog = knit two stitches together (a right-leaning decrease)
- SSK = slip, slip, knit (a left-leaning decrease)
- YO = yarn over (creates an eyelet hole)
- St(s) = stitch(es)
The Wave Stitch Pattern (Multiple of 10 + 2)
This is the heart of your tote. The pattern creates a beautiful, flowing texture that resembles ocean waves. Repeat these 8 rows throughout the main body of the bag.
- Row 1 (RS): K1, *K2tog, K3, YO, K1, YO, K3, SSK*, repeat from * to * until last st, K1.
- Row 2 (WS): Purl all stitches.
- Row 3: K1, *K2tog, K2, YO, K3, YO, K2, SSK*, repeat from * to * until last st, K1.
- Row 4: Purl all stitches.
- Row 5: K1, *K2tog, K1, YO, K5, YO, K1, SSK*, repeat from * to * until last st, K1.
- Row 6: Purl all stitches.
- Row 7: K1, *K2tog, YO, K7, YO, SSK*, repeat from * to * until last st, K1.
- Row 8: Purl all stitches.
Tip: Place a stitch marker after the first stitch and before the last stitch to help you keep track of the pattern edges.
Panel 1 (Make 2)
Follow these instructions twice to create both sides of your tote.
- Cast On: With your Main Color (MC) yarn, cast on 62 stitches loosely. This gives you exactly 6 full repeats of the wave pattern (60 stitches) plus 2 edge stitches.
- Knit the Body: Work in the Wave Stitch Pattern for 60 rows total. This will measure approximately 15 inches in length. As you knit, you'll see the beautiful undulating texture emerge—it's incredibly satisfying!
- Switch to Contrast Color: Cut your MC yarn, leaving a 6-inch tail. Join your Contrast Color (CC) yarn and work in garter stitch (knit every row) for 10 rows. This creates the sturdy, textured top band of your bag, measuring about 2.5 inches.
- Bind Off: Bind off all stitches loosely in knit. Tip: To avoid a tight edge, use a needle one size larger for the bind-off row, or bind off using the "knit two together" method for extra stretch.
Finishing: Bringing Your Tote Together
Now for the magical part—watching your flat panels transform into a three-dimensional bag.
- Block Your Panels: This step is essential for achieving professional results. Wet block both panels to the same dimensions (approximately 15 inches wide x 18 inches tall). Pin them flat and allow them to dry completely. This evens out your stitches and gives the cotton a beautiful drape.
- Seam the Sides and Bottom: Place your two panels with right sides together. Using your tapestry needle and MC yarn, sew the side seams and bottom seam using a mattress stitch. This creates an invisible, sturdy seam. Leave the top edge open.
- Turn Right Side Out: Carefully turn your tote right side out, gently pushing out the corners to create a clean, flat bottom.
Attaching the Rope Handles
These sturdy handles are what give the Marina Tote its distinctive, coastal character.
- Prepare the Rope: Take one 24-inch length of cotton rope and fold it in half to create a loop. The two loose ends should be together.
- Position the Handle: Place the folded loop on the outside of the bag, positioning the two loose ends about 4 inches apart on the inside of the tote. This creates a comfortable handle length and distributes weight evenly.
- Sew Securely: Using your CC yarn and a sturdy whip stitch, sew the rope ends securely to the inside of the tote. Make sure to go through both the rope and the knitted fabric. Critical: Reinforce this area with several extra passes of stitching—this is what will support the weight of your belongings!
- Repeat: Attach the second rope handle to the opposite side of the tote in the same manner.
Optional Lining for Extra Durability
If you plan to carry heavy items or want to prevent small things from slipping through the knit, a fabric lining is a wonderful addition.
- Cut a piece of cotton canvas to match the interior dimensions of your tote, adding a 1-inch seam allowance.
- Sew the lining fabric into a bag shape, leaving the top open.
- Place the lining inside your knit tote and fold the top edge over by 1 inch.
- Using a blind stitch or whip stitch, attach the lining to the inside of the tote, just below the top band. This keeps it hidden while providing excellent structure.
Final Touches
Weave in all loose ends with your tapestry needle, taking care to hide them within the seams or the garter stitch band. Give your finished tote a gentle steam or light mist to relax the fibers one last time.
Congratulations! Your Marina Beach Tote is complete and ready for sunshine and sandy adventures. This beautiful, textured carryall is a testament to your skill and a lovely reminder of the coast, no matter where your day takes you. Enjoy your new handmade treasure!