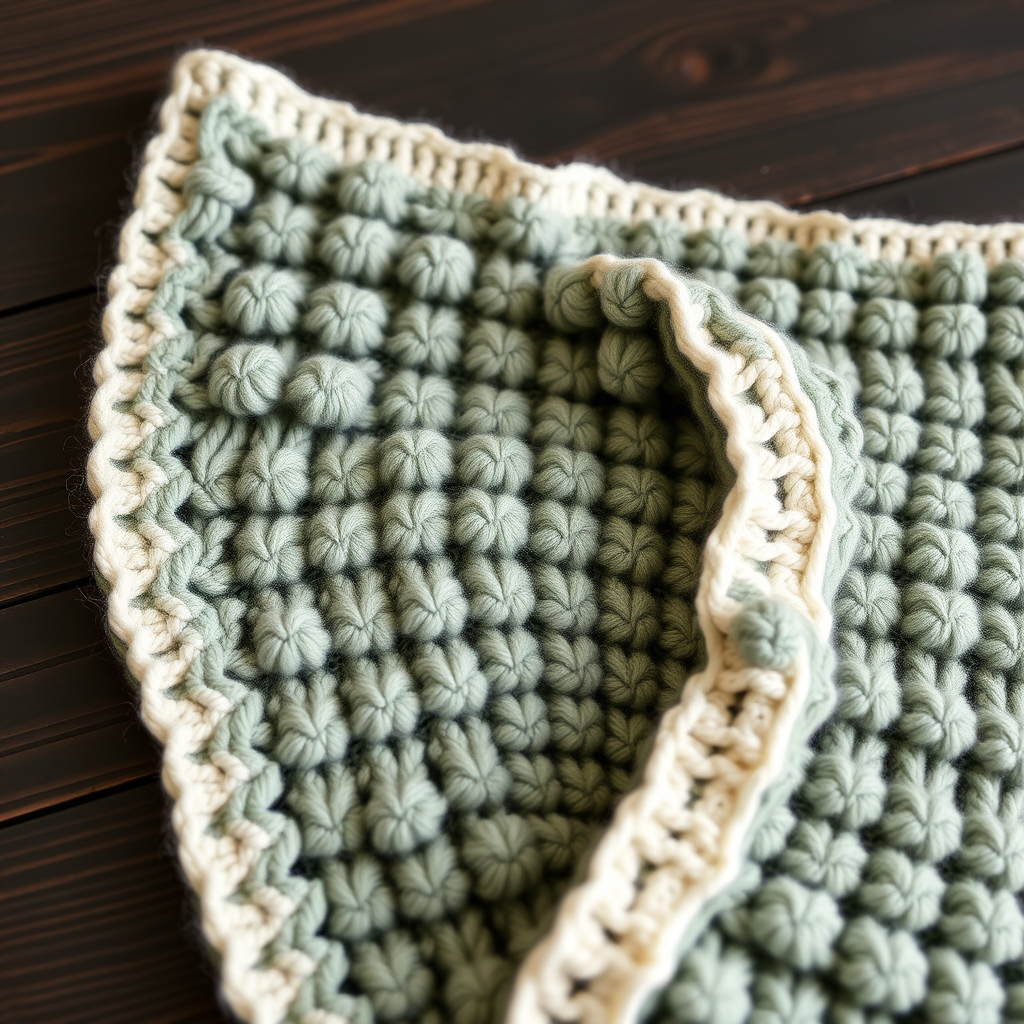
Lullaby Luxe Cloud Blanket Free Pattern – Knitted Baby Afghan with Honeycomb Texture

Introducing the Lullaby Luxe Cloud Blanket
There is something truly magical about wrapping a newborn in a blanket made with your own hands. The Lullaby Luxe Cloud Blanket is more than just a baby afghan—it's a modern heirloom designed to become a cherished family keepsake. Featuring a stunning, deeply textured honeycomb stitch, this pattern creates interlocking hexagonal shapes that feel as dreamy and soft as they look.
This pattern is perfect for knitters ready to move beyond basic scarves. The honeycomb stitch is surprisingly simple—it uses only knit and purl stitches—yet produces a professional, dimensional fabric that looks far more complex than it is. The subtle color blocking with dusty lavender and sage green bands adds a contemporary, calming aesthetic that fits beautifully into any modern nursery.
Whether you're crafting a gift for a baby shower or creating a special piece for your own little one, this blanket is designed to be both a joy to knit and a treasure to receive. Let's dive into everything you need to create this heirloom-quality piece.
Materials Needed
Before you begin, gather these supplies to ensure a smooth and enjoyable knitting experience:
Yarn
- Worsted weight superwash merino wool (e.g., Malabrigo Rios) for easy care and ultimate softness
- Color A (Cloud White): 800g (approximately 1,760 yards)
- Color B (Dusty Lavender): 300g (approximately 660 yards)
- Color C (Sage Green): 200g (approximately 440 yards)
Tip: Superwash merino is ideal for baby items because it's machine-washable and gentle on sensitive skin. If you prefer a budget-friendly alternative, any worsted weight acrylic or cotton blend will work beautifully.
Needles & Notions
- US 7 (4.5mm) circular knitting needle with a 32-inch cable (or longer—you'll need room for 182 stitches)
- Tapestry needle for weaving in ends
- Stitch markers (optional, but helpful for tracking pattern repeats)
Gauge
- 20 stitches x 28 rows = 4 inches in honeycomb stitch (blocked)
Important: Always knit a gauge swatch before starting. This ensures your finished blanket matches the intended dimensions of 36 x 42 inches. If your gauge is off, adjust your needle size accordingly.
Step-by-Step Instructions
Follow these detailed instructions carefully, and you'll create a beautiful, professional-looking blanket. Take your time, count your stitches regularly, and enjoy the process!
Finished Size
36 inches x 42 inches (approximately crib size)
Special Stitches: The Honeycomb Pattern
This pattern is worked over a multiple of 6 + 2 stitches. It's a 6-row repeat that's easy to memorize:
- Row 1 (RS): *K2, P2, K2*; repeat from * to end of row.
- Row 2 (WS): *P2, K2, P2*; repeat from * to end of row.
- Row 3: *K1, P1, K2, P1, K1*; repeat from * to end of row.
- Row 4: *P1, K1, P2, K1, P1*; repeat from * to end of row.
- Row 5: *K2, P2, K2*; repeat from * to end of row.
- Row 6: *P2, K2, P2*; repeat from * to end of row.
Repeat rows 1-6 for the entire pattern. The combination of these simple knit and purl stitches creates the beautiful honeycomb texture.
Getting Started: The Garter Stitch Border
- With Color A (Cloud White), cast on 182 stitches loosely. A loose cast-on is crucial here—if it's too tight, the edges will pucker. Consider using a larger needle for the cast-on row only, or use a stretchy cast-on method like the long-tail or knitted cast-on.
- Knit 6 rows in garter stitch (knit every row). This creates a flat, sturdy border that won't curl. After completing these 6 rows, you're ready to begin the main body.
Main Body: The Honeycomb Section
- Begin the honeycomb stitch pattern. Work rows 1-6 of the honeycomb stitch using Color A. Continue repeating these 6 rows until the piece measures 20 inches from the cast-on edge, ending with a wrong-side row (Row 2, 4, or 6).
- Tip: Place a stitch marker every 30 stitches to help you keep track of your pattern repeats. This makes it much easier to catch mistakes early.
Color Block Section: Adding the Lavender & Sage
This is where the blanket gets its modern, artistic flair. Follow these steps precisely:
- First Lavender Block: Switch to Color B (Dusty Lavender). Work 6 rows of the honeycomb stitch pattern. Make sure you start on Row 1 of the pattern to maintain the stitch alignment.
- First Sage Block: Switch to Color C (Sage Green). Work 6 rows of the honeycomb stitch pattern.
- Second Lavender Block: Switch back to Color B. Work another 6 rows of the honeycomb stitch.
- Second Sage Block: Switch back to Color C. Work a final 6 rows of the honeycomb stitch.
In total, you'll have 12 rows of Color B and 12 rows of Color C. When changing colors, don't cut the yarn—simply carry it up the side of the work. This creates a neat, seamless edge and reduces the number of ends to weave in later.
Finishing the Main Body
- After completing the color blocks, switch back to Color A (Cloud White).
- Continue working the honeycomb stitch pattern for another 20 inches, ending with a wrong-side row. Your blanket should now measure approximately 40 inches in length (20" + color blocks + 20").
Final Border & Bind-Off
- With Color A, knit 6 rows in garter stitch (knit every row) to mirror the bottom border.
- Bind off loosely in knit. Again, a tight bind-off will ruin the drape of your blanket. Use a needle one size larger for the bind-off row if needed, or use a stretchy bind-off method like the "Jeny's Surprisingly Stretchy Bind-Off."
Finishing Touches: Weaving & Blocking
- Weave in all ends with your tapestry needle. Take your time here—neatly woven ends make a professional-looking finished piece.
- Block the blanket to finished measurements. This step is essential for the honeycomb stitch to open up and show its full texture. Here's how:
- Fill a basin or sink with lukewarm water and add a small amount of wool wash (like Eucalan or Soak).
- Submerge the blanket and let it soak for 15-20 minutes. Do not agitate—this can cause felting.
- Gently squeeze out excess water (never wring or twist).
- Lay the blanket flat on clean towels and roll up to remove more water.
- Place the blanket on a blocking mat or dry towels. Pin it to 36 x 42 inches, using a measuring tape to ensure accuracy.
- Allow it to dry completely—this can take 24-48 hours depending on humidity.
Optional: Adding a Crochet Edging
For an extra-special, delicate finish, you can add a simple crochet edging:
- With Color A and a crochet hook (size H/5mm works well), work a round of single crochet around the entire border. Work 3 single crochet stitches in each corner to keep the corners flat.
- Then, work a round of reverse single crochet (also called crab stitch) around the entire edge. This creates a beautiful, twisted rope-like finish that looks professional and polished.
Final Thoughts
Congratulations! You've just created a stunning, heirloom-quality baby blanket that will be treasured for generations. The Lullaby Luxe Cloud Blanket is more than just a project—it's a labor of love that will keep a little one warm and cozy.
Remember, knitting is a journey, not a race. Enjoy each row, take breaks when you need to, and don't be afraid to rip back if you make a mistake—it's all part of the process. Your finished blanket will be a beautiful testament to your skill and care.
Happy knitting!