Lucky Clover Crochet Applique Free Pattern
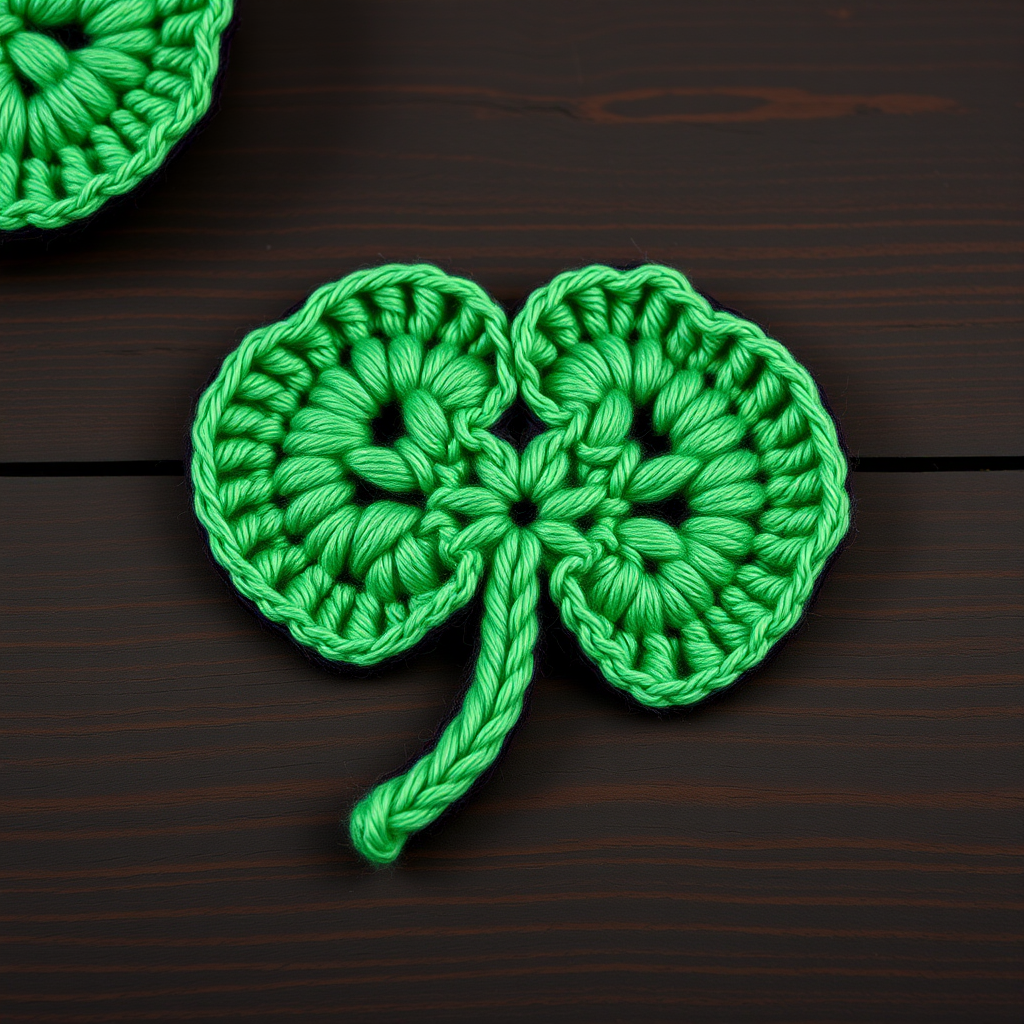
Bring a Little Luck to Your Crafting: The Lucky Clover Crochet Applique
Are you looking for a quick, charming project to add a touch of Irish charm to your handmade gifts? This Lucky Clover Crochet Applique is the perfect way to celebrate St. Patrick's Day or simply add a bit of whimsy to your everyday items. This pattern is wonderfully beginner-friendly, working up in just a few minutes with basic stitches. Whether you're embellishing a hat, a tote bag, a scarf, or even creating a festive garland, these adorable clovers are sure to bring a smile. Let's dive into this delightful crochet pattern and create a little luck of the Irish!
Materials Needed
Before you begin, gather your supplies. This project is wonderfully simple, requiring only a few essentials:
- Yarn: Worsted weight yarn in a vibrant green. Great options include Lily Sugar 'n Cream or Red Heart Super Saver for durability and stitch definition.
- Crochet Hook: A 5 mm (H/8) crochet hook. This size pairs perfectly with worsted weight yarn to create a firm fabric.
- Other Tools: A yarn needle for weaving in ends and sewing the pieces together, and a stitch marker (optional but helpful for keeping track of rounds).
Note on Gauge: Gauge is not critical for this project. Just aim for a tight, firm fabric so the applique holds its shape well.
Step-by-Step Instructions
This pattern is worked in continuous rounds for the leaves, so using a stitch marker to keep track of your rounds is highly recommended. Let's break it down into manageable parts.
Making the Leaves (Make 3)
Each leaf is worked from the center out, creating a heart-like shape with a beautiful scalloped edge.
Round 1: Make a magic ring. Chain 2 (this counts as your first double crochet). Work 11 double crochet (dc) into the ring. Pull the ring tight to close the center. Join with a slip stitch to the top of the beginning chain-2. You should have 12 dc stitches in total.
Round 2: Chain 2 (counts as first dc). Work 1 dc in the same stitch (the base of the chain-2). Then, work 2 dc in each of the next 11 stitches. Join with a slip stitch to the top of the beginning chain-2. You will now have 24 dc stitches.
Round 3 (Creating the Scallops): Chain 1. Work 1 single crochet (sc) in the same stitch. *Skip the next 2 dc. Work 5 dc in the very next dc (this creates a fan or scallop). Skip the next 2 dc. Work 1 sc in the next dc. Repeat from * around. You will create a total of 4 scallops. Finish by joining with a slip stitch to the first single crochet. Fasten off, leaving a long tail (about 12 inches) for sewing the leaves together.
Creating the Stem
The stem is a simple, straight piece that anchors the clover.
Row 1: With your green yarn, make a slip knot and chain 8. Work 1 single crochet (sc) in the second chain from the hook. Work 1 sc in each of the remaining chains across. You will have 7 sc stitches total. Fasten off, leaving a long tail for sewing.
Assembling Your Clover
Now for the fun part—bringing your clover together! Lay the three leaves flat on a table. Arrange them in a clover shape, with the points (the center of the magic ring) meeting at the center. The flat edges of the leaves should be touching.
Place the stem at the bottom, pointing downwards. It should overlap the bottom leaf slightly, with the top of the stem touching the center point where all the leaves meet.
Using the long tails you left on the leaves, thread one through your yarn needle. Sew the leaves together securely at the center point, making several passes through all three layers to ensure they are firmly attached. Then, use the tail from the stem to sew it to the bottom leaf, making sure it's centered and secure.
Finally, weave in all ends securely on the back of the applique to give it a clean, professional finish. Your lucky clover is now ready to be sewn onto your favorite project!
This pattern is a fantastic way to use up small scraps of green yarn. Make a whole patch of clovers to create a festive garland or to sprinkle onto gifts for a personalized touch. Happy crocheting, and may your stitches always be lucky!


