Heirloom Vintage Shells Crochet Wrap Free Pattern
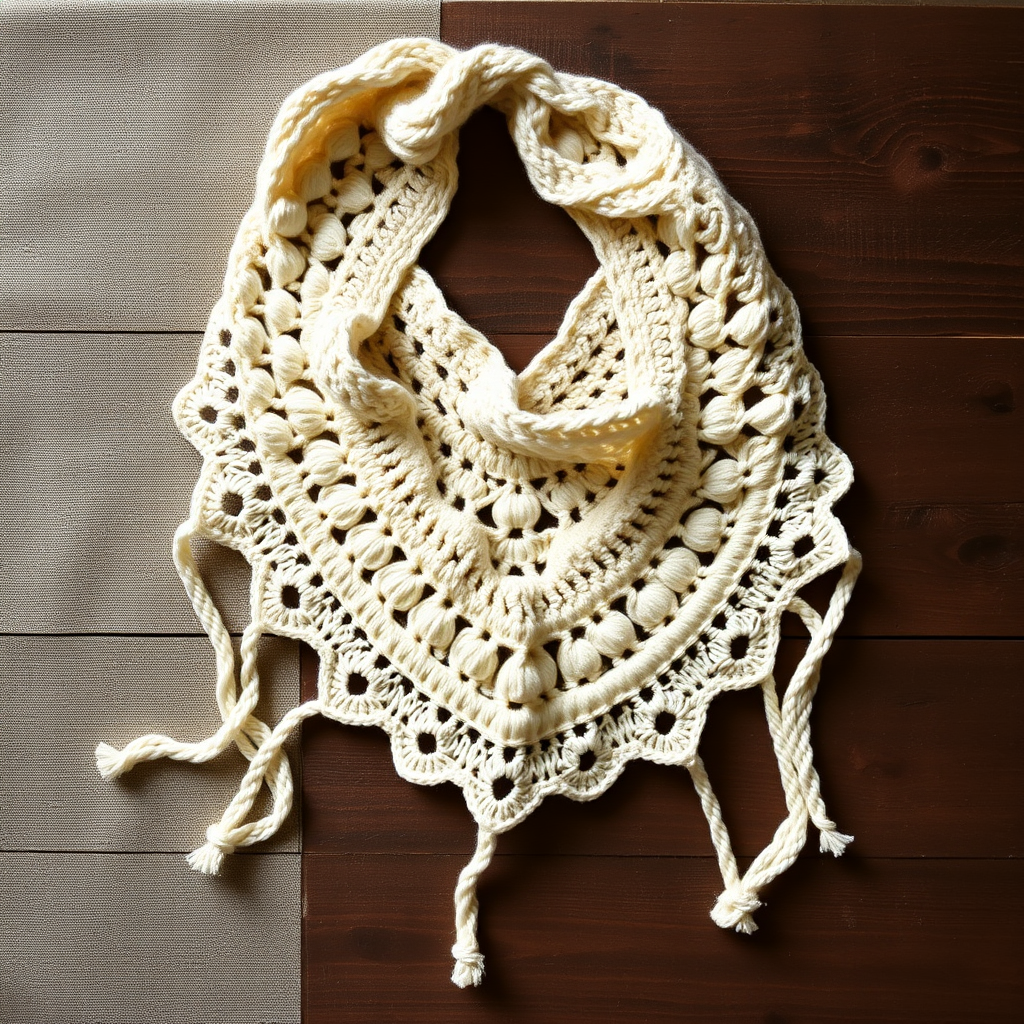
Heirloom Vintage Shells Crochet Wrap: A Timeless Treasure
There are certain pieces that transcend trends—garments that feel like they carry stories, whispered through generations of skilled hands. The Heirloom Vintage Shells Crochet Wrap is exactly that kind of project. With its delicate scalloped edges, romantic drape, and classic shell stitch pattern, this wrap is designed to become a cherished piece in your wardrobe for years to come. Whether you're dressing up for a special occasion or adding a touch of elegance to a simple outfit, this wrap delivers timeless beauty with every stitch.
This pattern is perfect for intermediate crocheters looking to expand their skills, but with clear instructions and a repetitive rhythm, even confident beginners can tackle this project with success. The result is a stunning, airy shawl that catches the light beautifully and drapes gracefully over your shoulders. Let's dive into creating this heirloom piece together.
Materials Needed
Before you begin, gather the following materials to ensure a smooth and enjoyable crochet session:
- Yarn: Worsted weight cotton or cotton-blend yarn (approximately 800-900 yards) in a soft ivory or cream color. The cotton content gives the wrap structure while maintaining a soft, breathable feel.
- Crochet Hook: 5.5 mm (I-9) crochet hook. This size works perfectly with worsted weight yarn to create a fabric that's substantial yet drapey.
- Gauge: 4 shell stitches (each shell = 3 dc, ch 1, 3 dc) and 6 rows = 4 inches in pattern. Checking your gauge ensures your wrap comes out the intended size.
- Extras: Yarn needle for weaving in ends, scissors, and blocking pins (for the finishing touches).
Step-by-Step Instructions
Follow these detailed instructions carefully, and you'll be amazed at how quickly this beautiful wrap takes shape. The pattern is worked from the bottom up, increasing at the beginning of each row to create the triangular shape.
Pattern Notes
- The wrap is worked from the bottom up, starting with a foundation chain and increasing at the beginning of each row to create a triangular shape.
- Ch 3 at the beginning of each row counts as the first double crochet.
- Shell stitch: (3 dc, ch 1, 3 dc) all in the same stitch or space.
Foundation Row
Chain 100. This foundation chain will form the bottom edge of your wrap. Take your time to ensure your chain is not twisted before proceeding.
Row 1
Dc in the 4th chain from hook (this counts as your first dc), dc in each of the next 2 chains. Now you'll begin the shell pattern: *skip 2 chains, shell in next chain, skip 2 chains, dc in next chain*. Repeat from * to * across until 3 chains remain. Dc in each of the last 3 chains. Turn your work. (You will have 16 shells)
Tip: Count your shells at the end of this row to ensure accuracy. Getting the foundation right makes the rest of the pattern flow smoothly.
Row 2
Ch 3 (counts as dc), 2 dc in the same stitch (this is your increase). *Skip 2 dc, shell in the ch-1 space of the next shell, skip 2 dc, dc in the next dc*. Repeat from * to * across until you reach the last dc of the row. Work 3 dc in the last dc. Turn. (17 shells)
Note: The increase at the beginning and end of each row is what creates the triangular shape of the wrap. The 3 dc in the first and last stitches add width gradually.
Row 3
Ch 3, 2 dc in the same stitch. *Skip 2 dc, shell in the ch-1 space of the next shell, skip 2 dc, dc in the next dc*. Repeat from * to * across until the last dc of the row. Work 3 dc in the last dc. Turn. (18 shells)
Rows 4-40
Repeat Row 3, increasing the number of shells by 1 each row. Continue this pattern until you have 55 shells across the top edge. This will take some time, but the repetitive rhythm is meditative and rewarding.
Pro tip: Place a stitch marker at the beginning of each row to help you keep track of your place, especially if you need to set your work down.
Edging
Do not turn at the end of Row 40. Working along the top edge (the long edge), sc evenly across, placing 1 sc in each dc and 1 sc in each ch-1 space. At the corner, work 3 sc in the corner stitch. Then work sc evenly down the side edge, placing 1 sc in each row end. At the bottom point, work 3 sc in the point. Continue sc up the other side edge, and finish with 3 sc in the starting corner. Join with a slip stitch to the first sc. Fasten off and weave in all ends.
This simple single crochet border frames the wrap beautifully, following the scalloped contours and giving the piece a refined, finished look.
Blocking
To enhance the lace pattern and achieve a beautiful drape, wet block the wrap. Soak it in lukewarm water with a mild soap, gently squeeze out excess water (never wring!), and lay flat on a blocking mat. Pin out the scalloped edges and allow to dry completely. This step is crucial for showcasing the intricate stitch work and giving your wrap that professional, heirloom-quality appearance.
Final Thoughts
As you complete your Heirloom Vintage Shells Crochet Wrap, take a moment to appreciate the craftsmanship you've invested. This piece is more than just an accessory—it's a testament to your skill and patience, a future heirloom that carries the warmth of your hands. Whether you gift it to someone special or keep it for yourself, this wrap is sure to be treasured for generations.
Happy crocheting, and may your stitches always be even and your shells always be full!



