Harvest Moon Pumpkin Beanie Free Pattern
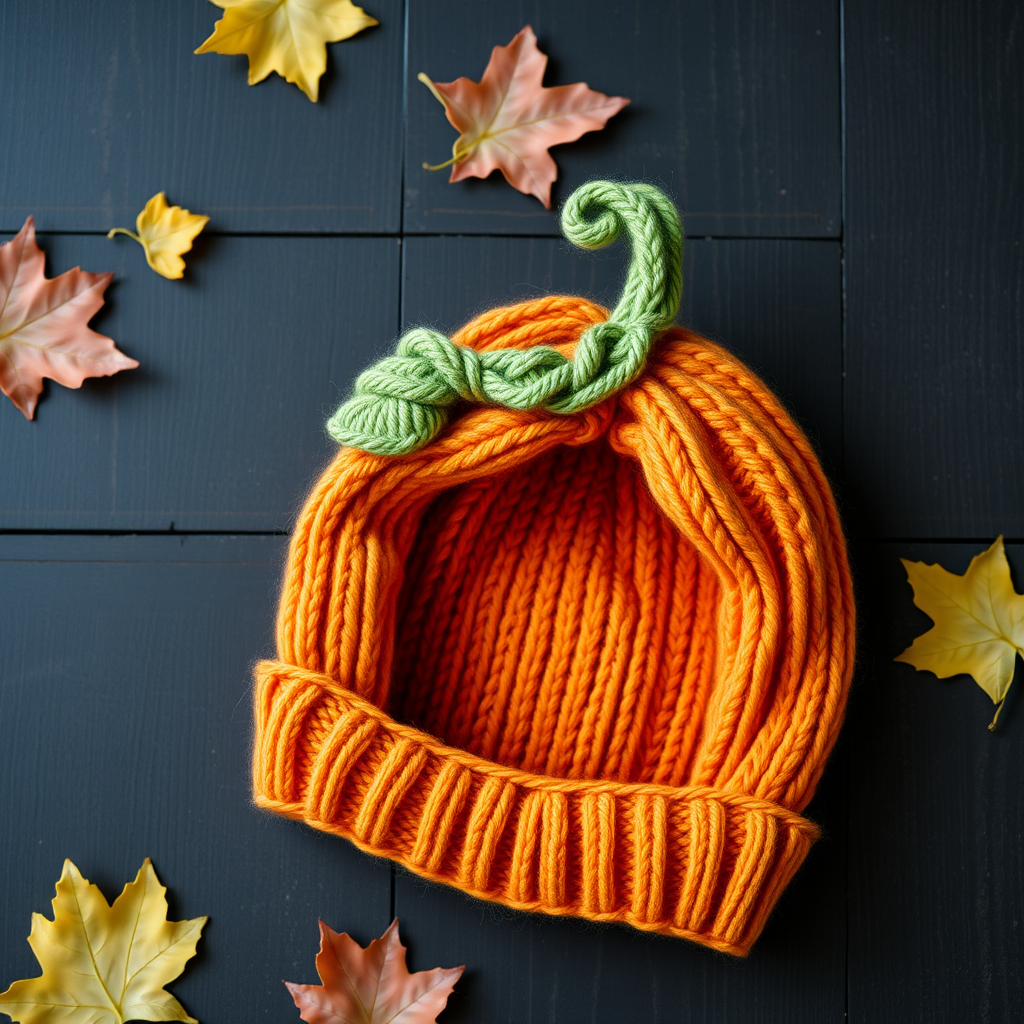
Embrace Autumn with the Harvest Moon Pumpkin Beanie
As the leaves begin to turn and the air gets crisp, there's nothing quite like wrapping yourself in a cozy, handcrafted knit. The Harvest Moon Pumpkin Beanie is the perfect project to welcome the fall season. This richly textured hat features a unique ribbed crown and a playful curly vine stem, making it a standout accessory for pumpkin patches, festive gatherings, or simply a chilly morning commute. Whether you're an experienced knitter or a confident beginner looking for a fun challenge, this free pattern will guide you through creating a warm, whimsical beanie that captures the spirit of autumn.
This pattern is designed to be both stylish and practical. The thick worsted weight yarn ensures a warm, durable fabric, while the clever crown shaping mimics the natural ridges of a pumpkin. The finishing touch—a knitted green stem that curls playfully at the top—adds a dose of personality that will have everyone asking where you got your hat. Let's dive into the materials and steps you'll need to bring this charming beanie to life.
Materials Needed
Before you begin, gather the following supplies. Having everything ready will make your knitting experience smooth and enjoyable.
Yarn
- Main Color (Pumpkin Orange): Worsted weight yarn, approximately 200 yards. Choose a rich, warm orange to capture that perfect harvest hue.
- Contrast Color (Green): A small amount of worsted weight yarn in green for the stem. Any shade of green will work, from deep forest to bright apple.
Needles & Notions
- US 7 (4.5 mm) 16-inch circular needle for the main body of the hat.
- US 7 (4.5 mm) double-pointed needles (DPNs) for working the crown decreases.
- Stitch marker to mark the beginning of the round.
- Tapestry needle for weaving in ends and sewing the stem.
- Scissors
Gauge
To ensure your beanie fits perfectly, it's crucial to check your gauge. In stockinette stitch, you should have 20 stitches and 28 rows = 4 inches. If your gauge is off, adjust your needle size accordingly. A tighter gauge will result in a smaller hat, while a looser gauge will make it larger.
Step-by-Step Instructions
This pattern is worked in the round from the bottom up. Follow these detailed instructions carefully, and you'll have a beautiful pumpkin beanie in no time. The pattern is written for an adult size fitting a 20-22 inch head circumference.
Abbreviations
- CO: Cast on
- K: Knit
- P: Purl
- K2tog: Knit two stitches together (decrease)
- St(s): Stitch(es)
- Rnd(s): Round(s)
Ribbed Brim
Using your circular needle and pumpkin orange yarn, CO 96 stitches. Place a stitch marker on your right-hand needle to mark the beginning of the round. Join in the round by knitting the first stitch from the left needle with the working yarn from the right needle. Be extremely careful not to twist the cast-on edge; a twisted brim will ruin the hat's shape.
Once joined, work the ribbing pattern: *K2, P2* repeat from * to * around for every round. Continue this K2, P2 ribbing until the brim measures 2 inches from the cast-on edge. This ribbed brim provides a snug, comfortable fit that will keep the hat securely on your head.
Body of the Hat
After completing the ribbed brim, switch to stockinette stitch, which means you will knit every stitch in every round. This creates the smooth, classic fabric that forms the main body of the beanie. Continue knitting in the round until the piece measures 6 inches from the cast-on edge. This measurement includes the 2-inch brim. If you prefer a slouchier hat, you can knit an additional 1-2 inches before starting the crown shaping.
Crown Shaping
Now it's time to shape the top of the hat to create that rounded pumpkin silhouette. You will be working a series of decrease rounds, alternating with plain knit rounds. When the circumference becomes too small for your circular needle, switch to your double-pointed needles. Distribute the stitches evenly across three or four DPNs as needed.
Follow this sequence precisely:
- Rnd 1: *K10, K2tog* repeat from * to * around (88 sts)
- Rnd 2: Knit all sts
- Rnd 3: *K9, K2tog* repeat from * to * around (80 sts)
- Rnd 4: Knit all sts
- Rnd 5: *K8, K2tog* repeat from * to * around (72 sts)
- Rnd 6: Knit all sts
- Rnd 7: *K7, K2tog* repeat from * to * around (64 sts)
- Rnd 8: Knit all sts
- Rnd 9: *K6, K2tog* repeat from * to * around (56 sts)
- Rnd 10: Knit all sts
- Rnd 11: *K5, K2tog* repeat from * to * around (48 sts)
- Rnd 12: Knit all sts
- Rnd 13: *K4, K2tog* repeat from * to * around (40 sts)
- Rnd 14: Knit all sts
- Rnd 15: *K3, K2tog* repeat from * to * around (32 sts)
- Rnd 16: Knit all sts
- Rnd 17: *K2, K2tog* repeat from * to * around (24 sts)
- Rnd 18: Knit all sts
- Rnd 19: *K1, K2tog* repeat from * to * around (16 sts)
- Rnd 20: *K2tog* repeat from * to * around (8 sts)
After completing Rnd 20, you will have 8 stitches remaining on your needles. Cut the yarn, leaving a long tail (about 8 inches). Thread the tail through a tapestry needle, then slide the needle through all 8 remaining stitches. Remove the needles and pull the yarn tight to cinch the top of the hat closed. Secure the yarn with a knot on the inside of the hat, then weave in the end.
Knitted Stem
Now for the fun part—the curly vine stem! Using your green yarn and a pair of straight needles (or your DPNs), CO 6 stitches. Work back and forth in stockinette stitch (knit on the right side, purl on the wrong side) for 3 inches. This will create a flat, rectangular piece of fabric.
Next, work a decrease row: K2tog across the row. You will now have 3 stitches on your needle. Cut the yarn, leaving a tail. Thread the tail through the remaining 3 stitches, pull tight, and secure. This will gather one end of the stem, giving it a natural, tapered look.
Finishing Touches
Position the stem at the very top of the hat, where you cinched the crown closed. Using the tail from the stem and a tapestry needle, sew the stem securely to the hat. For a playful, organic look, curl the stem slightly before sewing it down, or simply let it flop naturally. Sew around the base of the stem a few times to ensure it's firmly attached.
Finally, weave in all remaining loose ends on the inside of the hat using your tapestry needle. If desired, you can gently block your beanie by wetting it and laying it flat to dry, reshaping it as needed. This will help even out the stitches and give the hat a polished finish.
And there you have it—your very own Harvest Moon Pumpkin Beanie! This charming hat is not only a joy to knit but also a delight to wear. The rich texture and whimsical stem make it a perfect gift for a loved one or a special treat for yourself. Pair it with a chunky scarf and a warm coat, and you're ready to embrace all the beauty that autumn has to offer. Happy knitting!


