Harvest Moon Granny Pumpkin Free Pattern
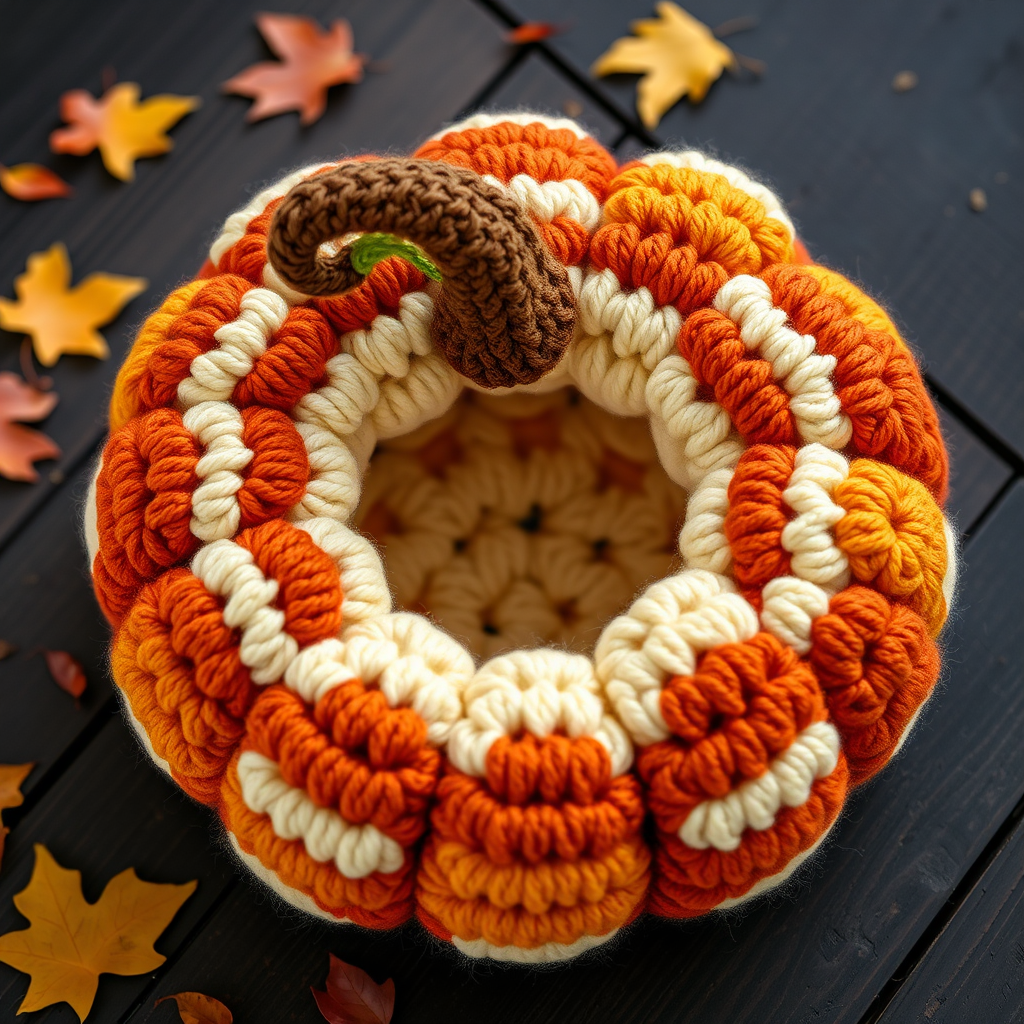
Embrace Autumn with the Harvest Moon Granny Pumpkin
There's something undeniably magical about the arrival of autumn—the crisp air, the changing leaves, and the desire to fill our homes with warmth and coziness. If you're looking for a delightful project that captures the essence of the season, look no further than this Harvest Moon Granny Pumpkin. This free crochet pattern offers a modern twist on a classic fall decoration, combining the nostalgic charm of granny squares with the playful shape of a pumpkin. Whether you're a seasoned crocheter or a curious beginner, this project is designed to be approachable, rewarding, and utterly charming. Let's dive in and create a handmade treasure that will grace your seasonal display for years to come.
Materials Needed
Before we begin, let's gather our supplies. This project is wonderfully beginner-friendly, requiring just a few basic materials. The chunky yarn ensures quick progress and a beautifully textured finish.
- Yarn: Bulky weight yarn in warm autumn tones. You'll need approximately 200 yards of your main color (think terracotta or burnt orange) and 100 yards of accent colors (cream, mustard yellow, or any complementary shades).
- Crochet Hook: An 8 mm (L/11) hook is essential for achieving the correct gauge and a soft, pliable fabric.
- Gauge: 4 granny square rounds = 4 inches (10 cm) in diameter. Don't stress too much about gauge for this project—consistency is more important than exact measurements.
- Other Supplies: A yarn needle for sewing and weaving in ends, scissors, and polyester fiberfill for stuffing.
Step-by-Step Instructions
This pumpkin is constructed from 8 granny squares, which are then cleverly sewn together and gathered to create the iconic pumpkin shape. Each square is worked in the round, and the process is repetitive and relaxing once you get the hang of it. Let's start with the foundation.
Granny Square Pattern (Make 8)
Round 1: With your main color, make a magic ring. Chain 3 (this counts as your first double crochet). Work 2 double crochet (dc) into the ring, then chain 2. *Work 3 dc into the ring, chain 2.* Repeat from * to * two more times. You will now have 4 groups of 3 dc, separated by chain-2 spaces. Slip stitch to the top of the beginning chain 3 to close the round. Fasten off. (12 dc total)
Round 2: Join your accent color in any chain-2 corner space. Chain 3, then work 2 dc in the same space. Chain 1. *In the next corner space, work 3 dc, chain 2, 3 dc in the same space, then chain 1.* Repeat from * to * around. To finish, work 3 dc in the starting corner space, chain 2, and slip stitch to the top of the beginning chain 3. Fasten off. (24 dc total)
Round 3: Join your main color in any chain-2 corner space. Chain 3, work 2 dc in the same space, chain 1. Work 3 dc in the next chain-1 space, chain 1. *In the next corner space, work 3 dc, chain 2, 3 dc in the same space, chain 1. Work 3 dc in the next chain-1 space, chain 1.* Repeat from * to * around. Finish with 3 dc in the starting corner space, chain 2, and slip stitch to close. Fasten off. (36 dc total)
Round 4: Join your accent color in any chain-2 corner space. Chain 3, work 2 dc in the same space, chain 1. *Work 3 dc in the next chain-1 space, chain 1.* Repeat from * to * until you reach the next corner. In the corner space, work 3 dc, chain 2, 3 dc in the same space, chain 1. Continue around the square, repeating the pattern. End with 3 dc in the starting corner space, chain 2, and slip stitch to close. Fasten off. (48 dc total)
Repeat this process until you have 8 beautiful granny squares. Take a moment to admire your work—these squares are the building blocks of your pumpkin!
Assembly: Bringing Your Pumpkin to Life
Now for the fun part—watching your pumpkin take shape. This assembly process is simple but transformative.
Step 1: Arrange and Sew. Lay out your 8 squares in a circle, with the corners meeting at the center point. This will form a ring. Carefully sew the squares together along their adjacent edges. Leave the center opening (where the magic rings are) open—this is crucial for the next steps.
Step 2: Gather the Bottom. Once all squares are sewn together, you'll have a tube-like shape with two open ends. Thread a yarn needle with a long piece of your main color yarn. Weave the yarn through the stitches around one opening, then pull it tight to gather the opening closed. Secure it firmly with a knot. This will be the bottom of your pumpkin.
Step 3: Stuff Your Pumpkin. Through the remaining opening, stuff your pumpkin firmly with polyester fiberfill. Be generous—a well-stuffed pumpkin holds its shape beautifully. Ensure the stuffing is evenly distributed for a plump, round appearance.
Step 4: Gather the Top. Gather the second opening closed in the same manner as the bottom, pulling the yarn tight to form the top of the pumpkin. Secure it with a knot and weave in the ends. You now have a lovely pumpkin base!
Finishing Touches: Stem and Vine
No pumpkin is complete without its stem. This simple addition adds the perfect finishing touch.
Step 5: Create the Stem. With brown yarn, chain 6. Work 5 single crochet (sc) into the second chain from the hook. Fasten off, leaving a long tail for sewing. Attach the stem to the top center of your pumpkin, curling it slightly for a natural, organic look. Sew it securely in place.
Step 6: Add a Vine (Optional). For an extra touch of charm, create a vine with green yarn. Chain 20, then work 2 sc in each chain across. Fasten off and sew the vine around the base of the stem, letting it curl playfully.
Step 7: Weave in All Ends. Take a moment to weave in any remaining yarn ends with your needle. This ensures your pumpkin is neat, durable, and ready for display.
Congratulations! Your Harvest Moon Granny Pumpkin is complete. Place it on your mantel, dining table, or porch to add a handmade, cozy touch to your autumn decor. This pattern is not only a joy to make but also a wonderful gift for fellow crafters and fall enthusiasts. Happy crocheting!


