Fade To Green Poncho Free Pattern – Knitted Gradient Wrap
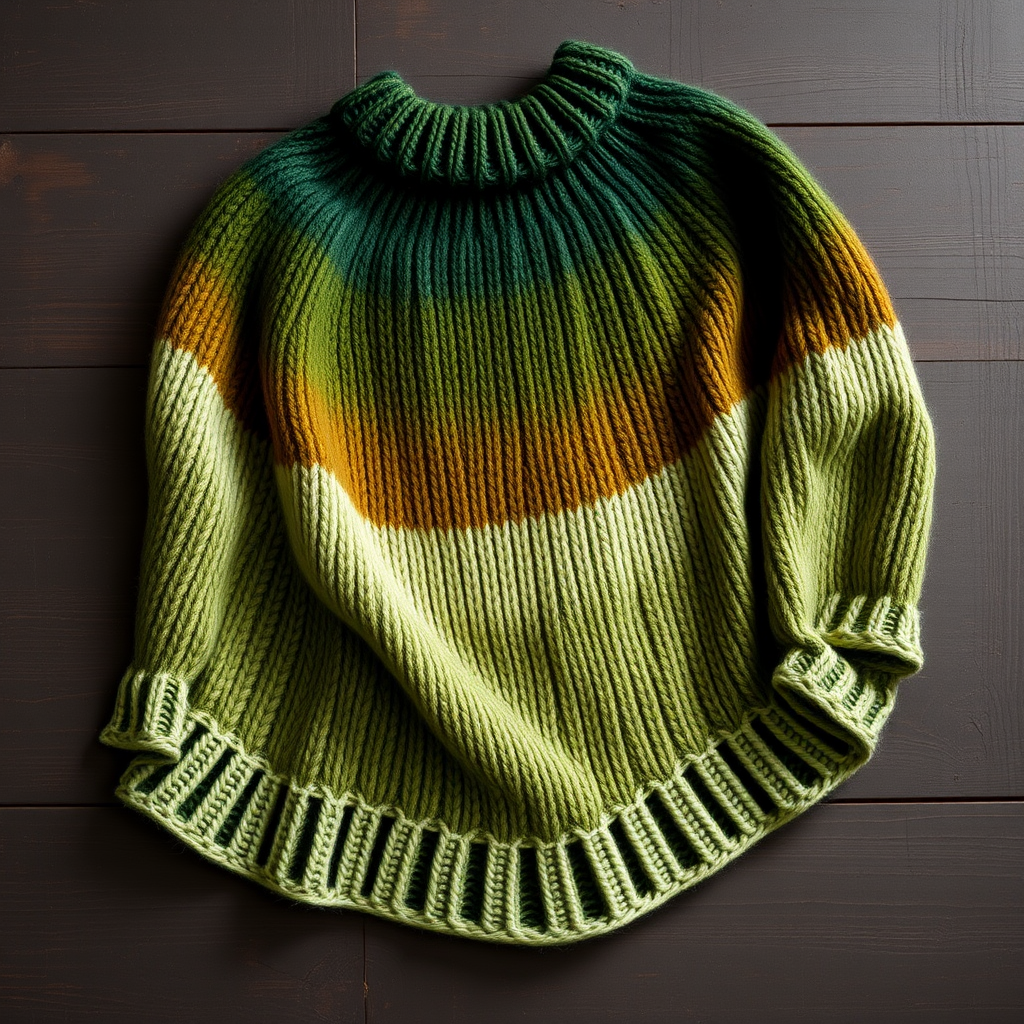
Fade To Green Poncho Free Pattern – Knitted Gradient Wrap
Wrap yourself in the serene beauty of a forest gradient with this cozy, oversized poncho. Knitted in the round with a soothing fade from deep emerald to soft sage, it's the perfect layering piece for cool evenings. This beginner-friendly pattern uses simple knit and purl stitches, a touch of yarn overs for shaping, and a clever color-fade technique that creates a stunning ombre effect. The seamless, top-down construction means no sewing at the end—just pure knitting pleasure. Whether you're curled up by the fire or stepping out for a crisp autumn walk, this poncho will keep you warm and stylish.
Materials Needed
Before you begin, gather the following supplies. This pattern is designed for worsted weight yarn, which is easy to work with and widely available. The gradient effect requires four shades of green, but you can easily substitute any color family to match your personal style.
- Yarn: Worsted weight yarn in 4 shades of green (e.g., Lion Brand Wool-Ease in Forest, Olive, Sage, and Mist). Approx. 1200-1400 yards total. (Color A = Forest, Color B = Olive, Color C = Sage, Color D = Mist)
- Needle: US 9 (5.5 mm) 32-inch circular knitting needle (the long cable is essential for holding all stitches comfortably).
- Notions: Stitch markers (at least 1), tapestry needle for weaving in ends, scissors.
- Gauge: 16 stitches and 22 rows = 4 inches in stockinette stitch. Always check your gauge to ensure the correct size and drape.
Step-by-Step Instructions
This poncho is knitted seamlessly from the top down in the round. You will work a simple ribbed neckline, then increase gradually to create a flowing A-line shape. The color fade is achieved by alternating yarns in a gradient sequence. Follow the steps carefully, and you'll have a beautiful, custom-made poncho in no time.
Abbreviations
- CO: Cast on
- K: Knit
- P: Purl
- K2tog: Knit two together
- YO: Yarn over
- PM: Place marker
- SM: Slip marker
- St(s): Stitch(es)
- Rep: Repeat
Neckline
CO 80 sts. Join in the round, being careful not to twist. PM at the beginning of the round.
Rounds 1-6: *K2, P2* rep to end. This creates a stretchy, comfortable ribbed neckline that will sit nicely against your shoulders.
Yoke Increases
Now we'll shape the poncho by adding stitches evenly. The YO (yarn over) creates a small decorative hole, which is a classic feature of this style. Don't worry if it looks a bit loose at first—it will be part of the design.
Round 7: *K8, YO* rep to end (90 sts).
Round 8: Knit all sts (the YOs are worked as knit stitches in the next round).
Round 9: *K9, YO* rep to end (100 sts).
Round 10: Knit all sts.
Continue in this manner, increasing every other round by working one more knit stitch before the YO each time. For example:
Round 11: *K10, YO* rep to end (110 sts).
Round 12: Knit all sts.
Repeat this increase pattern until you have 200 sts on the needle. This will take about 20 increase rounds. Tip: Place a marker every 50 stitches to help you keep track of your progress.
Color Fade Sequence
To create the beautiful gradient, you will change colors gradually. This is done by holding two strands of yarn together for a few rounds, which blends the colors seamlessly. Work the following sequence, changing colors every 8 rounds:
- Rounds 1-8: Color A (Forest)
- Rounds 9-16: Color A + Color B held together (Forest + Olive)
- Rounds 17-24: Color B (Olive)
- Rounds 25-32: Color B + Color C held together (Olive + Sage)
- Rounds 33-40: Color C (Sage)
- Rounds 41-48: Color C + Color D held together (Sage + Mist)
- Rounds 49-56: Color D (Mist)
- Rounds 57-64: Color D + Color C held together (Mist + Sage)
- Rounds 65-72: Color C (Sage)
- Rounds 73-80: Color C + Color B held together (Sage + Olive)
- Rounds 81-88: Color B (Olive)
- Rounds 89-96: Color B + Color A held together (Olive + Forest)
- Rounds 97-104: Color A (Forest)
Note: When holding two strands together, treat them as a single yarn. Knit with both strands as if they were one.
Body
After completing the yoke increases and color sequence, continue in stockinette stitch (knit every round) with Color A for the remainder of the body. Work until the poncho measures approximately 20 inches from the neckline, or desired length. Tip: Try it on as you go to ensure it falls at your preferred length.
Edging
Work 6 rounds of *K2, P2* ribbing. This matches the neckline and gives the bottom edge a polished, finished look. Bind off loosely in pattern. Tip: Use a larger needle or a stretchy bind-off method to ensure the edge isn't too tight.
Finishing
Weave in all ends with a tapestry needle, being careful to secure them neatly on the wrong side of the fabric. Block gently to shape—this will even out the stitches and enhance the drape of the poncho. Lay it flat on a towel, pin to the desired dimensions, and allow it to dry completely. Your Fade To Green Poncho is ready to wear!
Enjoy your new handcrafted wrap, and don't forget to share your creation with fellow knitting enthusiasts. Happy knitting!