Emberwood Wrap Collar Free Pattern
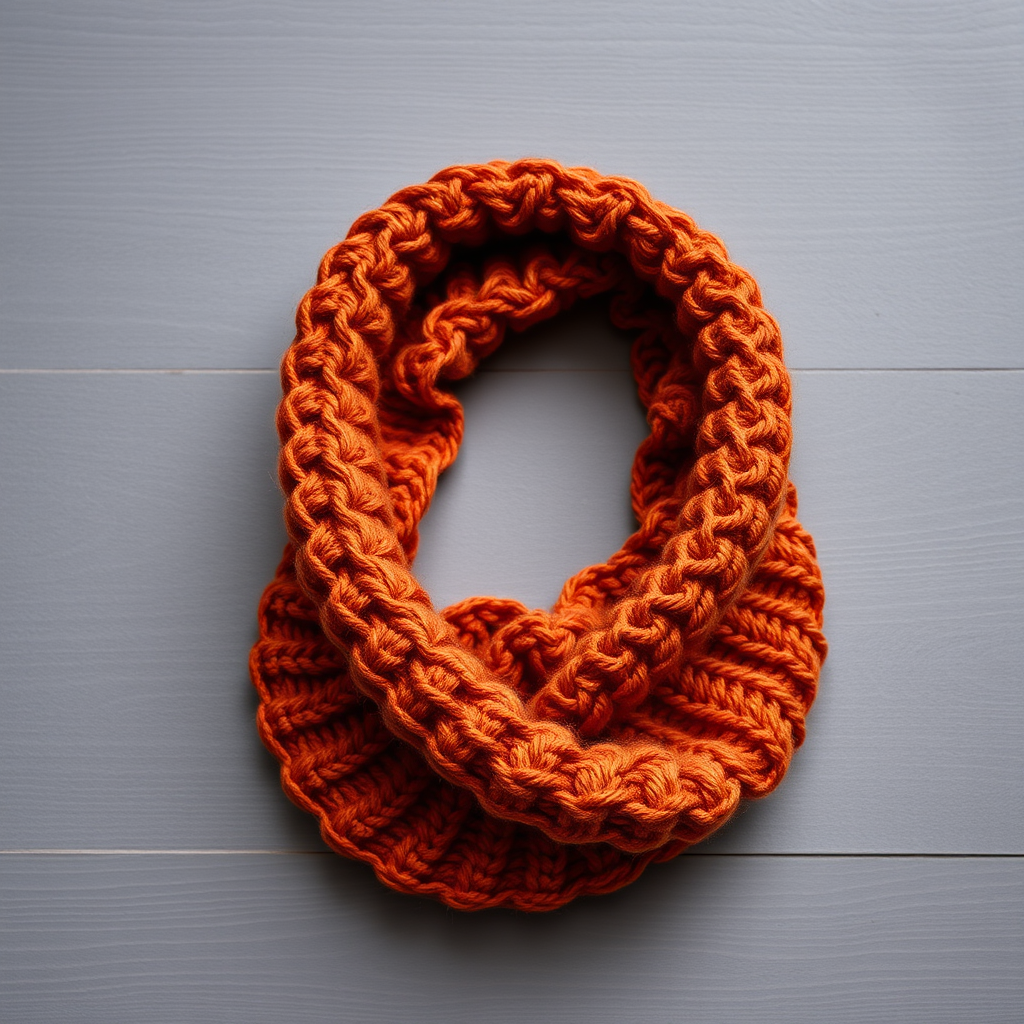
Wrap Yourself in Warmth: The Emberwood Wrap Collar Free Knitting Pattern
There's something magical about wrapping a hand-knit cowl around your neck on a crisp autumn day. The Emberwood Wrap Collar is more than just a cowl—it's a modern statement piece that combines classic knitting techniques with contemporary shaping. This free pattern creates a rich, textured accessory with a unique asymmetrical drape that dips elegantly in the front, making it perfect for layering over coats, cardigans, or sweaters. Whether you're a seasoned knitter or a confident beginner looking for your next project, this wrap collar delivers both style and satisfaction. The deep burnt orange color evokes falling leaves and cozy evenings, while the dense, textured stitch pattern adds handmade luxury to any outfit.
Materials Needed
Before you begin your Emberwood Wrap Collar journey, gather these essential supplies:
- Yarn: Worsted weight yarn (Category 4), approximately 250-300 yards. For the best results, try Lion Brand Wool-Ease in 'Ember' (a rich burnt orange) or a deep burgundy for a moodier look.
- Needles: US Size 8 (5 mm) circular knitting needle, 16-inch length. Alternatively, you can use straight needles if you prefer to knit flat and seam at the end.
- Notions: Stitch marker, tapestry needle for weaving in ends, and scissors.
- Gauge: 18 stitches and 24 rows = 4 inches in the textured stitch pattern. While gauge isn't critical for this project, matching it will ensure your cowl comes out the intended size.
Understanding Your Pattern
Before diving in, let's review the key elements of this pattern:
- Finished Measurements: Approximately 24 inches around and 10 inches tall (when laid flat). The short-row shaping creates a front that's longer than the back.
- Abbreviations: CO (cast on), K (knit), P (purl), K2tog (knit two together), Yo (yarn over), Sl (slip stitch purlwise), W&T (wrap and turn).
- Pattern Stitch: This is a multiple of 4 + 2 stitches. The repeating pattern creates a beautiful ribbed texture with subtle eyelet details.
Step-by-Step Instructions
Pattern Stitch (Worked in the Round)
This textured stitch pattern is the heart of your cowl. It combines ribbing with yarn overs and decreases to create visual interest and gentle drape.
- Row 1 (RS): K2, *P2, K2; repeat from * to end of round.
- Row 2: P2, *K2, P2; repeat from * to end of round.
- Row 3: K2, *Yo, K2tog, P2; repeat from * to end of round.
- Row 4: P2, *K2, P2; repeat from * to end of round.
Repeat Rows 1-4 throughout the body of your cowl. The yarn overs on Row 3 create delicate eyelets that add a touch of elegance to the dense texture.
Collar Body
Now that you understand the stitch pattern, let's cast on and begin:
- Cast On: CO 110 stitches. Place a stitch marker and join in the round, being extremely careful not to twist your stitches. This is crucial for creating a seamless tube.
- Work the Pattern: Continue working in the pattern stitch as established above for 8 inches, ending with Row 4 of the pattern. This creates the main body of your cowl with consistent texture throughout.
- Prepare for Shaping: After completing 8 inches, you'll begin the short-row shaping that gives the Emberwood its distinctive wrap effect. This technique makes the front of the collar longer than the back, creating that beautiful asymmetrical drape.
Short Row Shaping
Short rows are a technique that allows you to knit partial rows, creating curves and shaping in your fabric. Don't be intimidated—we'll walk through each step carefully:
- Row 1 (RS): Work in pattern across 80 stitches, then W&T. To do a W&T, knit or purl to the specified stitch, slip the next stitch purlwise to the right needle, bring the yarn to the front (between the needles), slip the stitch back to the left needle, then turn your work. You've now "wrapped" that stitch.
- Row 2 (WS): Work in pattern back across 50 stitches, then W&T again. Remember to work the pattern stitch as it appears—if you're on a knit row, knit; if purl, purl.
- Row 3: Work in pattern across 70 stitches, W&T.
- Row 4: Work in pattern back across 60 stitches, W&T.
- Row 5: Work in pattern across all stitches. As you encounter each wrapped stitch, pick up the wrap and knit it together with the stitch. This hides the wraps and creates a smooth, professional finish. To do this, insert your right needle under the wrap from front to back, then into the stitch on the left needle, and knit them together.
- Finish Shaping: Work 2 more rows in pattern across all stitches. This locks in the shaping and ensures your wraps are secure.
- Bind Off: Bind off loosely in pattern. To keep the edge stretchy, bind off using a larger needle or use a stretchy bind-off method like the "Jeny's Surprisingly Stretchy Bind-Off." This ensures your cowl slips easily over your head.
Finishing Touches
Your Emberwood Wrap Collar is almost complete! Follow these final steps for a polished result:
- Weave in Ends: Thread your tapestry needle with the yarn tails and weave them carefully through the wrong side of your work. Make sure to weave in at least 4-6 inches to prevent unraveling.
- Block Your Cowl: Gently wet block your cowl to even out the stitches and enhance the drape. Soak it in lukewarm water with a drop of wool wash, gently squeeze out excess water (never wring!), and lay flat on a towel to dry. Shape it gently to your desired dimensions.
- Enjoy Your Creation: Once dry, your wrap collar is ready to wear! The wrap effect naturally creates a beautiful drape, with the front longer than the back—perfect for layering over coats or sweaters.
Tips for Success
To ensure your Emberwood Wrap Collar turns out beautifully, keep these expert tips in mind:
- Count Your Stitches: After each short row, count your stitches to ensure you haven't accidentally dropped or added any. The pattern stitch is forgiving, but accuracy matters for the shaping.
- Use Stitch Markers: Place markers at the 50, 60, 70, and 80-stitch points before starting your short rows. This makes it much easier to know where to wrap and turn.
- Practice W&T: If you're new to short rows, practice the wrap and turn technique on a swatch first. It's a valuable skill that opens up endless design possibilities.
- Choose Your Yarn Wisely: The pattern calls for worsted weight yarn, but you can experiment with different fibers. A wool blend gives excellent stitch definition, while a cotton blend creates a cooler, more breathable cowl for transitional weather.
The Emberwood Wrap Collar is more than just a knitting project—it's a wearable work of art that showcases your skills and creativity. Whether you're knitting it for yourself or as a thoughtful handmade gift, this pattern delivers both beauty and functionality. The rich texture, elegant shaping, and cozy warmth make it a piece you'll reach for again and again. So grab your needles, choose your favorite worsted weight yarn, and let the soothing rhythm of knitting transport you to a place of creativity and calm. Happy knitting!


