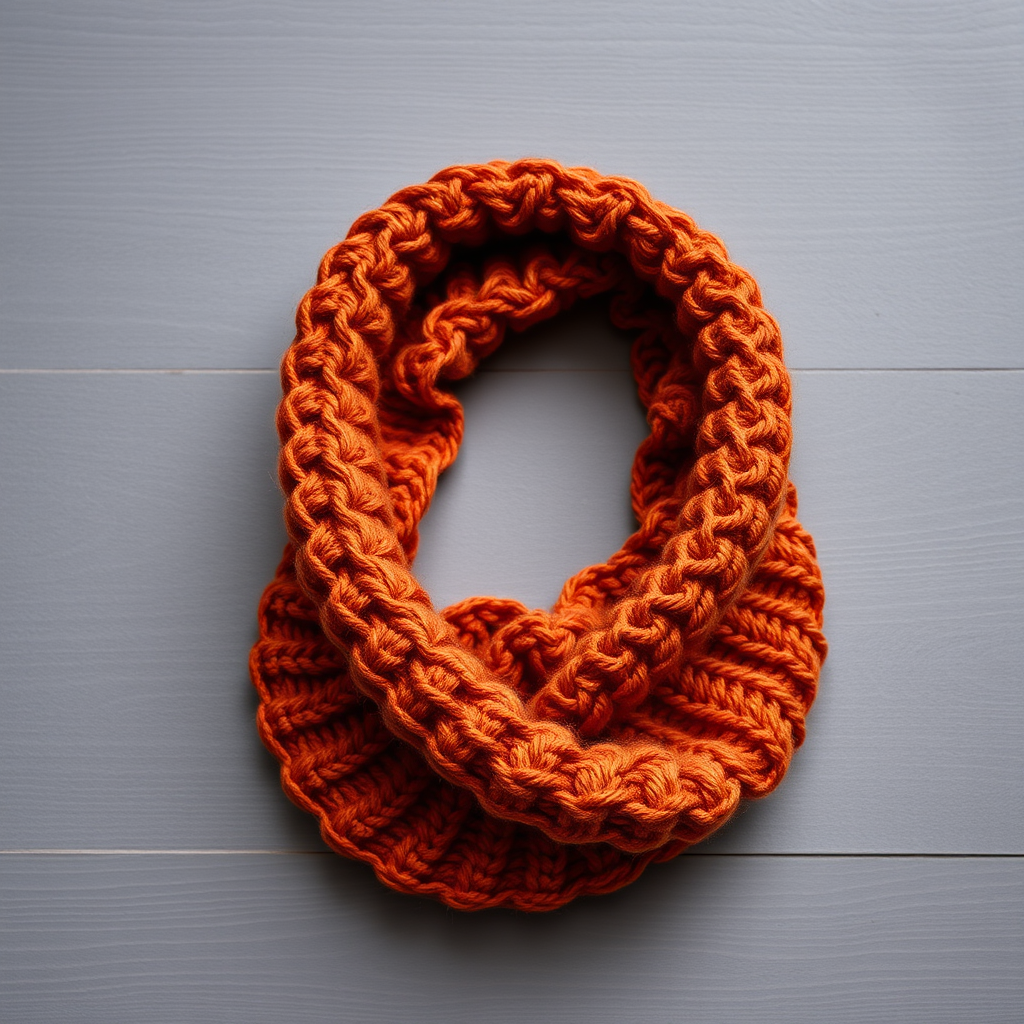
Ember Glow Twisted Cowl Free Pattern – Knitted Cozy Firelight Wrap

Ember Glow Twisted Cowl: A Free Knitting Pattern for Cozy Firelight Style
Imagine wrapping yourself in the warm, flickering glow of a hearth on a crisp autumn evening. That's the magic of the Ember Glow Twisted Cowl—a richly textured, gradient masterpiece that captures the essence of sunset embers in every stitch. This free knitting pattern is designed for intermediate beginners who want to elevate their skills with a mesmerizing twisted stitch technique, all while creating a stunning, wearable accessory.
Knitted in the round from the bottom up, this cowl features a subtle yet captivating spiral texture achieved by knitting through the back loop. The gradient transitions from deep burgundy to burnt orange and finally to golden yellow, mimicking the beautiful progression of a fading fire. With short-row shaping at the top, the cowl drapes elegantly, making it both a cozy and fashionable statement piece for chilly days.
Whether you're a seasoned knitter looking for a quick, satisfying project or a newer maker ready to tackle short rows and twisted stitches, this pattern is perfect. Let's dive into the details and create something truly special together.
Materials Needed for Your Ember Glow Cowl
Before you begin, gather these simple supplies. The beauty of this pattern is that it requires minimal materials, making it a great travel project or a thoughtful handmade gift.
Yarn
- Worsted weight yarn in three colors:
- Color A: Deep Burgundy (approx. 220 yards)
- Color B: Burnt Orange (approx. 220 yards)
- Color C: Golden Yellow (approx. 220 yards)
Pro tip: Choose a soft, wool-blend yarn for maximum warmth and stitch definition. The twisted stitch pattern really pops with a smooth, non-fuzzy yarn.
Needles & Notions
- US 8 (5 mm) 16-inch circular needle – essential for knitting in the round
- Stitch marker to mark the beginning of the round
- Tapestry needle for weaving in ends
- Scissors
Gauge
18 stitches and 24 rows = 4 inches in stockinette stitch (knit every round). Always knit a gauge swatch to ensure your cowl matches the finished measurements. Adjust your needle size if necessary to achieve the correct gauge.
Step-by-Step Instructions: Knitting Your Ember Glow Cowl
This pattern is worked in the round from the bottom up. The twisted stitch is simply knitting every stitch through the back loop (K tbl), which creates a beautiful, subtle spiral effect. Don't worry if it feels a bit tight at first—the fabric will relax beautifully after blocking.
Finished Measurements
- Circumference: 24 inches (unstretched)
- Height: 10 inches
Abbreviations
- CO: Cast on
- K: Knit
- P: Purl
- K tbl: Knit through the back loop
- W&T: Wrap and turn (short rows)
- PM: Place marker
Pattern Notes
- Worked in the round from the bottom up.
- The twisted stitch pattern (K tbl) creates a beautiful, textured spiral.
- Short rows shape the top edge for a flattering drape.
- When changing colors, do so at the beginning of a round for a clean transition.
Getting Started: The Ribbed Bottom Edge
With Color A (deep burgundy), CO 108 stitches. Place a marker and join in the round, being very careful not to twist your stitches. This is the foundation of your cowl, so take your time.
Rounds 1-6: *K2, P2* repeat around. This classic ribbing creates a snug, stretchy edge that will hold its shape beautifully.
Knitting the Twisted Body
Now it's time to create that gorgeous twisted texture. Switch to Color B (burnt orange).
Rounds 7-18: K all stitches through the back loop (K tbl). This is the magic stitch! Knitting through the back loop twists the stitch, creating that subtle, elegant spiral effect. Keep your tension even and consistent.
Switch to Color C (golden yellow).
Rounds 19-30: K tbl all stitches around.
Switch to Color A (deep burgundy).
Rounds 31-42: K tbl all stitches around.
Switch to Color B (burnt orange).
Rounds 43-54: K tbl all stitches around.
Switch to Color C (golden yellow).
Rounds 55-66: K tbl all stitches around.
You've now completed the main body of the cowl. The gradient effect is stunning, transitioning from deep burgundy through burnt orange to golden yellow, and then back again. This creates a beautiful, balanced design.
Shaping the Top Edge with Short Rows
This is where the cowl gets its elegant, flared drape. Switch to Color A (deep burgundy).
Round 67: K all stitches (regular knit, not through the back loop).
Now, you'll work short rows back and forth over the last 36 stitches of the round. This is the front section of the cowl that will be slightly longer, creating a beautiful drape. The wrap and turn (W&T) technique is simple: you knit to the specified stitch, wrap the next stitch, turn your work, and purl back. Don't worry—it sounds more complicated than it is!
Row 1 (RS): K36, W&T.
Row 2 (WS): P36, W&T.
Row 3: K34, W&T.
Row 4: P34, W&T.
Row 5: K32, W&T.
Row 6: P32, W&T.
Row 7: K30, W&T.
Row 8: P30, W&T.
Row 9: K28, W&T.
Row 10: P28, W&T.
Row 11: K26, W&T.
Row 12: P26, W&T.
Row 13: K24, W&T.
Row 14: P24, W&T.
Row 15: K22, W&T.
Row 16: P22, W&T.
Row 17: K20, W&T.
Row 18: P20, W&T.
Row 19: K18, W&T.
Row 20: P18, W&T.
Row 21: K16, W&T.
Row 22: P16, W&T.
Row 23: K14, W&T.
Row 24: P14, W&T.
Row 25: K12, W&T.
Row 26: P12, W&T.
Row 27: K10, W&T.
Row 28: P10, W&T.
Row 29: K8, W&T.
Row 30: P8, W&T.
Row 31: K6, W&T.
Row 32: P6, W&T.
Row 33: K4, W&T.
Row 34: P4, W&T.
Row 35: K2, W&T.
Row 36: P2, W&T.
You've now created a beautiful, curved shape. Now, it's time to knit back across all stitches, picking up the wraps to hide them.
Round 68: K all stitches around, picking up the wraps as you go. To pick up a wrap, simply insert your right needle under the wrap and then into the wrapped stitch, knitting them together. This hides the wrap and creates a clean, professional finish.
Finishing with Ribbing
Now, complete your cowl with a matching ribbed edge.
Rounds 69-74: *K2, P2* repeat around.
Bind off loosely in pattern. A loose bind-off is crucial here to ensure the top edge remains stretchy and comfortable. You can use a larger needle for binding off if you tend to bind off tightly.
Weaving in Ends and Blocking
Weave in all loose ends with your tapestry needle, being careful to weave them in on the inside of the cowl so they're invisible from the outside.
Finally, block your cowl gently to shape. Wet blocking is ideal: soak the cowl in lukewarm water with a bit of wool wash, gently squeeze out excess water (never wring!), and lay it flat on a towel to dry. Gently shape it to the correct measurements. Blocking will even out your stitches and make the twisted texture really shine.
Your Cozy Masterpiece Awaits
Congratulations! You've just created a stunning Ember Glow Twisted Cowl. This beautiful, gradient accessory is perfect for crisp autumn walks, cozy evenings by the fire, or as a thoughtful handmade gift for someone special. The twisted stitch texture catches the light beautifully, and the warm, sunset-inspired colors will brighten any winter wardrobe.
We'd love to see your finished cowl! Share your photos on social media with the hashtag #EmberGlowCowl and tag us so we can admire your beautiful work. Happy knitting!