Ember Dune Cocoon Shrug Free Pattern
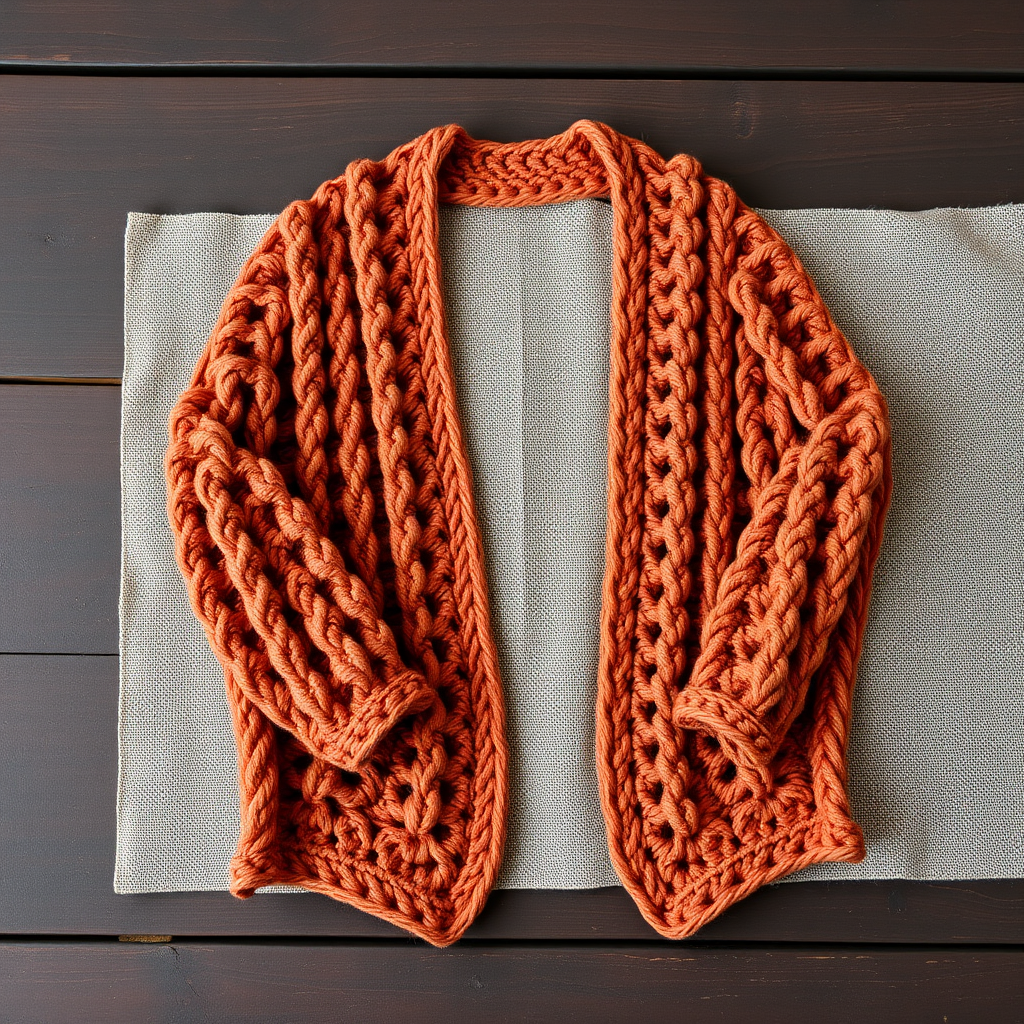
Wrap Yourself in Warmth: The Ember Dune Cocoon Shrug Free Crochet Pattern
Imagine wrapping yourself in a cloud of warm, sculptural fabric that drapes effortlessly over your shoulders. That's the magic of the Ember Dune Cocoon Shrug—a modern, asymmetric wrap that's as stylish as it is cozy. Designed with bulky yarn and a gorgeous textured stitch, this project works up quickly, making it the perfect weekend make for crocheters ready to level up from beginner basics.
With its open, drapey construction and rich, heathered tones, this shrug is more than just an accessory—it's a statement piece. Whether you're curling up with a book or heading out for a crisp evening, this cocoon shrug adds a touch of handcrafted luxury to any outfit. Let's dive into this free pattern and create something beautiful together.
Why You'll Love This Cocoon Shrug Pattern
This pattern is thoughtfully designed for beginner-intermediate crocheters. It uses simple stitches—single crochet and double crochet clusters—to create a dense, warm, and surprisingly drapey fabric. The construction is genius: two identical rectangular panels seamed together to form the cocoon shape. No complicated shaping, no tricky increases or decreases. Just straightforward, rhythmic stitching that's almost meditative.
The result? A chic, oversized shrug with a deep, open front and generous armholes that feels custom-made. Plus, because it's worked in bulky yarn, you'll see your progress quickly—instant gratification for your crafting soul.
Materials Needed
Before you begin, gather these supplies to ensure a smooth crochet session:
- Yarn: Bulky weight yarn (Category 5), approximately 450–550 yards. The sample shown uses a heathered terracotta and sand tonal yarn for that beautiful, earthy gradient effect.
- Crochet Hook: US Size L/11 (8.0 mm) hook, or the size needed to obtain gauge.
- Yarn Needle: For weaving in ends and seaming the panels.
- Scissors: For cutting yarn.
- Measuring Tape: To check gauge and panel dimensions.
Gauge Information
Getting the right gauge is crucial for the perfect fit. In the pattern stitch, you should have:
- 10 stitches and 8 rows = 4 inches (after light steaming or blocking).
Always make a gauge swatch first! If your swatch is too small, try a larger hook. If it's too big, switch to a smaller hook. This small step ensures your shrug drapes beautifully.
Step-by-Step Instructions
This shrug is worked in two identical rectangular panels, which are then seamed to create the cocoon shape. The pattern uses a simple repeat of single crochet and double crochet clusters to create a dense, warm, and drapey fabric.
Special Stitches
Before you start, let's master the one special stitch you'll need:
- Cluster (CL): Yarn over, insert hook into indicated stitch, yarn over and pull up a loop, yarn over and pull through 2 loops (2 loops on hook). Yarn over, insert hook into same stitch, yarn over and pull up a loop, yarn over and pull through 2 loops (3 loops on hook). Yarn over and pull through all 3 loops. (This is a 2-dc cluster.)
Panel (Make 2)
Follow these instructions carefully to create each panel. Both panels are identical, so repeat this process twice.
Foundation: Chain 46 loosely.
Row 1: Single crochet (sc) in the 2nd chain from the hook and in each chain across. Turn. (You should have 45 sc stitches.)
Row 2: Chain 1 (does not count as a stitch here and throughout). Sc in the first stitch. *Skip the next 2 stitches. Work a CL in the next stitch. Chain 1. Skip the next 2 stitches. Sc in the next stitch.* Repeat from * to * across. Turn. (You will have 7 clusters and 8 single crochets, with chain-1 spaces between clusters.)
Row 3: Chain 1. Sc in the first sc. *Chain 1. Work a CL in the chain-1 space from the previous row (the space between the two skipped stitches). Chain 1. Sc in the next sc (the sc between clusters).* Repeat from * to * across. Turn.
Row 4: Chain 1. Sc in the first sc. *Chain 1. Work a CL in the top of the CL from the previous row (insert your hook into the center of the cluster). Chain 1. Sc in the next sc.* Repeat from * to * across. Turn.
Repeat Row 4 until the panel measures approximately 22 inches from the foundation edge. End with a row that is a multiple of 2 (i.e., after an even number of repeats of Row 4). Do not fasten off.
Edging (Optional but Recommended)
This neat border gives your shrug a polished, professional finish.
- Chain 1, do not turn.
- Work a round of single crochet evenly around the entire outer edge of the panel, working 3 sc in each corner to help the corners lie flat.
- Join with a slip stitch to the first sc.
- Fasten off and weave in ends.
Repeat the entire panel process to create your second panel.
Seaming the Cocoon Shape
Now for the fun part—transforming your flat panels into a wearable cocoon! Lay both panels flat, right sides up. Follow these steps carefully:
- Stack the Panels: Place the panels one on top of the other, wrong sides together, aligning the long edges perfectly.
- Seam the First Short End: This will be the bottom edge of your shrug. Whip-stitch or single crochet the edges together for approximately 8 inches from the corner. This creates the bottom opening for your body. Leave the remaining 14 inches of that short edge open—this will be your armhole opening.
- Seam the Second Short End: This time, seam the entire edge together (all 22 inches). This will be the top edge that goes over your shoulder.
- Turn Right Side Out: Carefully turn the shrug right side out. The seamed short edges will form the side seams, with the long unseamed edges becoming the front and back openings. The armhole is the gap you left in the short seam.
Finishing Touches
Your cocoon shrug is almost ready to wear! Here's how to finish it perfectly:
- Weave in Ends: Use your yarn needle to weave in all remaining loose ends securely.
- Blocking: Lightly steam or block the seams to flatten them and even out your stitches. This step makes a huge difference in the final drape and polish of your garment.
And there you have it—your very own Ember Dune Cocoon Shrug! Slip it on, adjust the drape, and enjoy the cozy, sculptural warmth of your handmade creation. This pattern is perfect for gifting, too. Happy crocheting!



