Desert Bloom Sunburst Coasters Free Crochet Pattern – Fringed Boho Home Decor
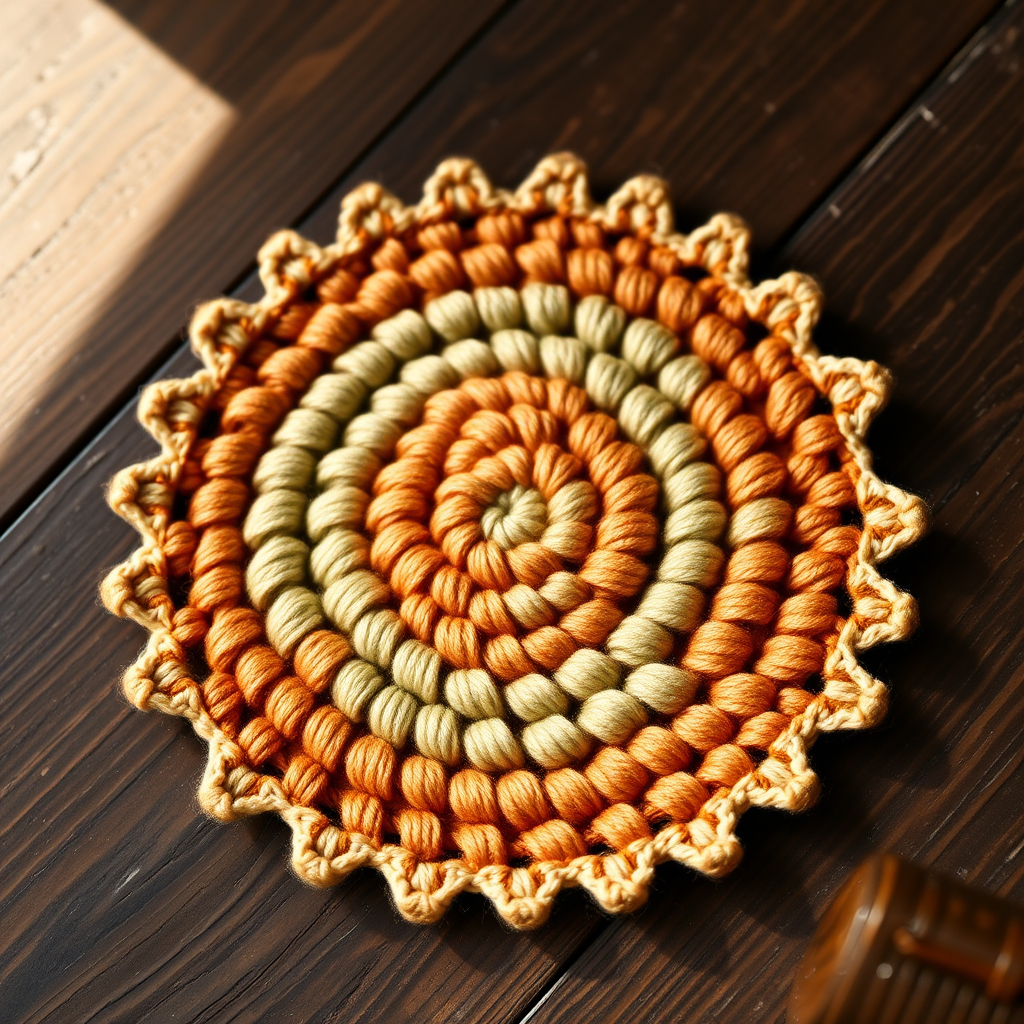
Desert Bloom Sunburst Coasters: A Free Boho Crochet Pattern
Bring a touch of sunbaked desert charm to your table with these vibrant, textured coasters. Each one is a tiny mandala of earthy tones and soft fringe, perfect for adding a handmade boho accent to any room. This free crochet pattern is designed with beginners in mind, using simple stitches and clear instructions to create a stunning, functional piece of home decor.
Whether you're looking to protect your furniture in style or searching for a thoughtful handmade gift, these coasters are a delightful project. The combination of terracotta, sand, sage, and cream creates a warm, natural palette that complements any interior. Let's dive into the pattern and create your own desert bloom!
Materials Needed
Before you begin, gather the following materials. Having everything ready will make your crochet session smooth and enjoyable.
- Yarn: Worsted weight cotton yarn in 4 colors:
- Terracotta (A) – for the center and final edge
- Sand (B) – for the second and fifth color bands
- Sage (C) – for the third and sixth color bands
- Cream (D) – for the fourth and seventh color bands
- Crochet Hook: 5.0 mm (H-8) crochet hook
- Stitch Marker: To keep track of your rounds
- Yarn Needle: For weaving in ends
- Scissors: For cutting yarn
Gauge: The first 3 rounds should measure 2 inches in diameter. This ensures your coaster will be the right size. If your gauge is off, adjust your hook size accordingly.
Step-by-Step Instructions
This pattern is worked in continuous spiral rounds. Use a stitch marker to keep track of your rounds, as you will not be joining with a slip stitch until the very end. Each coaster is made with a combination of single crochet and picot stitches to create a beautiful sunburst texture.
Round 1: The Magic Ring
With color A (Terracotta), make a magic ring. Work 6 single crochet (sc) into the ring. Pull the tail to tighten the ring closed. (6 stitches)
Round 2: Increasing the Center
Work 2 sc in each stitch around. This doubles your stitch count. (12 stitches)
Round 3: Building the Base
*2 sc in next stitch, 1 sc in next stitch* repeat around. This creates a gradual increase. (18 stitches)
Round 4: Introducing Sand
Switch to color B (Sand). *2 sc in next stitch, 1 sc in next 2 stitches* repeat around. (24 stitches)
Round 5: Expanding the Circle
Continuing with color B, *2 sc in next stitch, 1 sc in next 3 stitches* repeat around. (30 stitches)
Round 6: Adding Sage
Switch to color C (Sage). *2 sc in next stitch, 1 sc in next 4 stitches* repeat around. (36 stitches)
Round 7: Continuing the Growth
With color C, *2 sc in next stitch, 1 sc in next 5 stitches* repeat around. (42 stitches)
Round 8: Cream Band
Switch to color D (Cream). *2 sc in next stitch, 1 sc in next 6 stitches* repeat around. (48 stitches)
Round 9: Expanding Further
With color D, *2 sc in next stitch, 1 sc in next 7 stitches* repeat around. (54 stitches)
Round 10: Returning to Terracotta
Switch back to color A (Terracotta). *2 sc in next stitch, 1 sc in next 8 stitches* repeat around. (60 stitches)
Round 11: Nearing the Edge
With color A, *2 sc in next stitch, 1 sc in next 9 stitches* repeat around. (66 stitches)
Round 12: Sand Border
Switch to color B (Sand). *2 sc in next stitch, 1 sc in next 10 stitches* repeat around. (72 stitches)
Round 13: Sage Calm
Switch to color C (Sage). Work 1 sc in each stitch around. No increases this round. (72 stitches)
Round 14: Cream Finish
Switch to color D (Cream). Work 1 sc in each stitch around. (72 stitches)
Round 15: Fringe and Picot Edge
Switch to color A (Terracotta) for the final decorative edge. *Work 1 sc in next stitch, chain 3, work 1 picot (3 chain, slip stitch in first chain), skip 1 stitch* repeat around. Join with a slip stitch to the first sc. Fasten off and weave in all ends.
Finishing Touches
Trim any fringe ends evenly to create a neat, uniform look. If desired, block the coaster lightly to shape it perfectly flat. To block, simply wet the coaster, gently press out excess water, and lay it flat to dry on a towel, shaping it as needed.
Repeat these steps to create a full set of coasters. They make a wonderful gift set or a beautiful addition to your own home. Enjoy your handmade boho desert blooms!


