Cozy Cactus Cuddler Free Crochet Pattern
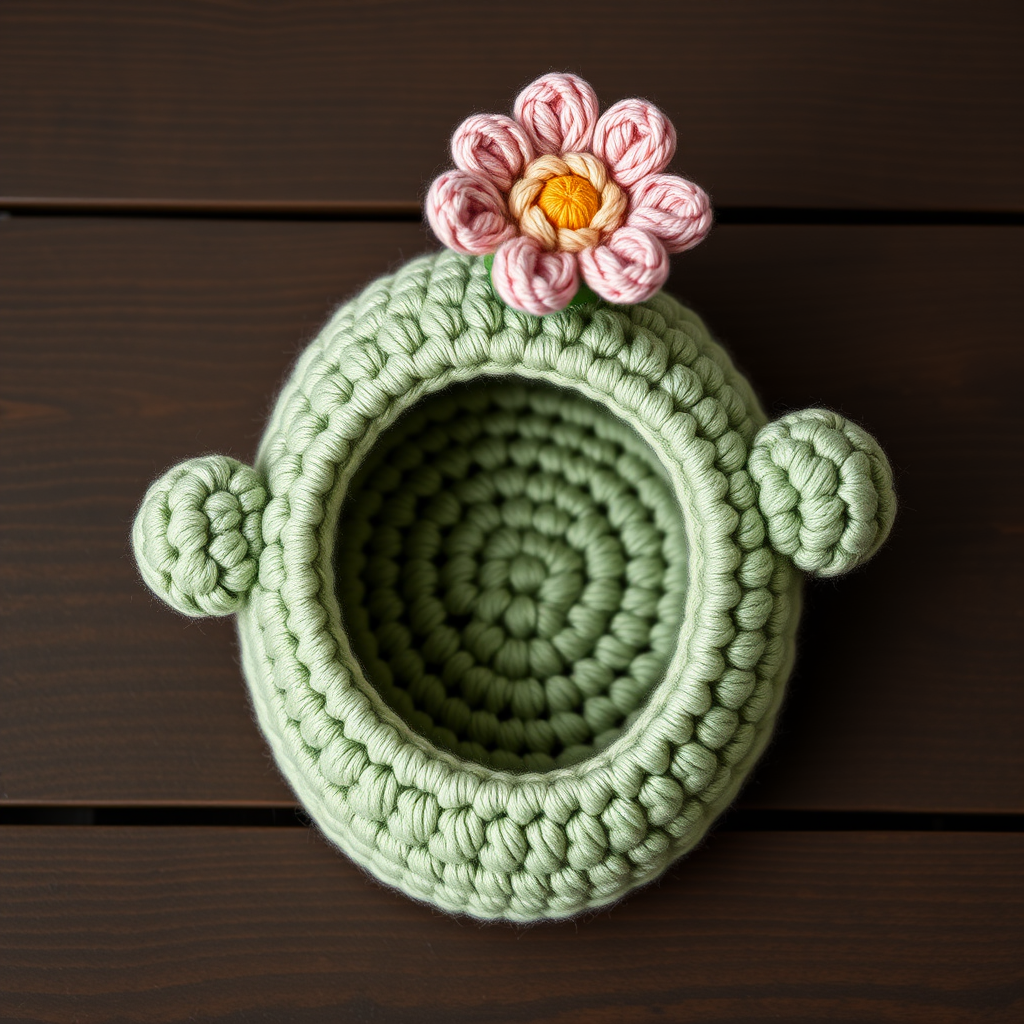
Bring the Desert Home: Your New Favorite Crochet Companion
Are you ready to add a touch of whimsical charm to your living space without the hassle of watering? Look no further than this adorable Cozy Cactus Cuddler! This beginner-friendly amigurumi project is the perfect way to dip your toes into the world of crochet or to enjoy a quick, satisfying weekend make. With its soft, textured body and a cheerful flower topper, this little cactus is more than just a craft project—it's a handmade hug that never needs sunlight. Whether you're looking for a unique shelf accent or a heartfelt, handmade gift, this pattern is your ticket to creating something truly special.
This pattern is designed with simplicity in mind, using basic stitches and continuous spiral rounds to create a polished, professional-looking result. The tight, uniform single crochet texture gives it that cozy, handmade feel, while the muted sage green and dusty pink palette fits perfectly into modern bohemian or plant-themed decor. Let's get started on creating your very own low-maintenance desert friend!
Materials Needed: Gather Your Supplies
Before we dive into the fun part, let's make sure you have everything you need. This project is wonderfully portable and requires minimal supplies, making it perfect for crafting on the go.
- Yarn: Worsted weight cotton yarn in three colors:
- Sage Green (for the cactus body and arms) – approximately 100 yards
- Dusty Pink (for the flower) – small amount
- Warm Yellow (for the flower center) – small amount
- Crochet Hook: 3.5 mm (E) crochet hook
- Fiberfill Stuffing: For a plush, firm body
- Stitch Marker: To keep track of your rounds
- Yarn Needle: For sewing pieces together and weaving in ends
- Scissors: For cutting yarn
- Optional: Small amount of brown yarn for embroidering a smile
Gauge Note: Gauge is not critical for this project. The most important thing is to maintain a tight, consistent tension throughout your stitches. This prevents the fiberfill from showing through and ensures a smooth, professional finish. If your stitches are loose, consider using a smaller hook.
Step-by-Step Instructions: Create Your Cactus
This pattern is worked in continuous spiral rounds unless otherwise stated. This means you will not join rounds with a slip stitch; instead, you'll work continuously in a spiral. Use a stitch marker at the beginning of each round to keep your place. Let's begin!
Part 1: The Cactus Body
We'll start with the main body, which is worked from the bottom up.
- Round 1: With sage green yarn, make a magic ring. Work 6 single crochet (sc) into the ring. Pull the tail to close the ring tightly. (6 stitches)
- Round 2: Work 2 sc in each stitch around. This is an increase round. (12 stitches)
- Round 3: *Sc in the next stitch, 2 sc in the next stitch.* Repeat from * to * around. (18 stitches)
- Round 4: *Sc in the next 2 stitches, 2 sc in the next stitch.* Repeat from * to * around. (24 stitches)
- Rounds 5-12: Sc in each stitch around for 8 even rounds. Do not increase or decrease. (24 stitches each round)
- Round 13: *Sc in the next 2 stitches, sc2tog (single crochet 2 together – a decrease).* Repeat from * to * around. (18 stitches)
- Round 14: *Sc in the next stitch, sc2tog.* Repeat from * to * around. (12 stitches)
- Stuff the body firmly with fiberfill. Make sure it's plump but not overstuffed, as you still need to close the opening.
- Round 15: Sc2tog around. (6 stitches)
- Fasten off by cutting the yarn, leaving a 6-inch tail. Thread the tail through the yarn needle and weave it through the front loops of the remaining 6 stitches. Pull tight to close the hole, then weave in the end securely.
Part 2: The Arms (Make 2)
These little appendages give your cactus its character. They're quick and easy!
- Round 1: With sage green yarn, make a magic ring. Work 6 sc into the ring. Pull to close. (6 stitches)
- Rounds 2-6: Sc in each stitch around for 5 even rounds. (6 stitches each round)
- Fasten off, leaving a long tail (about 12 inches) for sewing. Stuff the arm lightly with fiberfill. Do not overstuff, as you want them to be flexible and easy to attach.
Part 3: The Cheerful Flower
Time to add that pop of color! This simple flower is made in joined rounds.
- Round 1: With dusty pink yarn, make a magic ring. Work 5 sc into the ring. Join with a slip stitch (sl st) to the first sc. (5 stitches)
- Round 2 (Petals): In each of the 5 stitches around, work the following: (ch 2, 2 double crochet (dc) in the same stitch, ch 2, sl st in the same stitch). This creates one petal per stitch. You will have 5 petals total.
- Fasten off, leaving a tail for sewing.
Part 4: The Flower Center
- With warm yellow yarn, make a magic ring. Work 4 sc into the ring.
- Join with a sl st to the first sc. Fasten off, leaving a tail.
- Using the yarn needle, sew the yellow circle to the center of the pink flower. Weave in the ends securely.
Part 5: Assembly – Bringing It All Together
Now for the fun part—watching your cactus come to life!
- Attach the Arms: Position the arms on either side of the cactus body, about 3 rounds down from the top. Use the long tails to sew them securely. Weave the yarn through the body and the arm several times to ensure a strong hold. Weave in the ends.
- Attach the Flower: Sew the flower to the top center of the cactus body using the pink tail. Make sure it's centered and secure. Weave in the end.
- Add a Smile (Optional): Using the brown yarn and a yarn needle, embroider a small, friendly smile on the front of the cactus body, just below the top. You can do this by making a few small backstitches in a curved line. Weave in the ends.
And there you have it—your very own Cozy Cactus Cuddler! This charming little guy is ready to brighten up any shelf, desk, or windowsill. Because it's made of cotton yarn, it's durable and easy to clean (spot clean only). It also makes a fantastic gift for plant lovers, teachers, or anyone who appreciates a handmade touch.
We hope you enjoyed this pattern! Feel free to experiment with different color combinations to make it your own. Happy crocheting!


