Celtic Knot Coaster Free Knitting Pattern – Interwoven Cable Accents
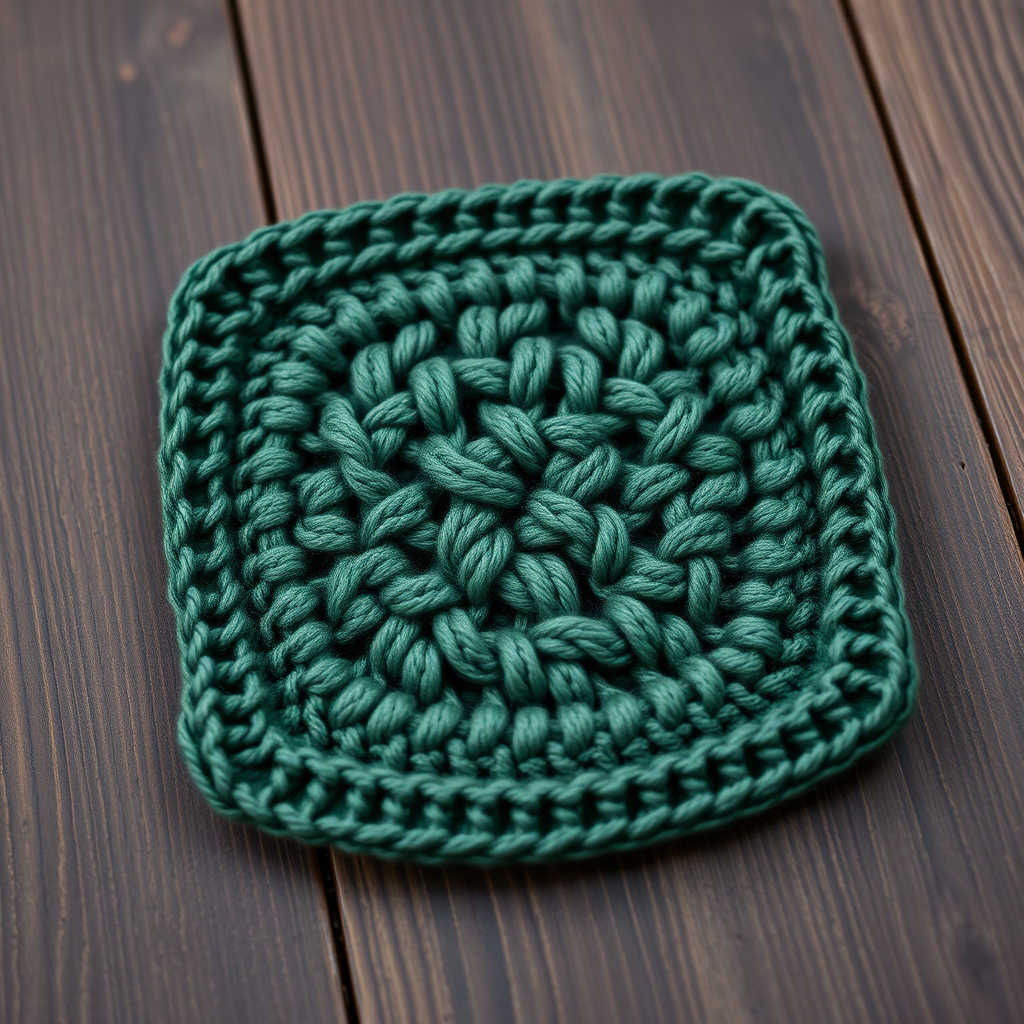
Celtic Knot Coaster Free Knitting Pattern – Interwoven Cable Accents
Elevate your table setting with these intricate Celtic knot coasters, featuring a rich cable design that adds a touch of timeless elegance. Knitted in a soft, heathered yarn, they are both functional and a beautiful conversation starter. This free knitting pattern is perfect for intermediate knitters looking to master cable techniques while creating a stunning home decor piece. The symmetrical interwoven pattern creates a gorgeous braided center that will impress your guests and protect your surfaces in style.
Whether you're looking for a thoughtful handmade gift or a way to add rustic charm to your own home, these Celtic knot coasters are the perfect project. The worsted weight yarn works up quickly, and the repeating cable pattern is meditative once you get into the rhythm. Let's dive into this delightful cable knitting adventure!
Materials Needed
Before you begin, gather the following supplies to ensure a smooth knitting experience:
- Yarn: Worsted weight yarn in a heathered forest green (approximately 50g per coaster) – look for a soft, durable blend like wool or acrylic that will hold its shape
- Knitting Needles: US 6 (4.0 mm) knitting needles – straight or circular both work well
- Cable Needle: A small cable needle (or a double-pointed needle) for creating the cable crosses
- Tapestry Needle: For weaving in ends and finishing
- Scissors: For cutting yarn
- Blocking Mats and Pins (optional): For shaping and enhancing the cable definition
Gauge: 20 stitches and 28 rows = 4 inches in stockinette stitch. While gauge isn't critical for coasters, matching it will ensure your finished pieces are the perfect size for mugs and glasses.
Abbreviations
Familiarize yourself with these knitting abbreviations before starting:
- CO: Cast on
- K: Knit
- P: Purl
- C4F: Slip 2 stitches to cable needle, hold to front, knit 2, knit 2 from cable needle
- C4B: Slip 2 stitches to cable needle, hold to back, knit 2, knit 2 from cable needle
- K2tog: Knit two together (decrease)
- SSK: Slip, slip, knit (decrease)
- BO: Bind off
Step-by-Step Instructions
Getting Started: Cast On
Begin by casting on 24 stitches using your preferred method (long-tail cast on works beautifully for this pattern). Make sure your cast-on edge is neither too tight nor too loose – you want it to have a nice, even tension that will match the rest of your knitting.
Foundation Rows
Before diving into the cable pattern, you'll work two simple rows to establish the ribbed border that frames the Celtic knot design.
Row 1 (Right Side): K2, P2, K2, P2, K2, P2, K2, P2, K2, P2, K2, P2
Row 2 (Wrong Side): P2, K2, P2, K2, P2, K2, P2, K2, P2, K2, P2, K2
These two rows create a lovely 2x2 ribbing that will form the border of your coaster. Notice how the knit stitches from Row 1 become purl stitches on Row 2 – this is what creates the ribbed texture.
The Celtic Cable Pattern
Now for the exciting part – the interwoven cable design! The pattern uses two cable techniques: C4F (cable front) and C4B (cable back). These create the braided, interlocking effect that mimics traditional Celtic knotwork.
Row 3: K2, P2, C4F, P2, K2, P2, C4B, P2, K2, P2
Let's break this down: Knit 2, purl 2, then work a C4F (slip 2 stitches to your cable needle and hold it in front of your work, knit the next 2 stitches from your left needle, then knit the 2 stitches from the cable needle). Purl 2, knit 2, purl 2, then work a C4B (slip 2 stitches to your cable needle and hold it to the back of your work, knit the next 2 stitches, then knit the 2 stitches from the cable needle). Finish with purl 2, knit 2, purl 2.
Row 4: Repeat Row 2 (P2, K2, P2, K2, P2, K2, P2, K2, P2, K2, P2, K2)
Row 5: K2, P2, K2, P2, C4F, P2, C4B, P2, K2, P2
Breakdown: Knit 2, purl 2, knit 2, purl 2, then work C4F (cable held to front), purl 2, work C4B (cable held to back), purl 2, knit 2, purl 2.
Row 6: Repeat Row 2
Row 7: K2, P2, C4B, P2, K2, P2, C4F, P2, K2, P2
Notice the switch! This row mirrors Row 3 but uses C4B first and C4F second. This creates the symmetrical interlocking effect. Knit 2, purl 2, work C4B (cable held to back), purl 2, knit 2, purl 2, work C4F (cable held to front), purl 2, knit 2, purl 2.
Row 8: Repeat Row 2
Row 9: K2, P2, K2, P2, C4B, P2, C4F, P2, K2, P2
Breakdown: Knit 2, purl 2, knit 2, purl 2, work C4B (cable held to back), purl 2, work C4F (cable held to front), purl 2, knit 2, purl 2.
Row 10: Repeat Row 2
Repeating the Cable Pattern
Now that you've completed the first full cable repeat (Rows 3-10), you'll repeat these 8 rows two more times. This gives you a total of 3 cable repeats, creating a beautiful, substantial Celtic knot motif in the center of your coaster.
Repeat Rows 3-10 two more times (total of 3 cable repeats).
As you work through the repeats, you'll notice the cables beginning to twist and interlock, forming that gorgeous braided pattern. Take your time with the cable stitches – keeping your tension even will ensure the cables lie flat and look crisp.
Finishing Edging
After completing your third cable repeat, you'll work two final rows to mirror the foundation ribbing and create a balanced, finished edge.
Row 1 (Right Side): K2, P2, K2, P2, K2, P2, K2, P2, K2, P2, K2, P2
Row 2 (Wrong Side): P2, K2, P2, K2, P2, K2, P2, K2, P2, K2, P2, K2
Bind off all stitches in pattern. This means you'll knit the knit stitches and purl the purl stitches as you bind off, maintaining the ribbed pattern right to the edge. This creates a professional, polished finish that matches the cast-on edge.
Finishing Touches
Now for the final steps to complete your Celtic knot coaster:
1. Weave in all ends: Thread your tapestry needle with the yarn tails from your cast-on and bind-off edges. Weave them carefully through the wrong side of the work, following the path of the stitches. Trim any excess yarn.
2. Block your coaster: This step is crucial for enhancing the cable definition. Soak your coaster in lukewarm water with a drop of mild soap for about 15 minutes. Gently squeeze out excess water (never wring!) and lay flat on a towel. Roll the towel to remove more moisture, then pin the coaster to your blocking mats, gently stretching it to its proper shape. Allow it to dry completely.
3. Admire your work: Once dry, your Celtic knot coaster will have beautifully defined cables and a crisp, professional appearance. The heathered forest green yarn adds depth and richness to the pattern, making it look like a piece of art.
Tips for Success
- Keep your cable needle handy: Always know whether you're holding it to the front or back – this is the key to getting the cable direction right.
- Count your stitches: After each cable row, count to make sure you still have 24 stitches. It's easy to accidentally drop or add a stitch when working cables.
- Use stitch markers: Place markers between the border sections and the cable section to help you keep track of where you are in the pattern.
- Practice on a swatch: If you're new to cables, practice C4F and C4B on a small swatch first to build confidence.
Make all four coasters to complete your set – they make a wonderful handmade gift or a beautiful addition to your own home. The Celtic knot design is timeless, and these coasters will be treasured for years to come. Happy knitting!


