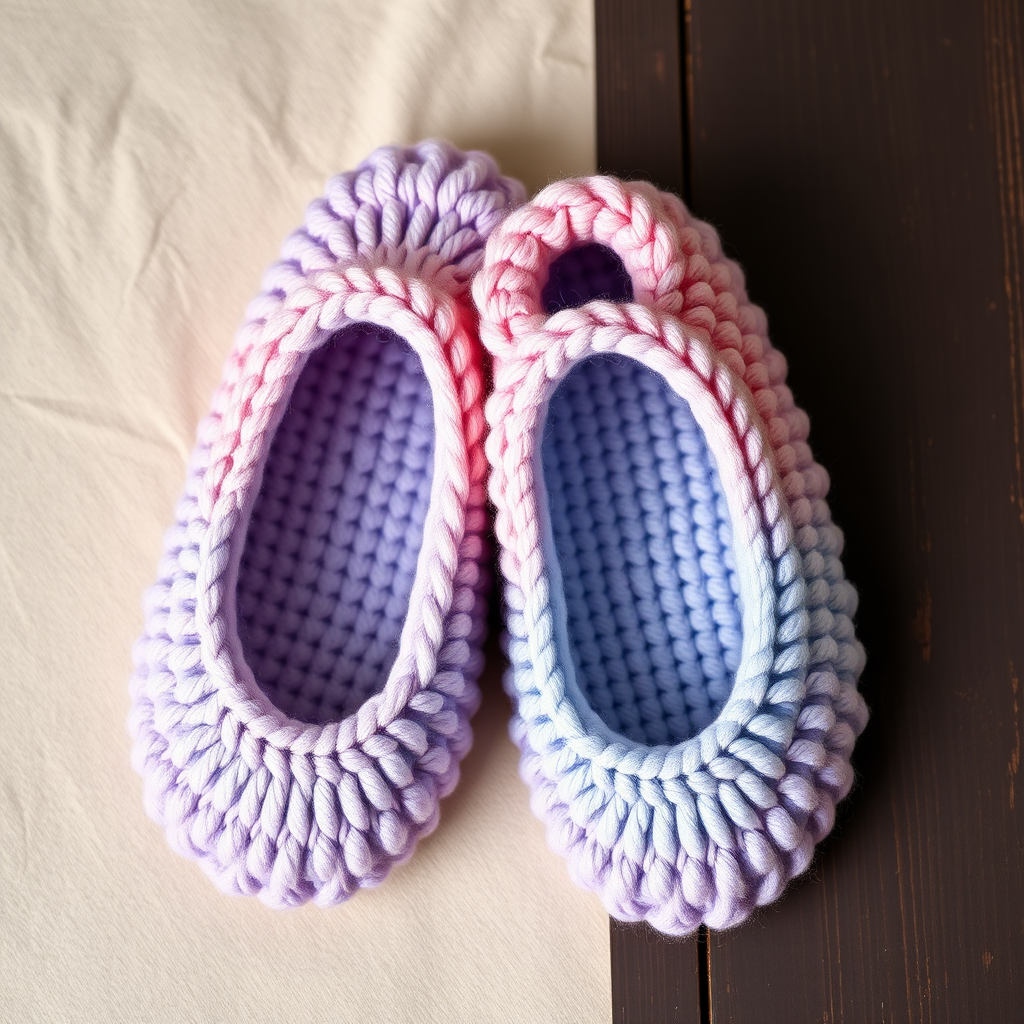
Celtic Dream Crochet Slippers Free Pattern – Cozy Cable Knit House Shoes

Celtic Dream Crochet Slippers: A Cozy Cable Knit Pattern for Beginners
Imagine slipping your feet into a pair of handcrafted slippers that combine the timeless elegance of Celtic cables with the plush comfort of a fleece-lined sole. The Celtic Dream Crochet Slippers are exactly that—a beautiful fusion of heritage-inspired Aran texture and modern, cozy design. Whether you're curling up by the fireplace or padding around on cold winter mornings, these slippers will keep your toes warm while adding a touch of handcrafted charm to your loungewear.
This free pattern is perfect for crocheters who have mastered the basics and are ready to explore the world of post stitches and cable work. Don't worry if you've never attempted cables before—I'll walk you through every step with clear instructions and detailed explanations. By the end of this tutorial, you'll have a stunning pair of slippers that look like they came straight from a boutique, but with the pride of being made entirely by your own hands.
Why You'll Love These Slippers
The Celtic Dream Slippers feature a rich, textured cable pattern that twists and crosses over the top of your foot, creating that iconic Aran-style look. The deep forest green main color evokes the lush Irish countryside, while the cream contrast cuff adds a delicate, feminine touch. The dense single crochet sole provides durability and warmth, making these slippers perfect for everyday wear during the colder months.
What makes this pattern especially beginner-friendly is the way it's structured. You'll start with a simple oval sole, then build the body in the round, gradually introducing post stitches and cable crossings. By the time you finish, you'll have mastered several new techniques that you can apply to future projects like scarves, sweaters, and blankets.
Materials Needed
Before we dive into the pattern, let's gather all the supplies you'll need. Having everything ready beforehand will make your crocheting experience smooth and enjoyable.
Yarn Requirements
- Main Color (MC): Worsted weight yarn in Deep Forest Green – approximately 200 grams (about 400 yards)
- Contrast Color (CC): Worsted weight yarn in Cream/Off-White – approximately 50 grams (about 100 yards)
Pro tip: Choose a yarn that's soft but durable, like a wool-acrylic blend. This will ensure your slippers are both comfortable and long-lasting.
Tools and Notions
- Crochet Hook: 5.5mm (I-9) hook
- Yarn Needle: For weaving in ends and finishing
- Stitch Markers: To keep track of rounds and important stitches
- Scissors: For cutting yarn
Gauge Information
Gauge: 14 single crochet stitches x 16 rows = 4x4 inches (10x10 cm) in single crochet with Main Color
While gauge is important for achieving the correct size, don't stress too much about it. These slippers are quite forgiving, and you can easily adjust the size by adding or removing rows in the foot section.
Understanding the Pattern
Before we begin, let's review the abbreviations and special stitches you'll encounter throughout this pattern. Take a moment to familiarize yourself with these—it will make following the instructions much easier.
Abbreviations
- ch = chain
- sc = single crochet
- hdc = half double crochet
- dc = double crochet
- fpdc = front post double crochet
- bpdc = back post double crochet
- sl st = slip stitch
- st(s) = stitch(es)
- rnd = round
- MC = main color
- CC = contrast color
Special Stitches
Cable Stitch (CS): Skip 2 stitches, double crochet in the next 2 stitches, then front post double crochet around the 2 skipped stitches (crossing in front). This creates a cable that twists to the left.
Reverse Cable Stitch (RCS): Skip 2 stitches, double crochet in the next 2 stitches, then back post double crochet around the 2 skipped stitches (crossing behind). This creates a cable that twists to the right.
These two stitches work together to create the beautiful Celtic cable pattern. Don't worry if they feel awkward at first—with a little practice, they'll become second nature.
Step-by-Step Instructions
Now let's get to the fun part! We'll work through this pattern in three main sections: the sole, the slipper body, and the cuff. Take your time, follow each step carefully, and soon you'll have a beautiful pair of slippers.
Part 1: The Sole (Make 2 – One for Each Slipper)
The sole forms the foundation of your slipper. We'll create a dense, flat oval shape using single crochet stitches. This provides durability and comfort underfoot.
Foundation Chain: With Main Color, chain 14.
Row 1: Single crochet in the 2nd chain from hook and in each chain across. You should have 13 single crochet stitches.
Row 2: Chain 1, turn. Work 2 single crochet in the first stitch, single crochet in the next 11 stitches, then 2 single crochet in the last stitch. You should now have 15 single crochet stitches.
Row 3: Chain 1, turn. Work 2 single crochet in the first stitch, single crochet in the next 13 stitches, then 2 single crochet in the last stitch. You should now have 17 single crochet stitches.
Rows 4-12: Chain 1, turn. Single crochet in each stitch across. Keep 17 single crochet stitches throughout these rows.
Size adjustment tip: For a larger size (US 9-10), work 2-3 additional rows here. For a smaller size (US 5-6), work 2-3 fewer rows. The sole should measure approximately 9-10 inches in length for a women's US 6-8.
Row 13: Chain 1, turn. Work a single crochet decrease (sc2tog), single crochet in the next 13 stitches, then another single crochet decrease. You should now have 15 single crochet stitches.
Row 14: Chain 1, turn. Work a single crochet decrease, single crochet in the next 11 stitches, then another single crochet decrease. You should now have 13 single crochet stitches.
Row 15: Chain 1, turn. Work a single crochet decrease, single crochet in the next 9 stitches, then another single crochet decrease. You should now have 11 single crochet stitches.
Fasten off and weave in the ends. Set this sole aside and repeat the entire process to create the second sole.
Part 2: The Slipper Body (Worked in the Round)
Now we'll build the body of the slipper by working in rounds around the edge of the sole. This creates a seamless, comfortable fit.
Joining Round: With Main Color, join yarn with a slip stitch to any edge stitch of the sole. Work single crochet evenly around the entire sole edge, placing 2 single crochet in each corner stitch to help turn the corners smoothly. Join with a slip stitch to the first single crochet. You should have approximately 40-44 single crochet stitches around.
Round 1: Chain 1, single crochet in each stitch around, join with a slip stitch to the first single crochet. Maintain 40-44 stitches.
Round 2: Chain 2 (this counts as a half double crochet), half double crochet in each stitch around, join with a slip stitch to the top of the chain-2. Maintain 40-44 half double crochet stitches.
Round 3: Chain 2, *front post double crochet around the next stitch, back post double crochet around the next stitch* – repeat from * to * around, ending with a front post double crochet, join with a slip stitch. This creates a ribbed cuff base that will give your slipper structure and stretch.
Rounds 4-5: Repeat Round 3. This continues the ribbed texture, creating a nice foundation for the cable pattern.
Round 6 (Cable Pattern Begins): Chain 2, *work a Cable Stitch (CS) over the next 4 stitches (skip 2, double crochet in the next 2, then front post double crochet around the 2 skipped stitches), back post double crochet around the next 2 stitches* – repeat from * to * around, ending with a Cable Stitch, join with a slip stitch. This sets up the beautiful cable pattern.
Round 7: Chain 2, *work a Reverse Cable Stitch (RCS) over the next 4 stitches (skip 2, double crochet in the next 2, then back post double crochet around the 2 skipped stitches), front post double crochet around the next 2 stitches* – repeat from * to * around, ending with a Reverse Cable Stitch, join with a slip stitch.
Rounds 8-11: Repeat Rounds 6 and 7 twice more. This gives you a total of 3 cable crossings, creating that rich, textured Aran look.
Round 12 (Shape Toe): Chain 1, single crochet in the next 10 stitches, work a single crochet decrease (sc2tog), single crochet in the next 8 stitches, work another single crochet decrease, single crochet in the next 10 stitches, work a third single crochet decrease, then single crochet in the remaining stitches, join with a slip stitch. You've decreased 3 stitches this round.
Round 13: Chain 1, single crochet in the next 8 stitches, work a single crochet decrease, single crochet in the next 6 stitches, work another single crochet decrease, single crochet in the next 8 stitches, work a third single crochet decrease, then single crochet in the remaining stitches, join with a slip stitch. You've decreased 3 stitches this round.
Round 14: Chain 1, single crochet in the next 6 stitches, work a single crochet decrease, single crochet in the next 4 stitches, work another single crochet decrease, single crochet in the next 6 stitches, work a third single crochet decrease, then single crochet in the remaining stitches, join with a slip stitch. You've decreased 3 stitches this round.
Round 15: Chain 1, single crochet in the next 4 stitches, work a single crochet decrease, single crochet in the next 2 stitches, work another single crochet decrease, single crochet in the next 4 stitches, work a third single crochet decrease, then single crochet in the remaining stitches, join with a slip stitch. You've decreased 3 stitches this round.
Fasten off, leaving a long tail (about 12 inches). Thread the tail through a yarn needle, then weave it through the remaining stitches. Pull tight to close the toe opening. Weave in the ends securely.
Part 3: The Cuff (Worked Back and Forth)
The contrast color cuff adds a beautiful finishing touch and creates that cozy, rolled look. We'll work this section back and forth across the top of the foot opening.
Row 1: With Contrast Color, join yarn to the center front of the slipper opening (where the toe decreases began). Chain 1, single crochet evenly across the top edge of the foot opening. You should have about 12-14 single crochet stitches. Turn your work.
Row 2: Chain 1, single crochet in each stitch across. Turn your work.
Row 3: Chain 1, single crochet in the first stitch, *chain 3, skip 1 stitch, single crochet in the next stitch* – repeat from * to * across. Turn your work. This creates a delicate, lacy edging that adds a touch of elegance to your slipper.
Fasten off and weave in the ends.
Finishing Touches
Now that your slipper is complete, it's time to add those final details that make it truly special.
Step 1: Fold the cuff down over the slipper body for a cozy, rolled look. The cream-colored lacy edge will peek out beautifully against the forest green body.
Step 2 (Optional): Add a small Contrast Color pom-pom to the center front of the cuff. This adds a playful, whimsical touch that makes the slippers even more adorable.
Step 3: Repeat all steps to create the second slipper. Make sure to work the cable pattern in the same direction for both slippers so they match.
Step 4: Give your finished slippers a gentle once-over, weaving in any remaining loose ends and trimming excess yarn.
Care Instructions
To keep your Celtic Dream Slippers looking beautiful for years to come, follow these simple care guidelines:
- Hand wash in cold water with a gentle wool-safe detergent
- Gently squeeze out excess water (don't wring or twist)
- Lay flat to dry on a towel, reshaping if necessary
- Store in a cool, dry place away from direct sunlight
Tips for Success
As you work through this pattern, keep these helpful tips in mind:
- Count your stitches regularly – especially when working the cable pattern. It's easy to lose track, and catching mistakes early saves time.
- Use stitch markers to mark the beginning of each round and to keep track of cable sections.
- Practice the cable stitches on a small swatch first if you're new to post stitches. This will help you build confidence before starting the actual slipper.
- Keep your tension consistent – not too tight, not too loose. This ensures your slippers have the right amount of stretch and comfort.
- Don't rush the toe shaping – the decreases need to be worked evenly to create a nice, rounded toe.
Customization Ideas
Once you've mastered this pattern, feel free to make it your own! Here are some fun ideas:
- Color variations: Try burgundy with a blush pink cuff, or navy blue with a silver-gray cuff for a modern twist.
- Add a fleece lining: Sew a soft fleece lining to the inside of the sole for extra warmth and comfort.
- Embellish the cuff: Add buttons, beads, or embroidery to the cuff for a personalized touch.
- Make them for gifts: These slippers make wonderful handmade gifts for family and friends. Consider making a pair in their favorite colors!
Conclusion
Congratulations! You've just created a beautiful pair of Celtic Dream Crochet Slippers. These aren't just any house shoes—they're a testament to your creativity and skill. The intricate cable pattern, the plush comfort, and the elegant contrast cuff all come together to create something truly special.
As you slip your feet into your new handmade treasures, take a moment to appreciate the craftsmanship that went into them. Every stitch represents time well spent, and every cable twist tells a story of patience and dedication. These slippers will keep your feet warm and cozy all winter long, and they're sure to become a favorite part of your home wardrobe.
We'd love to see your finished slippers! Share photos of your Celtic Dream creations on social media using the hashtag #CelticDreamSlippers. Happy crocheting, and may your feet always be warm and stylish!