Celestial Guardian Angel Ornament Free Pattern
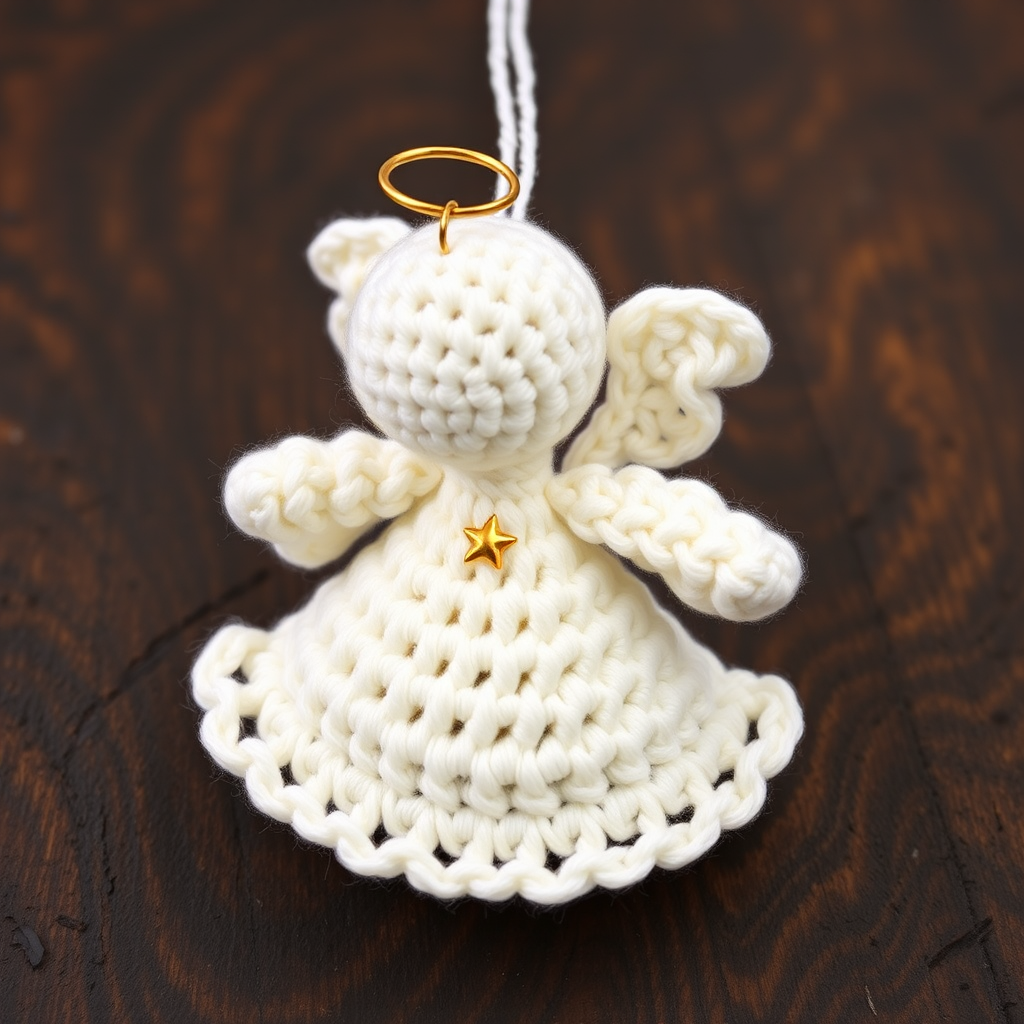
Celestial Guardian Angel Ornament: A Free Crochet Pattern
Bring a touch of heavenly charm to your holiday decor with this delicate Celestial Guardian Angel Ornament. Crocheted in fine lace-weight cotton thread, this ethereal angel features softly stuffed head and body, scalloped wings, and a gleaming gold halo. Perfect for advanced beginners seeking a quick, elegant make, this ornament adds a handmade, heirloom-quality touch to any Christmas tree or gift package. At just about 3 inches tall, it's a delightful project that works up in an evening.
Materials Needed
Before you begin, gather these supplies to ensure a smooth crochet session:
- Yarn: Lace weight cotton thread (e.g., size 10 crochet thread) in white or ivory – approximately 20-30 yards. Small amounts of gold metallic thread for the halo and embroidery.
- Hook: Steel crochet hook size 7 (1.65 mm). This small hook is essential for creating a tight, firm fabric that holds the angel's shape.
- Other: Polyester fiberfill for stuffing, a yarn needle for sewing and weaving in ends, and small scissors.
Note on gauge: Gauge is not critical for this project, but aim for a tight, firm fabric to prevent stuffing from showing through. If your stitches are loose, try a smaller hook.
Step-by-Step Instructions
This pattern uses standard US crochet abbreviations: sc (single crochet), ch (chain), sc2tog (single crochet two together – a decrease), and st(s) (stitch(es)).
Head
Begin with a magic ring for a seamless start.
- Round 1: Make a magic ring, work 6 sc into the ring. Pull tight to close. (6 sts)
- Round 2: Work 2 sc in each stitch around. (12 sts)
- Round 3: *Sc in next st, 2 sc in next st* – repeat from * to * around. (18 sts)
- Rounds 4-6: Sc in each stitch around. (18 sts) – This creates the rounded shape of the head.
- Round 7: *Sc in next 2 sts, sc2tog* – repeat from * to * around. (12 sts) – Begin shaping the top of the head.
- Stuff the head firmly with fiberfill, ensuring it's smooth and round.
- Round 8: *Sc2tog* – repeat around. (6 sts) – Close the opening.
- Fasten off, leaving a tail. Weave the tail through the front loops of the remaining 6 stitches and pull tight to close. Weave in the end securely.
Body
The body is worked similarly to the head but slightly longer, creating a tapered silhouette.
- Round 1: Magic ring, 6 sc in ring. (6 sts)
- Round 2: 2 sc in each stitch around. (12 sts)
- Round 3: *Sc in next st, 2 sc in next st* – repeat around. (18 sts)
- Rounds 4-7: Sc in each stitch around. (18 sts) – Work 4 rounds straight to create the body length.
- Round 8: *Sc in next 2 sts, sc2tog* – repeat around. (12 sts) – Start tapering the bottom.
- Stuff the body lightly – you want it soft but not overstuffed, as this is an ornament.
- Round 9: *Sc2tog* – repeat around. (6 sts)
- Fasten off, leaving a long tail (about 12 inches) for sewing the head to the body. Do not close the opening yet; you'll use this tail to attach the head.
Wings (Make 2)
These wings are worked flat in rows, creating a lovely scalloped edge.
- Row 1: Ch 6, sc in 2nd ch from hook and in each ch across. (5 sts)
- Row 2: Ch 1, turn. Sc in first st, 2 sc in next st, sc in next st, 2 sc in next st, sc in last st. (7 sts) – This increases at the edges.
- Row 3: Ch 1, turn. Sc in first st, 2 sc in next st, sc in next 3 sts, 2 sc in next st, sc in last st. (9 sts)
- Row 4: Ch 1, turn. Sc in first st, 2 sc in next st, sc in next 5 sts, 2 sc in next st, sc in last st. (11 sts) – The wing now has a gentle curve.
- Fasten off, leaving a tail for sewing. Repeat for the second wing.
Halo
Using the gold metallic thread, create a simple ring for the halo.
- Ch 12, then slip stitch into the first chain to form a ring. This creates a small circle.
- Fasten off, leaving a tail for sewing. The halo should be slightly larger than the top of the head.
Assembly
Now it's time to bring your angel together.
- Sew the head to the body: Use the long tail from the body. Position the head on top of the body, aligning the decreases. Sew securely using a whip stitch, going through the stitches of both pieces. Weave in the end.
- Attach the wings: Position the wings on the back of the body, angling them outward like a "V". Use the tails to sew them securely to the body, stitching through the wing's base and the body. Weave in ends.
- Attach the halo: Place the gold ring on top of the head, slightly tilted for a charming look. Sew it in place using the tail, making small stitches through the ring and the head. Weave in ends.
Finishing Touches
Add the final details to complete your celestial angel.
- Embroider a star: Using the gold thread, embroider a small star or cross on the front of the body (chest area). Use a simple straight stitch or French knot technique to create a tiny star shape.
- Add a hanging loop: Cut a 6-inch piece of thread (white or gold). Thread it through the top of the head, just above the halo. Tie the ends together in a knot to form a loop for hanging.
- Weave in all ends: Use your yarn needle to carefully weave in any remaining loose ends inside the ornament.
Your Celestial Guardian Angel Ornament is now complete! This delicate piece makes a wonderful gift, a beautiful tree decoration, or a thoughtful addition to a gift package. The fine cotton thread gives it a subtle sheen and heirloom quality that will be treasured for years. Happy crocheting!


