Celestial Bloom Puzzle Sphere Free Pattern
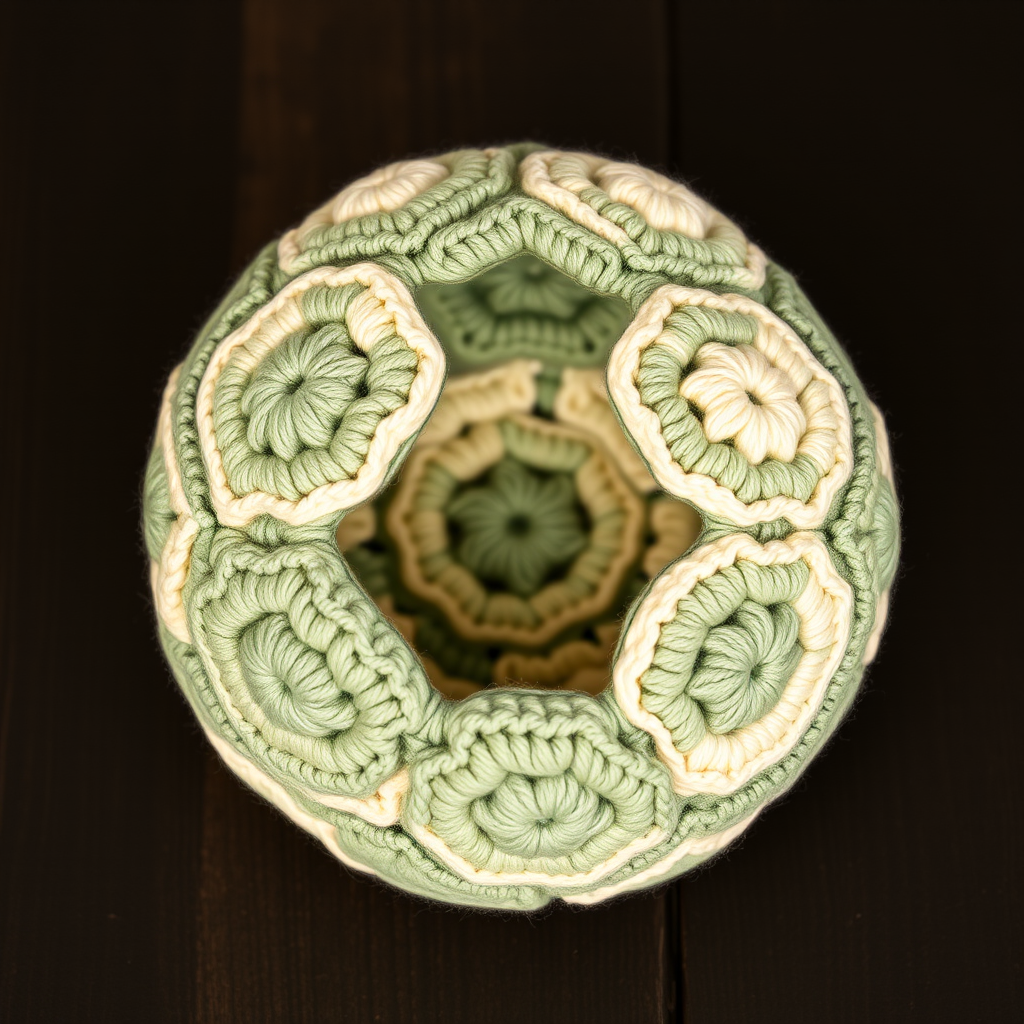
Unlock the Magic of Geometric Crochet: The Celestial Bloom Puzzle Sphere
Are you ready to embark on a crochet journey that combines geometry, tactile play, and cozy handmade charm? The Celestial Bloom Puzzle Sphere is a stunning project that transforms simple crochet motifs into a mesmerizing, star-shaped sphere. This isn't just another amigurumi ball; it's a dodecahedron-inspired wonder that blossoms with texture and color, making it the perfect handmade gift for babies, toddlers, or anyone who appreciates unique yarn art.
This pattern is surprisingly beginner-friendly, relying on nothing more than basic single crochet stitches and simple increases. The magic lies in the assembly, where twelve identical pentagon motifs come together to form a plush, perfectly round sphere. Whether you choose a soothing sage and cream palette or a vibrant dusty rose and mustard combo, this project is sure to become a cherished heirloom or a standout piece of cozy decor.
Let’s dive into the world of geometric crochet and create a tactile masterpiece that is as fun to make as it is to hold.
Materials Needed: Gathering Your Cosmic Toolkit
Before we begin stitching our celestial sphere, let's gather the essentials. The beauty of this pattern is its simplicity—you don't need a mountain of supplies, just a few key items to bring your vision to life.
Yarn & Hook
- Yarn: Worsted weight cotton or acrylic yarn in two contrasting colors. For the classic look, try sage green and cream, or get playful with dusty rose and mustard. You will need approximately 150-200 yards of each color to make 12 motifs (6 of each color, or your preferred ratio).
- Crochet Hook: A 4.0 mm (G/6) crochet hook is ideal for worsted weight yarn. This size ensures a tight, sturdy fabric.
Notions & Fillers
- Stitch Markers: Essential for keeping track of your rounds and holding motifs together during assembly.
- Tapestry Needle: A blunt-tipped needle for weaving in ends and sewing the motifs together.
- Polyester Fiberfill: For stuffing the sphere to a firm, plump perfection. Alternatively, use wool roving for a more natural, weighted feel.
- Scissors: A sharp pair for cutting your yarn tails.
Pro Tip: Gauge is not critical for this project, but aim for a tight tension to prevent the stuffing from peeking through your stitches. You want a dense fabric that holds its shape beautifully.
Step-by-Step Instructions: Crafting the Pentagons
This pattern is modular, meaning we create the whole by crafting identical parts. We will make 12 pentagon motifs in total. For a balanced look, make 6 in your main color and 6 in your contrasting color. Each motif is worked in continuous rounds (spiral), so there is no need to slip stitch or chain at the end of each round unless specified.
The Motif (Make 12)
Follow these rounds carefully. The number in parentheses at the end of each round indicates your total stitch count.
- Round 1: Start with a magic ring. Work 5 single crochet (sc) into the ring. Pull the tail tight to close the circle. (5 sc)
- Round 2: Work 2 sc in each sc around. (10 sc)
- Round 3: *Sc in the next sc, 2 sc in the next sc*; repeat from * to * around. (15 sc)
- Round 4: *Sc in the next 2 sc, 2 sc in the next sc*; repeat from * to * around. (20 sc)
- Round 5: *Sc in the next 3 sc, 2 sc in the next sc*; repeat from * to * around. (25 sc)
- Round 6: *Sc in the next 4 sc, 2 sc in the next sc*; repeat from * to * around. (30 sc)
- Round 7: *Sc in the next 5 sc, 2 sc in the next sc*; repeat from * to * around. (35 sc)
- Round 8: *Sc in the next 6 sc, 2 sc in the next sc*; repeat from * to * around. (40 sc)
- Round 9: *Sc in the next 7 sc, 2 sc in the next sc*; repeat from * to * around. (45 sc)
- Round 10: *Sc in the next 8 sc, 2 sc in the next sc*; repeat from * to * around. (50 sc)
Fasten off, leaving a long tail (about 12-15 inches) for sewing. Weave in the starting end from the magic ring. Repeat this process until you have 12 beautiful pentagon shapes.
Step-by-Step Instructions: Assembling the Sphere
This is where the magic happens! We are essentially constructing a dodecahedron—a 12-sided 3D shape. Don't worry, it sounds complex, but by following this logical sequence, it comes together easily.
Step 1: Create the "Flower" Base
Lay one pentagon flat on your work surface. This will be your "center" or "base" motif. Using stitch markers or small scraps of yarn, pin 5 other pentagons around it, attaching one edge of each new pentagon to one edge of the center pentagon. This will look like a flower with 5 petals.
Step 2: Whip Stitch the Center
Thread your tapestry needle with the long tail from one of the outer pentagons. Using a whip stitch, carefully sew the edge of the outer pentagon to the edge of the center pentagon. Use the stitch markers to ensure the edges align perfectly. Sew all 5 outer pentagons to the center pentagon. Weave in these ends securely.
Step 3: Build the Upper Hemisphere
Now, take the remaining 6 pentagons. You will attach them to the "valleys" created between the petals of your flower. Pin one pentagon so that it bridges the gap between two adjacent outer petals. You will be sewing it to the top edges of those two petals. This will start to pull the shape upward into a dome. Continue this process until you have attached all 6 pentagons, creating a complete bowl shape.
Step 4: The Crucial Stuffing Stage
Before you close the sphere, it's time to stuff it. Turn your crochet work inside out if needed to hide the seams, or keep them on the outside for a textured look (the pattern suggests a smooth sphere, so turn it right side out). Firmly stuff the ball with your polyester fiberfill. Be generous—you want the sphere to be plump and hold its shape. Press the stuffing to ensure it reaches all the corners of the pentagons.
Step 5: Closing the Final Seam
Now, you have a stuffed bowl. Take the last remaining pentagon (or the opening left in your sphere) and pin it into place. Whip stitch this final pentagon to the opening, closing the sphere completely. Sew securely, weaving the needle back and forth to ensure a tight closure. Weave in all remaining ends.
Finishing Touches & Variations
Congratulations! Your Celestial Bloom Puzzle Sphere is complete. You should have a perfectly round, plush sphere with a beautiful geometric pattern of pentagons.
Making it a True "Puzzle" Ball
The classic version of this ball is sewn shut, serving as a wonderful tactile toy for little hands to squeeze and explore. However, if you want to make it a true puzzle that comes apart, here is a fantastic variation:
- Create a Core: Crochet a small, simple sphere (about 3 inches in diameter) using a basic amigurumi ball pattern. Stuff it firmly.
- Assemble the Shell: Follow the assembly instructions, but instead of sewing the final pentagon shut, you will leave it as a flap.
- Add a Closure: Sew a large button to the inside of the flap and create a loop on the opposite side of the sphere, or simply use a snap button to allow the shell to open and close around the core.
This version allows the outer shell to be removed and reassembled, offering a unique challenge for older children and a stunning display piece for your coffee table.
Your handmade creation is now ready to be gifted, displayed, or enjoyed. The combination of the soft yarn and the structured geometric shape makes it an irresistible sensory toy and a testament to the beauty of modular crochet. Happy stitching!


