Aurora Borealis Wrap Free Pattern
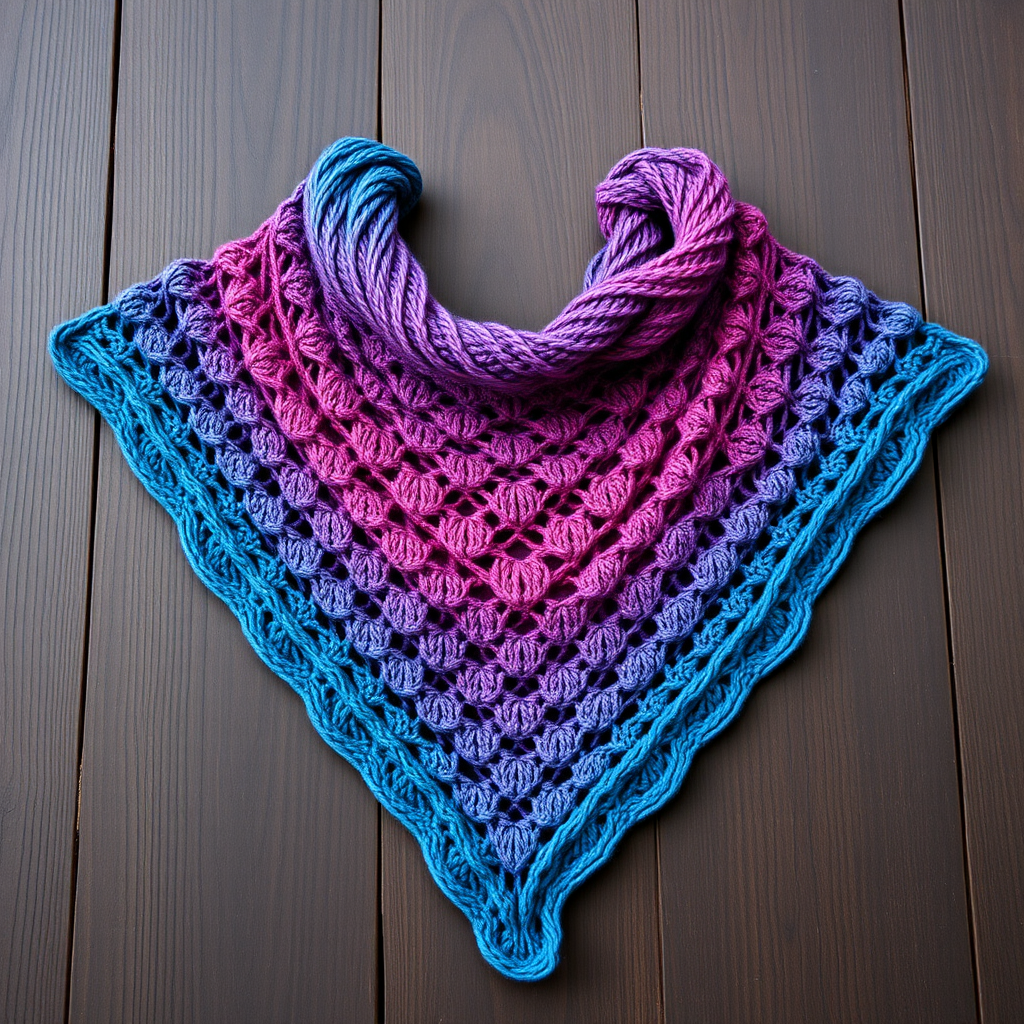
Wrap Yourself in the Northern Lights: The Aurora Borealis Knit Shawl
Imagine draping the ethereal, shifting colors of the aurora borealis over your shoulders. With the Aurora Borealis Wrap, you can knit that dream into reality. This free knitting pattern is designed for adventurous beginners and intermediate knitters alike, guiding you through a top-down triangular shawl that features a delicate lace stitch and a stunning gradient color transition. The result is a cozy, textured, and truly one-of-a-kind accessory that adds a touch of celestial magic to any outfit. Let's cast on and create something beautiful together.
Materials Needed
Before we begin our knitting journey, let's gather our supplies. This project is wonderfully portable and requires just a few key items:
- Yarn: Worsted weight yarn in 3 colors:
- Color A: Deep Teal (approx. 150g)
- Color B: Rich Purple (approx. 150g)
- Color C: Soft Pink (approx. 100g)
- Needle: US 8 (5mm) circular knitting needle, 32 inches or longer. The long cable is essential for holding the many stitches as the shawl grows.
- Notions: Stitch markers (at least 2), a tapestry needle for weaving in ends, and scissors.
Gauge
18 stitches and 24 rows = 4 inches in stockinette stitch (blocked). While gauge isn't critical for a shawl, matching it will help you achieve the correct drape and size. Always take a moment to knit a small swatch and block it before starting your project.
Step-by-Step Instructions: Knitting Your Aurora Wrap
This wrap is worked from the top down, starting with a simple garter stitch tab and increasing stitches to form a beautiful triangular shape. The lace pattern is repetitive and easy to memorize, making it a relaxing and rewarding knit.
Abbreviations
- k = knit
- p = purl
- yo = yarn over
- k2tog = knit two stitches together (right-leaning decrease)
- ssk = slip, slip, knit (left-leaning decrease)
- pm = place marker
- sm = slip marker
Getting Started: The Garter Tab Setup
This clever technique creates a seamless, neat edge at the top of your shawl.
- Cast on 3 stitches.
- Knit 6 rows of garter stitch (which means knitting every row). You will have a small, square tab.
- Turn your work 90 degrees. Along the side edge of your tab, you will see small bumps. Pick up and knit 3 stitches along this side edge.
- Now, turn your work again to the cast-on edge. Pick up and knit 3 stitches from the cast-on edge.
- You should now have 9 stitches on your needle. This is your foundation row.
Shaping the Shawl: The Increase Section
We will now establish the central spine and the garter stitch borders that frame the shawl.
- Row 1 (Right Side): k3, yo, k1, yo, pm, k1 (this is your center stitch), pm, yo, k1, yo, k3. (You now have 13 stitches.)
- Row 2 (Wrong Side): k3, purl until 3 stitches remain, k3.
- Row 3: k3, yo, knit to marker, yo, sm, k1, sm, yo, knit to last 3 stitches, yo, k3. (You now have 17 stitches.)
- Row 4: Repeat Row 2 (k3, purl to last 3 stitches, k3).
Repeat Rows 3 and 4 until you have a total of 25 stitches on your needle, ending after completing a right-side row. This establishes your increase rhythm: 4 stitches increased on every right-side row.
The Lace Pattern: Adding Airy Texture
Now for the fun part! This simple lace pattern adds a beautiful, airy texture with eyelets and a subtle wave.
- Row 1 (Right Side): k3, yo, *k2tog, yo*; repeat from * to * until 2 stitches before the marker, k2, yo, sm, k1, sm, yo, k2, *yo, ssk*; repeat from * to * until 5 stitches before the end of the row, yo, k3. (This row increases 2 stitches.)
- Row 2 (Wrong Side): k3, purl to last 3 stitches, k3.
- Row 3: k3, yo, knit to marker, yo, sm, k1, sm, yo, knit to last 3 stitches, yo, k3. (This row increases 2 stitches.)
- Row 4: Repeat Row 2 (k3, purl to last 3 stitches, k3).
Repeat Rows 1-4 to continue growing your shawl. As you knit, you will see the lace pattern emerge beautifully on either side of the central spine.
Color Transitions: Creating the Aurora Gradient
To achieve the mesmerizing northern lights effect, you will change yarn colors in a specific order. Simply tie in the new color at the beginning of a right-side row, leaving a tail to weave in later.
Alternate colors every 12 rows in this order:
- Color A (Deep Teal)
- Color B (Rich Purple)
- Color C (Soft Pink)
- Color B (Rich Purple)
- Color A (Deep Teal)
Continue repeating Rows 1-4 of the lace pattern, changing colors as indicated, until the wrap reaches your desired length. The pattern suggests approximately 60 inches from the cast-on edge to the point. You can easily customize this by trying it on as you go or measuring against your arm span.
Finishing Touches: Binding Off and Blocking
Your beautiful wrap is almost complete! Here’s how to finish it perfectly.
- Bind Off: On a right-side row, bind off all stitches loosely. A loose bind-off is crucial for a stretchy, elegant edge. You can use a larger needle to bind off if you tend to knit tightly.
- Weave in Ends: Using your tapestry needle, carefully weave in all loose yarn ends on the wrong side of the shawl. Take your time to make them invisible.
- Blocking (The Magic Step): This is where your shawl truly transforms! Soak the shawl in lukewarm water with a drop of mild soap for 20-30 minutes. Gently squeeze out excess water (do not wring). Lay it flat on a clean towel and roll it up to remove more water. Then, lay the shawl out on a blocking mat or a dry towel. Gently stretch it to its final dimensions, pinning the edges to open up the lace pattern and create a beautiful, crisp shape. Allow it to dry completely before unpinning.
Congratulations! You've just created a stunning, wearable piece of art. The Aurora Borealis Wrap is perfect for cozy evenings, adding a pop of color to a simple outfit, or gifting to someone special. The combination of the soft gradient and delicate lace makes it a timeless piece you'll treasure for years. Happy knitting!


