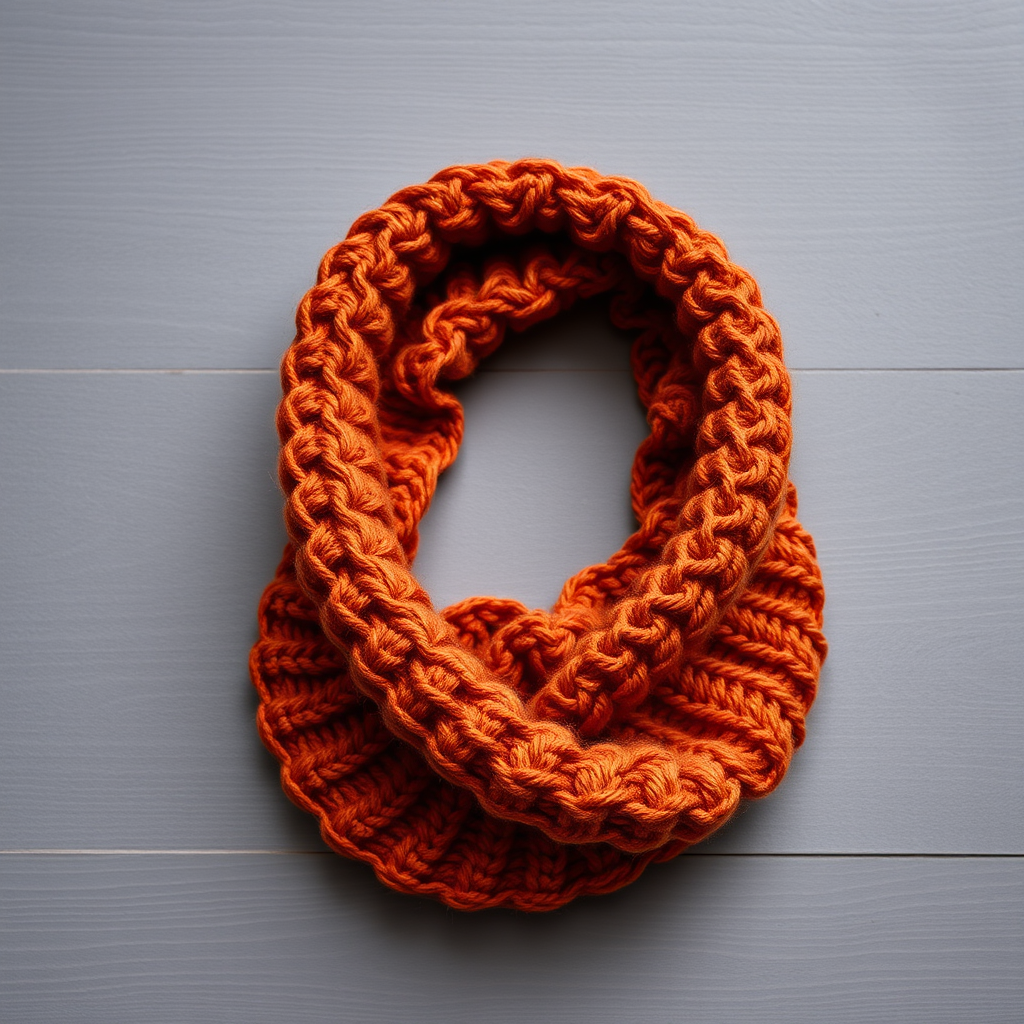
Aurora Borealis Driftwood Cowl Free Pattern – Textured Knitted Neck Warmer

Wrap Yourself in the Northern Lights: The Aurora Borealis Driftwood Cowl
Imagine wrapping yourself in the shifting, ethereal colors of the northern lights on a crisp winter evening. That's the magic of the Aurora Borealis Driftwood Cowl—a mesmerizing textured neck warmer that combines the art of slipped stitches with a breathtaking gradient of color. This free knitting pattern is perfect for intermediate beginners looking to expand their skills beyond basic knit and purl, creating a dense, woven fabric that's as sophisticated as it is cozy. The interplay of deep teal, dusty purple, and soft blush pink creates a one-of-a-kind accessory that will become the star of your cold-weather wardrobe.
This seamless cowl is worked in the round, meaning there's no seaming at the end—just pure, uninterrupted knitting pleasure. The slipped stitch pattern creates a beautiful, almost braided texture that mimics the flowing ribbons of the aurora borealis, while the soft gradient of colors adds depth and dimension. Whether you're a seasoned knitter or a confident beginner ready for a new challenge, this pattern will guide you through every step to create a stunning, handcrafted piece you'll be proud to wear.
Materials Needed
Before you begin your knitting journey, gather these essential supplies. The beauty of this pattern is that it requires minimal equipment—just yarn, a needle, and a few markers.
Yarn
- Weight: Worsted weight yarn (also known as 10-ply or medium weight)
- Colors: You'll need 3 coordinating colors:
- Color A: Deep teal (approximately 70g)
- Color B: Dusty purple (approximately 70g)
- Color C: Soft blush pink (approximately 60g)
- Total Yardage: Approximately 200g total (about 400-450 yards depending on your yarn choice)
Pro tip: Choose yarns with good stitch definition to showcase the slipped stitch pattern. A smooth wool or wool-blend works beautifully, as it will highlight the texture and allow the colors to transition cleanly.
Needles & Notions
- Needle: US 8 (5.0 mm) 16-inch circular knitting needle
- Stitch markers: At least 1 marker to indicate the beginning of the round
- Tapestry needle: For weaving in ends
- Scissors
Gauge
- Gauge: 18 stitches and 24 rows = 4 inches in stockinette stitch
- Finished Measurements: Approximately 9 inches tall and 24 inches in circumference
Important: Always knit a gauge swatch before starting. While this cowl is forgiving (it's a tube, after all), getting the right gauge ensures your cowl will have the perfect drape and fit. If your gauge is off, adjust your needle size accordingly—smaller needle for more stitches per inch, larger needle for fewer.
Step-by-Step Instructions
Now for the fun part! This cowl is worked in the round on a circular needle, creating a seamless tube. The pattern uses a combination of knit stitches and slipped stitches to create the textured, woven effect. Don't be intimidated by the slipped stitches—they're easier than they look and create a stunning result.
Abbreviations
- CO: Cast on
- K: Knit
- P: Purl
- Sl: Slip stitch purlwise (insert needle as if to purl, but just transfer the stitch to the right needle without knitting it)
- K2tog: Knit two stitches together (decrease)
- PM: Place marker
- RM: Remove marker
- Rep: Repeat
Getting Started: Cast On and Foundation
Step 1: Cast On
Using Color A (deep teal), cast on 120 stitches onto your US 8 circular needle. Use a stretchy cast-on method like the long-tail cast-on or the knitted cast-on—this will ensure your cowl has a nice, flexible edge that won't pucker.
Step 2: Join in the Round
Place a stitch marker on your right needle to mark the beginning of the round. Carefully join your work in the round, being extremely careful not to twist your stitches. This is the most common mistake in circular knitting! Before you knit your first stitch, lay your work flat and check that all the cast-on stitches are facing the same direction along the needle. Once you're confident, knit your first stitch to join.
Step 3: Knit the Foundation Rounds
Knit 4 rounds in Color A. This creates a solid base for your cowl and gives it a nice, finished edge. After these 4 rounds, you'll be ready to start the textured pattern.
The Aurora Pattern: Rounds 2-18
This is where the magic happens! The pattern is built on a 17-round repeat that cycles through your three colors. Each color works two rounds of the slipped stitch pattern, followed by one plain knit round. The slipped stitches create the woven texture, while the knit rounds allow the colors to transition smoothly.
Round 2 (Color A): *K1, Sl1 with yarn in front, K1, Sl1 with yarn in back*; rep from * to * around.
How to do this: Knit 1 stitch normally. Then, bring your yarn to the front of your work (between the needles) and slip the next stitch purlwise (as if to purl) onto the right needle. Bring the yarn to the back and knit the next stitch. Then bring the yarn to the back again and slip the next stitch purlwise with the yarn in back. Repeat this 4-stitch pattern all the way around.
Round 3 (Color A): *K1, Sl1 with yarn in back, K1, Sl1 with yarn in front*; rep from * to * around.
Note: This is the reverse of Round 2. Knit 1, then slip 1 with yarn in back, knit 1, then slip 1 with yarn in front. This alternation creates the woven effect.
Round 4 (Color B): Switch to Color B. *Sl1 with yarn in front, K1, Sl1 with yarn in back, K1*; rep from * to * around.
Round 5 (Color B): *Sl1 with yarn in back, K1, Sl1 with yarn in front, K1*; rep from * to * around.
Round 6 (Color B): Knit all stitches.
Round 7 (Color C): Switch to Color C. *K1, Sl1 with yarn in front, K1, Sl1 with yarn in back*; rep from * to * around.
Round 8 (Color C): *K1, Sl1 with yarn in back, K1, Sl1 with yarn in front*; rep from * to * around.
Round 9 (Color C): Knit all stitches.
Round 10 (Color A): Switch back to Color A. *Sl1 with yarn in front, K1, Sl1 with yarn in back, K1*; rep from * to * around.
Round 11 (Color A): *Sl1 with yarn in back, K1, Sl1 with yarn in front, K1*; rep from * to * around.
Round 12 (Color A): Knit all stitches.
Round 13 (Color B): Switch to Color B. *K1, Sl1 with yarn in front, K1, Sl1 with yarn in back*; rep from * to * around.
Round 14 (Color B): *K1, Sl1 with yarn in back, K1, Sl1 with yarn in front*; rep from * to * around.
Round 15 (Color B): Knit all stitches.
Round 16 (Color C): Switch to Color C. *Sl1 with yarn in front, K1, Sl1 with yarn in back, K1*; rep from * to * around.
Round 17 (Color C): *Sl1 with yarn in back, K1, Sl1 with yarn in front, K1*; rep from * to * around.
Round 18 (Color C): Knit all stitches.
Continuing the Pattern
Now that you've completed Rounds 2-18, you'll repeat this entire sequence two more times (for a total of three repeats). This will bring your cowl to approximately 10 inches from the cast-on edge. If you prefer a shorter cowl, you can stop after two repeats—just make sure you finish at the end of a full pattern repeat (after a knit round) so your color sequence is complete.
Helpful tip: As you work, your cowl will naturally curl and the pattern will begin to show. Don't worry if it looks a bit messy at first—the slipped stitches will settle beautifully once you block the finished piece.
Finishing Touches
Step 1: Knit the Top Edge
Once you've completed your desired length, knit 4 rounds in Color A. This mirrors the bottom edge and gives your cowl a polished, finished look.
Step 2: Bind Off
Bind off loosely in pattern (knitwise). To ensure a stretchy bind-off that won't pucker, use a larger needle or a stretchy bind-off method like the "Jeny's Surprisingly Stretchy Bind-Off." Simply knit the first stitch, knit the second, then pass the first stitch over the second. Continue this across all stitches. Cut your yarn, leaving a 6-inch tail, and pull it through the last loop.
Step 3: Weave in Ends
Using your tapestry needle, weave in all loose ends securely. Thread the needle with each yarn tail and weave it through the wrong side of the cowl, following the path of the stitches. Weave in at least 2-3 inches to ensure the ends won't come loose with wear. Trim any excess yarn.
Step 4: Block Your Cowl
Blocking is essential to open up the stitch pattern and even out the edges. Soak your cowl in lukewarm water with a gentle wool wash for 15-20 minutes. Gently squeeze out excess water (never wring or twist!). Lay the cowl flat on a towel and roll it up to remove more water. Then, shape it into a neat circle on a dry towel or blocking mat. Let it air dry completely. Blocking will relax the yarn and make the slipped stitch pattern beautifully defined.
Wearing and Caring for Your Cowl
Once your cowl is dry, it's ready to wear! The Aurora Borealis Driftwood Cowl is designed to be worn snugly around your neck, providing warmth and style. The 24-inch circumference means it can be worn doubled-up for extra coziness, or left loose for a more relaxed look. The gradient of colors—from deep teal through dusty purple to soft blush pink—will add a pop of color to any winter outfit.
To care for your handcrafted cowl, hand wash it gently in cold water with a mild detergent and lay it flat to dry. Avoid hanging it, as this can stretch the fabric. With proper care, your cowl will last for years and become a beloved staple in your cold-weather wardrobe.
This pattern is a wonderful way to practice slipped stitches and color changes while creating something truly beautiful. The rhythmic repetition of the pattern is meditative and relaxing—perfect for cozy evenings by the fire. And the result? A stunning, handcrafted accessory that captures the magic of the northern lights. Happy knitting!