Aurora Borealis Chunky Knit Throw Blanket Free Pattern
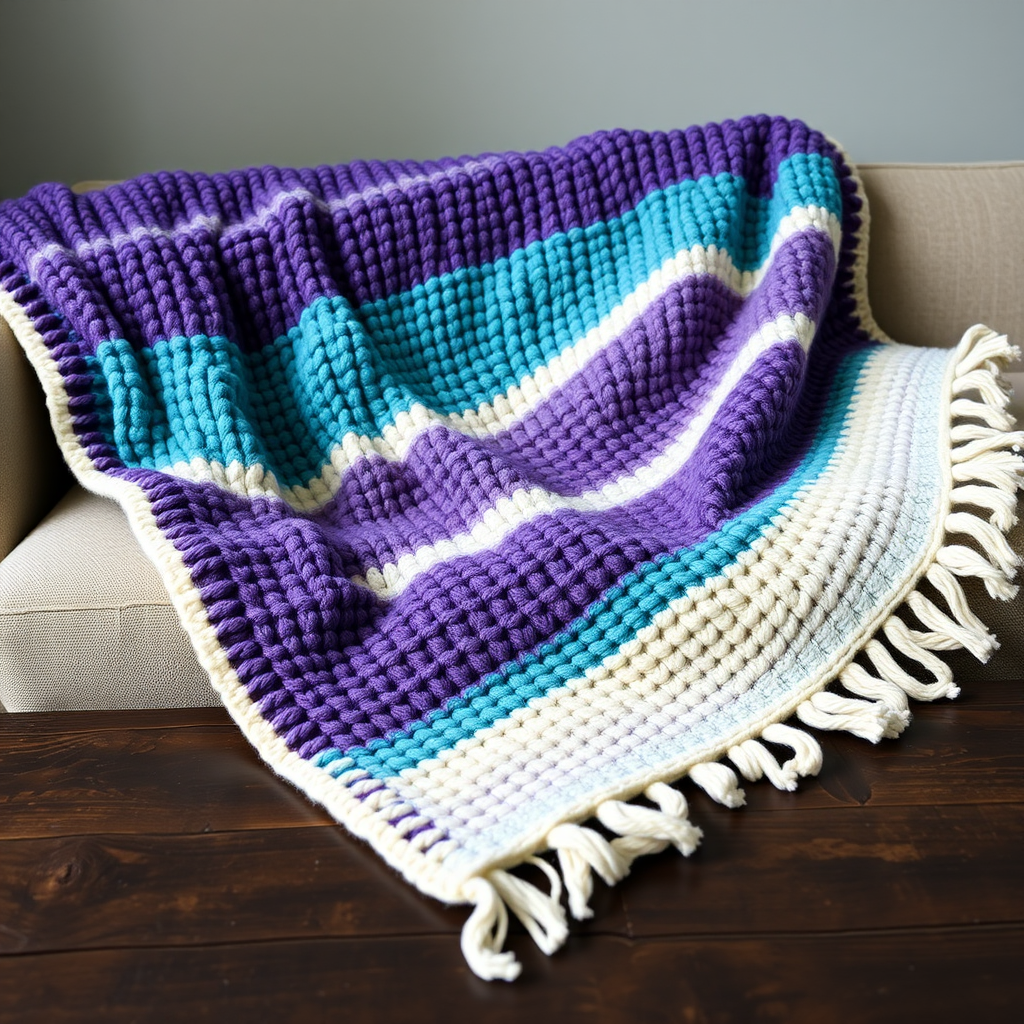
Aurora Borealis Chunky Knit Throw Blanket: A Free Beginner-Friendly Pattern
Imagine wrapping yourself in the breathtaking, swirling colors of the northern lights—deep purples melting into teals, soft blues, and lavender, all grounded by a warm cream. That dream becomes a cozy reality with this Aurora Borealis Chunky Knit Throw Blanket. This pattern is a joy to knit, using only the simplest of stitches to create a stunning, textured gradient effect. It's the perfect weekend project for beginners and seasoned knitters alike, resulting in a plush, luxurious throw that will become the centerpiece of your living space. Best of all, it's a free pattern that you can easily customize to match your home decor.
This blanket is more than just a craft project; it's an experience. The repetitive, calming motion of knitting with super bulky yarn is wonderfully meditative, and watching the colors shift and change row by row is deeply satisfying. By the end, you'll have a beautiful, functional piece of art that you made with your own hands. Let's dive in and create some magic!
Materials Needed: Gathering Your Northern Lights Palette
Before you begin, gather your materials. The beauty of this pattern lies in its simplicity, so you won't need a lot of fancy equipment. Here’s your complete shopping list:
Yarn
You will need super bulky weight yarn (size 6) in five beautiful colors. The total yardage is approximately 1200 yards. Here is the breakdown, with each skein being roughly 240 yards:
- Color A (Deep Purple): 1 skein (approx. 240 yards)
- Color B (Teal): 1 skein (approx. 240 yards)
- Color C (Light Blue): 1 skein (approx. 240 yards)
- Color D (Lavender): 1 skein (approx. 240 yards)
- Color E (Cream): 2 skeins (approx. 480 yards) - one for the main section and one for the border and fringe.
Needles & Notions
- US Size 15 (10 mm) circular knitting needles with a 36-inch cable. The long cable is essential to hold all 90 stitches comfortably.
- Tapestry needle for weaving in ends and attaching fringe.
- Scissors
Gauge
For the best results, aim for a gauge of 6 stitches and 8 rows = 4 inches in garter stitch. Don't worry if you're slightly off; since this is a blanket, exact gauge isn't critical. Just be consistent so your blanket is even.
Step-by-Step Instructions: Knitting Your Aurora
This pattern is a dream for beginners because it only uses the knit stitch. The entire blanket is worked in garter stitch, which means you knit every single row. This creates a squishy, textured fabric that is perfect for a cozy throw. Let's get started!
Abbreviations
- CO: Cast on
- K: Knit
- St(s): Stitch(es)
- Rep: Repeat
Getting Started: The Foundation
With your Color A (Deep Purple), cast on 90 stitches onto your circular needle. Use a loose cast-on method, like the long-tail cast-on, to ensure the edge of your blanket is stretchy and not too tight.
Section 1: Deep Purple (Color A)
Now, we begin the garter stitch. Simply knit every stitch in every row.
- Rows 1-10: Knit all stitches. (You will have 10 rows of garter stitch in deep purple).
Section 2: Teal (Color B)
When you're ready to change colors, simply cut the old yarn, leaving a 6-inch tail, and tie on your new color. Weave in the ends later.
- Rows 11-20: With Color B (Teal), knit all stitches for 10 rows.
Section 3: Light Blue (Color C)
- Rows 21-30: Switch to Color C (Light Blue) and knit all stitches for 10 rows.
Section 4: Lavender (Color D)
- Rows 31-40: Switch to Color D (Lavender) and knit all stitches for 10 rows.
Section 5: Cream (Color E)
- Rows 41-50: Switch to Color E (Cream) and knit all stitches for 10 rows.
Repeating the Gradient
You've just completed one full gradient sequence! To make your blanket the perfect throw size, you will now repeat this entire sequence two more times. This means you will knit the colors in the exact same order: Purple, Teal, Light Blue, Lavender, and Cream.
- Repeat Sections 1-5 two more times (for a total of 150 rows).
Pro-Tip: Keep a row counter or a simple tally sheet to track your progress. It's easy to lose count when you're in the knitting zone!
Adding the Finishing Border
Once you've completed all 150 rows, you'll add a clean, finished edge to your blanket. You'll use your second skein of Color E (Cream) for this.
- Border Rows 1-3: With Color E, knit all stitches for 3 rows.
Binding Off
Now, it's time to bind off. It's crucial to bind off loosely so the edge of your blanket doesn't pucker. Use a larger needle if you have one, or simply bind off using a loose tension.
- Bind off: Bind off all stitches loosely in knit. To do this, knit the first two stitches. Then, using your left needle, lift the first stitch over the second and off the needle. Knit one more stitch and repeat this process until you have one stitch left. Cut your yarn, leaving a 6-inch tail, and pull it through the last loop to secure.
Finishing Touches: Weaving in Ends
Thread your tapestry needle with the yarn tails from your color changes. Weave them in and out of the stitches on the wrong side of the blanket. Be sure to weave them in securely so they don't come loose with use. Trim any excess yarn.
Blocking for Perfection
Blocking is a simple process that will even out your stitches and give your blanket a professional, polished look. Lay the blanket flat on a clean surface or a blocking mat. Gently mist it with water until it's damp but not soaking wet. Smooth it out with your hands, shaping it into a perfect rectangle. Allow it to dry completely before moving it.
Optional: Adding Fringe
For an extra touch of boho-chic style, add a beautiful fringe to the short edges of your blanket. This is a fun and easy way to use up any leftover yarn.
- Cut the strands: Cut 12-inch strands of each color. You'll need about 15-20 strands per fringe tassel, and you'll want a tassel every 2-3 inches along the edge.
- Attach the fringe: Fold a group of strands in half. Insert your crochet hook (or your fingers) through the edge of the blanket from front to back. Pull the folded loop of yarn through the edge. Then, pull the loose ends of the yarn through the loop and pull tight to secure.
- Alternate colors: Alternate the colors of your fringe to mimic the gradient of the blanket, or create a rainbow effect. It's completely up to you!
Congratulations! You've just completed your very own Aurora Borealis Chunky Knit Throw Blanket. This stunning piece is sure to be a conversation starter and a beloved addition to your home. Whether you're curling up with a good book or adding a pop of color to your sofa, this blanket is a testament to your creativity and skill. Happy knitting!


