Aurora Borealis Chunky Crochet Necklace Free Pattern
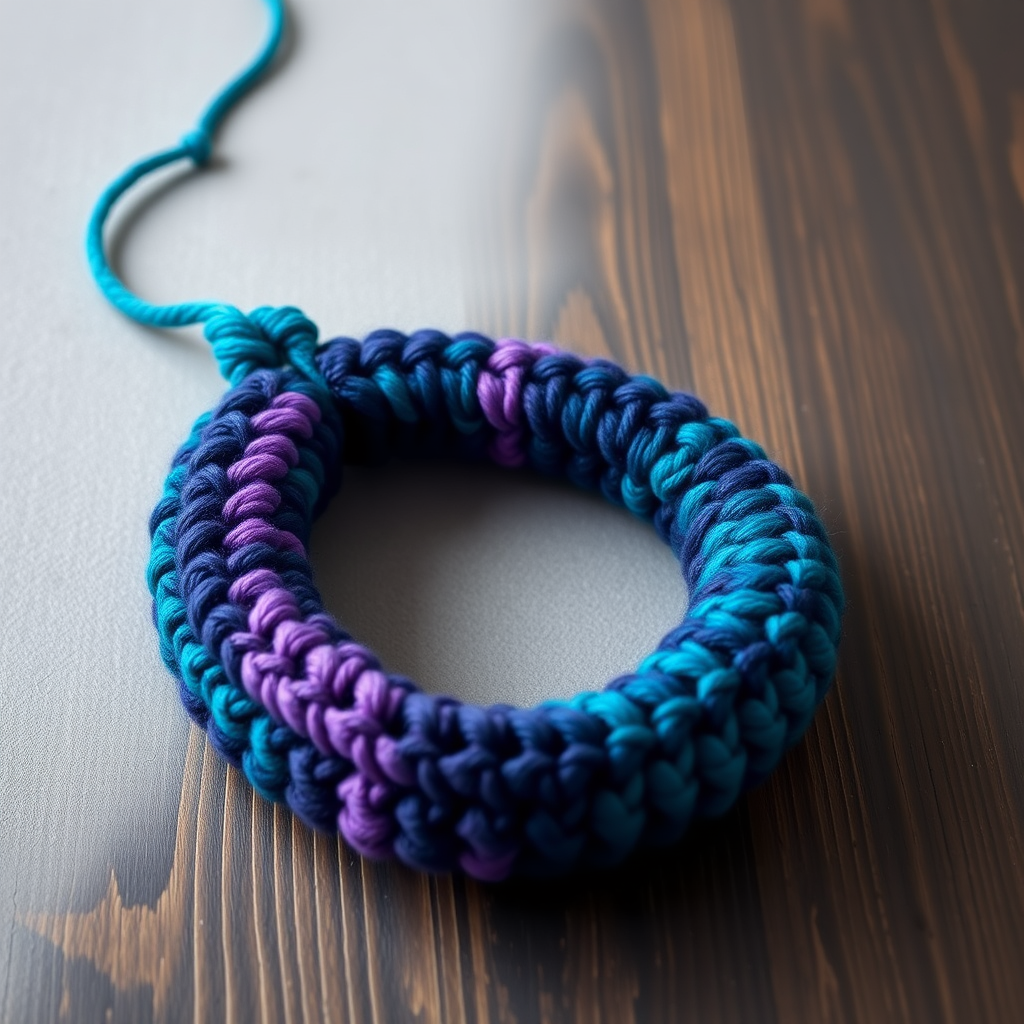
Aurora Borealis Chunky Crochet Necklace: A Free Beginner-Friendly Pattern
Imagine wearing the ethereal, flowing beauty of the northern lights around your neck. With this free crochet pattern, you can create a stunning, adjustable statement necklace that captures the rich, gradient colors of the aurora borealis. This project is perfect for beginners and experienced makers alike, using super bulky yarn and basic single crochet stitches to produce a dense, textured, and cozy tubular rope. The result is a unique, handmade piece of wearable art that adds a pop of color and texture to any outfit. Let's dive into this satisfying and quick project!
Materials Needed
Before you begin, gather the following supplies. This project is wonderfully simple, requiring only a few items:
- Yarn: Super Bulky (Weight 6) yarn in three colors. You will need approximately 30 yards of each color:
- Color A: Deep Teal
- Color B: Midnight Blue
- Color C: Amethyst Purple
- Crochet Hook: Size N/15 (10 mm) crochet hook. This larger hook is essential for achieving the right drape and texture with super bulky yarn.
- Yarn Needle: A large-eye yarn needle for weaving in ends and creating the closure.
- Scissors: For cutting yarn.
Note on Gauge: Gauge is not critical for this project, but for reference, 4 single crochet (sc) stitches x 4 rows equals 4 inches. The focus is on the technique and color changes, not exact sizing.
Step-by-Step Instructions
This necklace is worked in a continuous spiral, creating a seamless, tubular rope. The color changes mimic the flowing bands of the aurora. Follow these detailed instructions carefully, and you'll have a beautiful necklace in no time.
Getting Started: The Foundation
- Magic Ring: With Color A (Deep Teal), make a magic ring. If you're unfamiliar with this technique, it creates an adjustable loop that pulls tight to close the center hole neatly.
- Round 1: Work 6 single crochet (sc) stitches into the magic ring. Pull the tail to tighten the ring closed. You should now have 6 stitches. (6 sts)
- Round 2: Work 2 sc in each stitch around. This increases your stitch count to 12. (12 sts)
- Round 3: *Sc in the next stitch, then 2 sc in the next stitch*; repeat from * to * around. This increases your count to 18. (18 sts)
- Round 4: *Sc in the next 2 stitches, then 2 sc in the next stitch*; repeat from * to * around. You now have 24 stitches. (24 sts)
Building the Tube: Rounds 5-6
- Rounds 5-6: Work 1 sc in each stitch around. Do not increase. This begins to form the sides of your tube. (24 sts)
Color Change to Color B (Midnight Blue)
- Color Change: In the last stitch of Round 6, insert your hook, yarn over, and pull up a loop. Instead of finishing the stitch with Color A, yarn over with Color B and pull through both loops on your hook. Cut Color A, leaving a 6-inch tail to weave in later.
- Rounds 7-8: With Color B, work 1 sc in each stitch around. (24 sts)
Color Change to Color C (Amethyst Purple)
- Color Change: In the last stitch of Round 8, switch to Color C using the same method described above. Cut Color B, leaving a tail.
- Rounds 9-10: With Color C, work 1 sc in each stitch around. (24 sts)
Color Change Back to Color B
- Color Change: In the last stitch of Round 10, switch back to Color B. Cut Color C.
- Rounds 11-12: With Color B, work 1 sc in each stitch around. (24 sts)
Color Change Back to Color A
- Color Change: In the last stitch of Round 12, switch back to Color A. Cut Color B.
- Rounds 13-14: With Color A, work 1 sc in each stitch around. (24 sts)
- Rounds 15-16: Continue with Color A, working 1 sc in each stitch around. (24 sts)
Shaping the Necklace: Decreases
Now we will taper the end of the tube to create a neat, closed point.
- Round 17: *Sc in the next 2 stitches, then sc2tog (single crochet 2 together)*; repeat from * to * around. This reduces your stitch count to 18. (18 sts)
- Round 18: *Sc in the next stitch, then sc2tog*; repeat from * to * around. You now have 12 stitches. (12 sts)
- Round 19: *Sc2tog*; repeat from * to * around. You will now have 6 stitches. (6 sts)
Finishing the Tapered End
- Close the End: Cut the yarn, leaving a 12-inch tail. Thread the tail through a yarn needle. Weave the needle through the remaining 6 stitches, going through the front loop of each stitch. Pull the yarn tight to cinch the end closed. Secure with a knot. Weave in this tail and all other loose ends from your color changes.
Creating the Adjustable Closure
This clever closure allows you to adjust the necklace to any length.
- Make the Loop: Cut a 24-inch length of Color A yarn. Fold it in half to create a loop.
- Attach the Loop: Attach this loop to the end of the necklace where you started (the magic ring end). You can do this by threading the folded end through the center hole of the magic ring, then pulling the two loose ends through the loop and tightening. Alternatively, you can secure it with a slip stitch or by tying it securely to the first round.
- Thread the Necklace: Now, thread the tapered, closed end of the necklace through this loop. Pull the necklace through until it fits comfortably around your neck. The loop acts as a sliding knot, allowing you to adjust the length easily.
- Final Weave: Weave in any remaining ends from the loop attachment. Your Aurora Borealis Chunky Crochet Necklace is complete!
To wear, simply slide the knot to adjust the length to your preference. This beautiful, textured piece is sure to become a favorite accessory. Enjoy your handmade creation!