Whispering Willow Newborn Slouch Hat Free Pattern
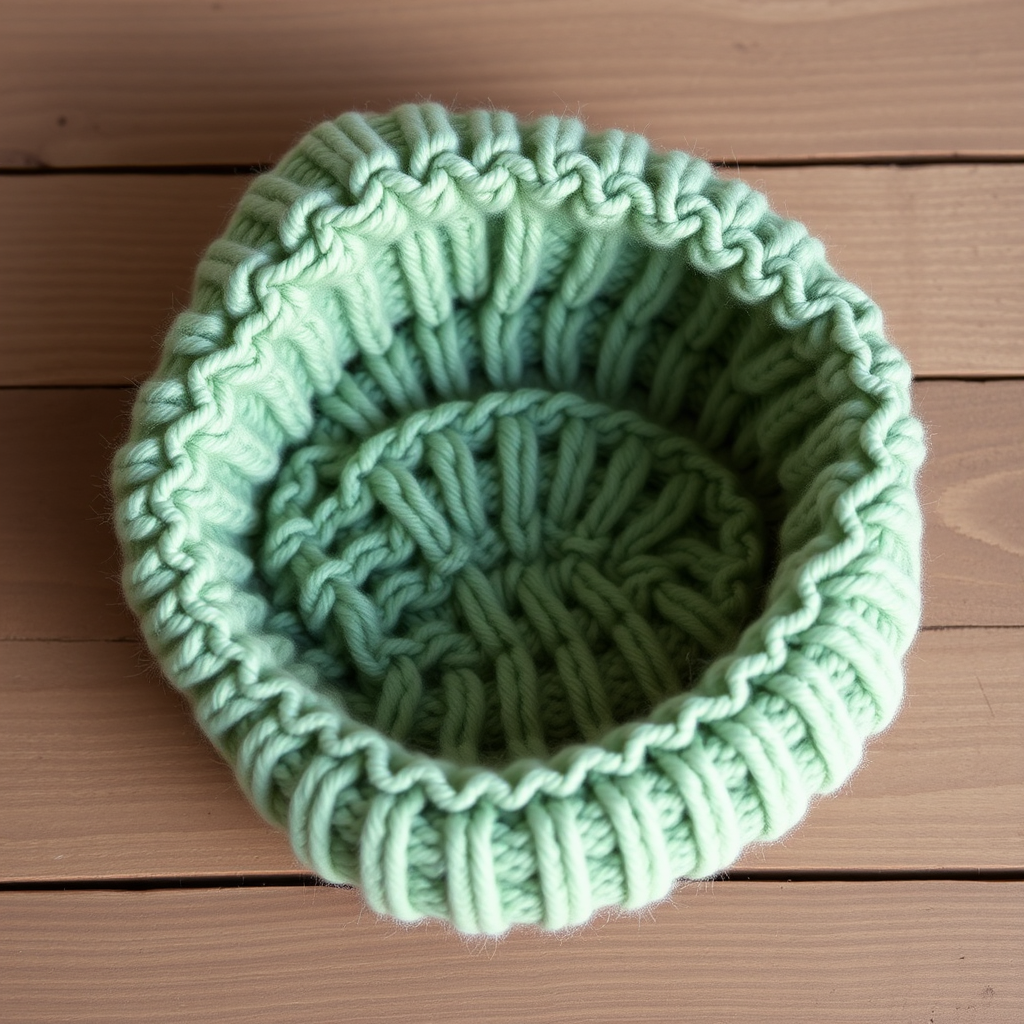
Whispering Willow Newborn Slouch Hat: A Free Knitting Pattern for the Perfect Handmade Gift
There is something truly magical about creating a handmade gift for a newborn. The tiny stitches, the soft yarn, and the love woven into every row make it a keepsake that parents will treasure forever. Today, I'm thrilled to share the Whispering Willow Newborn Slouch Hat—a luxuriously soft and textured pattern that combines modern style with classic knitting techniques. This adorable hat features a delicate rolled brim and a beautiful seed stitch body that gives it a nubby, cozy appearance. The relaxed slouchy silhouette is both practical and fashionable, making it the perfect accessory for a little one's first photoshoot or everyday wear. Whether you're a seasoned knitter or a beginner looking for your next project, this pattern is designed to be accessible, enjoyable, and utterly rewarding.
This pattern is a modern take on the classic baby beanie. Instead of a tight-fitting cap, the Whispering Willow offers a gentle, relaxed slouch that looks effortlessly chic. The seed stitch creates a wonderfully textured fabric that is both warm and breathable—ideal for a baby's sensitive skin. Plus, with bulky yarn, this project works up quickly, making it perfect for last-minute baby showers or thoughtful gifts throughout the year.
Materials Needed
Before we dive into the pattern, let's gather all the necessary materials. The beauty of this project is that it requires minimal supplies, and most are readily available at your local yarn shop or online. Here's what you'll need:
Yarn
- Bulky weight yarn (approx. 80-100 yards). I highly recommend Lion Brand Wool-Ease Thick & Quick in the color 'Willow'—a beautiful soft sage green that perfectly matches the hat's name. However, any soft acrylic/wool blend in bulky weight will work beautifully. The yarn should have a slight sheen and visible twist, clearly showing its bulky weight for that chunky, cozy look.
Needles
- US Size 10.5 (6.5 mm) 16-inch circular knitting needle for the main body of the hat.
- US Size 10.5 (6.5 mm) double-pointed needles (DPNs) for the crown shaping, when the stitch count becomes too small for the circular needle.
- Note: If you prefer, you can use the magic loop method with a longer circular needle instead of DPNs.
Other Supplies
- Tapestry needle for weaving in ends
- Stitch marker (optional, but helpful for marking the beginning of rounds)
- Scissors
Gauge
- 14 stitches and 20 rows = 4 inches in seed stitch (blocked). It's crucial to check your gauge before starting to ensure the hat fits a newborn perfectly. If your gauge is off, adjust your needle size accordingly.
Finished Size: Newborn (approx. 12-13 inches head circumference, 5-6 inches tall). This size is perfect for a newborn and will fit comfortably for the first few months.
Step-by-Step Instructions
Now, let's get to the fun part—knitting! This pattern is worked in the round, so you'll be creating a seamless hat. Don't worry if you're new to circular knitting; the instructions below are detailed and easy to follow. Let's begin.
Abbreviations
- CO: cast on
- K: knit
- P: purl
- K2tog: knit two together (decrease)
- P2tog: purl two together (decrease)
- St(s): stitch(es)
- Rnd: round
Brim
The brim of the Whispering Willow hat features a delicate rolled edge that adds a touch of elegance. We'll start by casting on and working in a simple ribbing.
- Cast On: CO 56 stitches onto your 16-inch circular needle. Pro tip: Use a long-tail cast-on for a nice, stretchy edge that will comfortably fit a baby's head.
- Join in the Round: Place a stitch marker on your right needle to mark the beginning of the round. Carefully join the work in the round, being extremely careful not to twist the stitches. This is the most common mistake in circular knitting, so take your time here.
- Ribbing Rounds: Work in K1, P1 ribbing for 6 rounds. This will create approximately 1 inch of ribbing. The ribbing will naturally roll up slightly, creating that beautiful rolled brim effect we're looking for.
Body
Now we'll transition to the seed stitch pattern, which gives the hat its lovely, textured appearance. Seed stitch is created by alternating knit and purl stitches in a specific pattern that creates a bumpy, nubby fabric.
- Round 1: *K1, P1; repeat from * to end of round.
- Round 2: *P1, K1; repeat from * to end of round.
- Repeat Rounds 1 and 2 until the piece measures 4 inches from the cast-on edge, ending with a Round 1. This means your last round should be a Round 1, so you'll know exactly where you are in the pattern.
Helpful Tip: To keep track of your rounds, you can use a row counter or simply count the "bumps" of the seed stitch. Each pair of rounds (Round 1 and Round 2) creates one complete seed stitch pattern repeat.
Crown Shaping
This is where the hat begins to take its slouchy shape. We'll be decreasing stitches gradually to create a gentle, gathered crown. Pay close attention to the stitch counts after each decrease round.
- Round 1 (Decrease Round): *K2tog, P1; repeat from * to end of round. You will now have 38 stitches on your needle.
- Round 2: *K1, P1; repeat from * to end of round. This round maintains the seed stitch pattern without decreasing.
- Round 3 (Decrease Round): *K2tog; repeat from * to end of round. You will now have 19 stitches on your needle.
- Round 4: K all stitches. This is a simple knit round to stabilize the decreases.
- Round 5 (Decrease Round): *K2tog; repeat from * to end of round, ending with K1. You will now have 10 stitches on your needle.
Transitioning to DPNs: As you work through the crown shaping, you'll notice the stitch count getting smaller, making it difficult to use the circular needle. When you reach Round 3 (19 stitches), it's time to switch to your double-pointed needles. Simply distribute the stitches evenly across three or four DPNs and continue following the pattern.
Finishing
You're almost done! The final steps will secure your work and give the hat its beautiful, finished look.
- Cut Yarn: Cut the yarn, leaving a 10-inch tail. Thread this tail through a tapestry needle.
- Gather Stitches: Carefully thread the tapestry needle through the remaining 10 stitches on your needles, slipping them off as you go. Pull the tail tight to gather the stitches together, closing the top of the hat. This creates that soft, gentle point at the crown.
- Secure: Pull the yarn through the center of the gathered stitches and weave it through the inside of the hat to secure it. Make a small knot to ensure it stays in place.
- Weave in Ends: Use your tapestry needle to weave in all loose ends on the inside of the hat. This will give your hat a clean, professional finish.
Blocking
Blocking is an essential step that helps even out your stitches and shape the hat properly. For this bulky yarn hat, a light blocking is all that's needed.
- Fill a sink or basin with lukewarm water and a small amount of gentle wool wash or baby shampoo.
- Submerge the hat and let it soak for 10-15 minutes. Do not agitate or wring the hat, as this can cause felting.
- Gently press the water out of the hat (do not twist). Roll it in a clean towel to remove excess moisture.
- Place the hat on a flat surface or a hat form (you can use a small balloon or a bowl covered in plastic wrap) to dry. Shape it gently to your desired slouch. The slouch will naturally form as the hat dries and is worn.
- Allow it to dry completely before wearing or gifting.
Tips for Success
- Check your gauge: Always knit a gauge swatch before starting. This ensures your hat will be the correct size for a newborn.
- Use a lifeline: If you're new to circular knitting, consider adding a lifeline (a piece of contrasting yarn threaded through your stitches) after the brim. This way, if you make a mistake, you can easily rip back to that point without losing all your work.
- Count your stitches: After each decrease round, count your stitches to ensure you have the correct number before proceeding.
- Relax and enjoy: Knitting should be a relaxing and enjoyable experience. Don't rush the process—savor each stitch and the love you're putting into this special gift.
Final Thoughts
The Whispering Willow Newborn Slouch Hat is more than just a knitting pattern—it's a way to create a cherished keepsake. The soft sage green color and chunky texture make it a standout piece in any baby's wardrobe, while the slouchy design ensures it's both comfortable and stylish. Whether you're knitting this for your own little one, a friend's baby shower, or as a donation to a local hospital, this hat is sure to be appreciated and adored.
I hope you enjoy knitting this pattern as much as I enjoyed creating it. Remember, every stitch you make is a stitch of love. Happy knitting!
If you make this hat, I'd love to see your creation! Share your photos on social media with the hashtag #WhisperingWillowHat and tag me so I can admire your beautiful work. Don't forget to check out my other free patterns for more handmade inspiration.



