Whispering Pines Throw Free Crochet Pattern
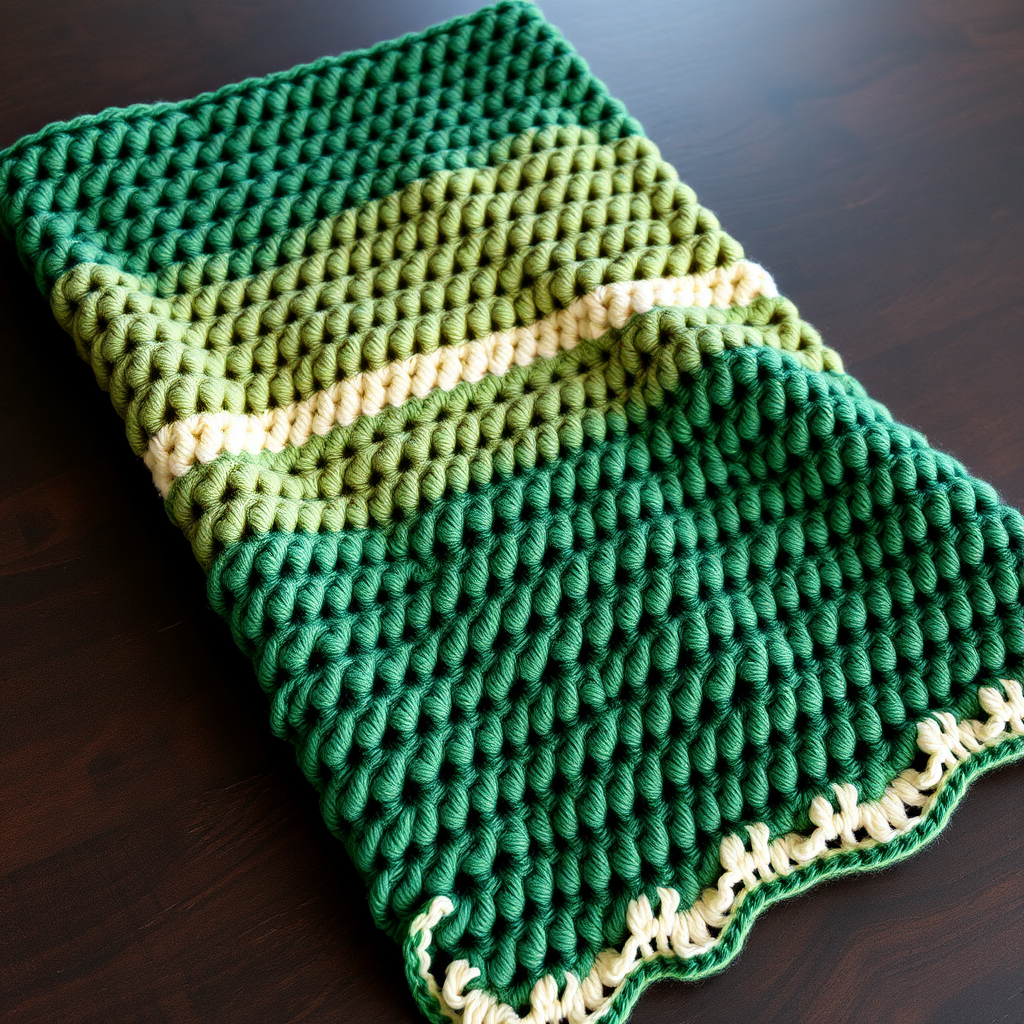
Whispering Pines Throw: A Free Crochet Pattern for a Cozy Forest-Inspired Blanket
Imagine wrapping yourself in the tranquil beauty of a pine forest, where the deep greens of towering trees meet the soft, muted tones of moss and sage. The Whispering Pines Throw captures that serene essence in a beautifully textured crochet blanket. This pattern combines the classic, dense moss stitch with a delicate shell border, creating a piece that is both visually stunning and wonderfully cozy. Whether you're an experienced crocheter looking for a relaxing project or a confident beginner ready for a rewarding challenge, this throw is the perfect way to add a touch of nature-inspired elegance to your living space. Let's gather our materials and begin crafting this heirloom-quality piece.
Materials Needed
Before you begin, it's essential to gather all your supplies. This project uses worsted weight yarn, which is perfect for creating a durable and warm blanket. Here’s your complete shopping list:
- Yarn: Worsted weight yarn in four colors:
- Color A (Forest Green): 600g – This is your main color, used for the largest sections.
- Color B (Sage Green): 500g – A softer, muted green for contrast.
- Color C (Moss Green): 400g – A deeper, earthy tone.
- Color D (Cream): 300g – For the accent stripes and border.
- Crochet Hook: I/9 (5.5 mm) – Ensure you have this size to match the gauge.
- Tapestry Needle: For weaving in the ends securely.
- Scissors: For cutting your yarn.
Gauge: 14 stitches and 12 rows = 4 inches in moss stitch. It is crucial to check your gauge before starting. If your swatch is too small, try a larger hook. If it's too big, switch to a smaller hook. This ensures your blanket turns out the correct size.
Special Stitches
This pattern uses two main stitches. Don't worry if they're new to you; they are simple to master and create a beautiful texture.
- Moss Stitch (MS): This is a simple repeat of single crochet and chain stitches. Work a single crochet (sc), then chain 1 (ch 1), and skip the next stitch. On the following row, you will work your single crochet into the chain-1 space from the previous row. This creates a dense, woven-looking fabric.
- Shell (Sh): This is a decorative cluster. Work (2 double crochet (dc), ch 1, 2 dc) all into the same stitch or space. This creates a lovely scalloped fan shape.
Step-by-Step Instructions
Follow these detailed instructions carefully, and you'll be amazed at the beautiful blanket you create. The pattern is worked in horizontal bands of color, which is a great way to use up yarn and create a modern look.
Getting Started: The Foundation
With Color A (Forest Green), create a foundation chain of 121 chains. This number is a multiple of 2 plus 1, which is essential for the moss stitch pattern to work out correctly.
Working the First Color Block (Forest Green)
- Row 1: Single crochet (sc) in the 2nd chain from your hook. *Chain 1 (ch 1), skip the next chain, sc in the next chain. Repeat from * across the row. At the end, you should have 60 sc and 60 ch-1 spaces. Turn your work.
- Row 2: Chain 1 (this counts as your first sc), sc in the first sc. *Sc in the next ch-1 space, ch 1, skip the next sc. Repeat from * across, ending with a sc in the last sc. Turn.
- Rows 3-10: Repeat Row 2. This maintains the moss stitch pattern. The key is to always work your sc into the ch-1 spaces from the previous row. At the end of Row 10, fasten off Color A.
Adding the Second Color Block (Sage Green)
- Row 11: Join Color B (Sage Green) in the first stitch. Ch 1, sc in the first st. *Ch 1, skip the next sc, sc in the next ch-1 space. Repeat from * across, ending with a sc in the last st. Turn. Note: This shift in starting the pattern creates a beautiful diagonal, textured effect.
- Rows 12-20: Repeat Row 11, working in the moss stitch pattern with Color B. Fasten off at the end of Row 20.
Continuing the Color Sequence
Now you will continue this rhythm, changing colors to create the beautiful striped effect. The process is the same as above, just with different colors.
- Color C (Moss Green): Join Color C. Repeat the Row 11 pattern for 10 rows (Rows 21-30). Fasten off.
- Color D (Cream): Join Color D. Work 2 rows of the moss stitch pattern (Rows 31-32). Fasten off.
- Color A (Forest Green): Join Color A. Work 10 rows of the moss stitch pattern (Rows 33-42). Fasten off.
- Color B (Sage Green): Join Color B. Work 10 rows (Rows 43-52). Fasten off.
- Color C (Moss Green): Join Color C. Work 10 rows (Rows 53-62). Fasten off.
- Color D (Cream): Join Color D. Work 2 rows (Rows 63-64). Fasten off.
- Color A (Forest Green): Join Color A. Work 10 rows (Rows 65-74). Fasten off.
- Color B (Sage Green): Join Color B. Work 10 rows (Rows 75-84). Fasten off.
- Color C (Moss Green): Join Color C. Work 10 rows (Rows 86-95). Fasten off.
- Color D (Cream): Join Color D. Work 2 rows (Rows 96-97). Fasten off.
Adding the Beautiful Border
The border is what truly elevates this blanket, giving it a polished, professional finish. We'll work in rounds.
- Round 1: Join Color D (Cream) in any corner. Ch 1, work single crochet (sc) evenly around the entire blanket. When you reach a corner, work 3 sc in that corner stitch to help the border turn the corner smoothly. Join with a slip stitch (sl st) to the first sc.
- Round 2: Ch 3 (this counts as your first double crochet), work 2 dc in the same stitch. *Skip the next 2 stitches, work a Shell (Sh) in the next stitch. Repeat from * around the blanket. When you reach a corner, work a Shell in the corner stitch (adjust as needed to make it lie flat). Join with a sl st to the top of the ch-3. Fasten off.
- Round 3: Join Color A (Forest Green) in any ch-1 space of a shell. Ch 1, sc in the same space. *Ch 3, sc in the next ch-1 space (the center of the next shell). Repeat from * around the entire blanket. Join with a sl st. Fasten off.
Finishing Touches
Take your tapestry needle and carefully weave in all the loose ends from your color changes. This step is crucial for a neat, durable finish. Once all ends are secured, gently block your blanket if desired to even out the stitches and enhance the drape. Your Whispering Pines Throw is now complete, ready to add warmth and forest-inspired charm to your home.



