Whispering Pines Pocket Wrap Free Crochet Pattern
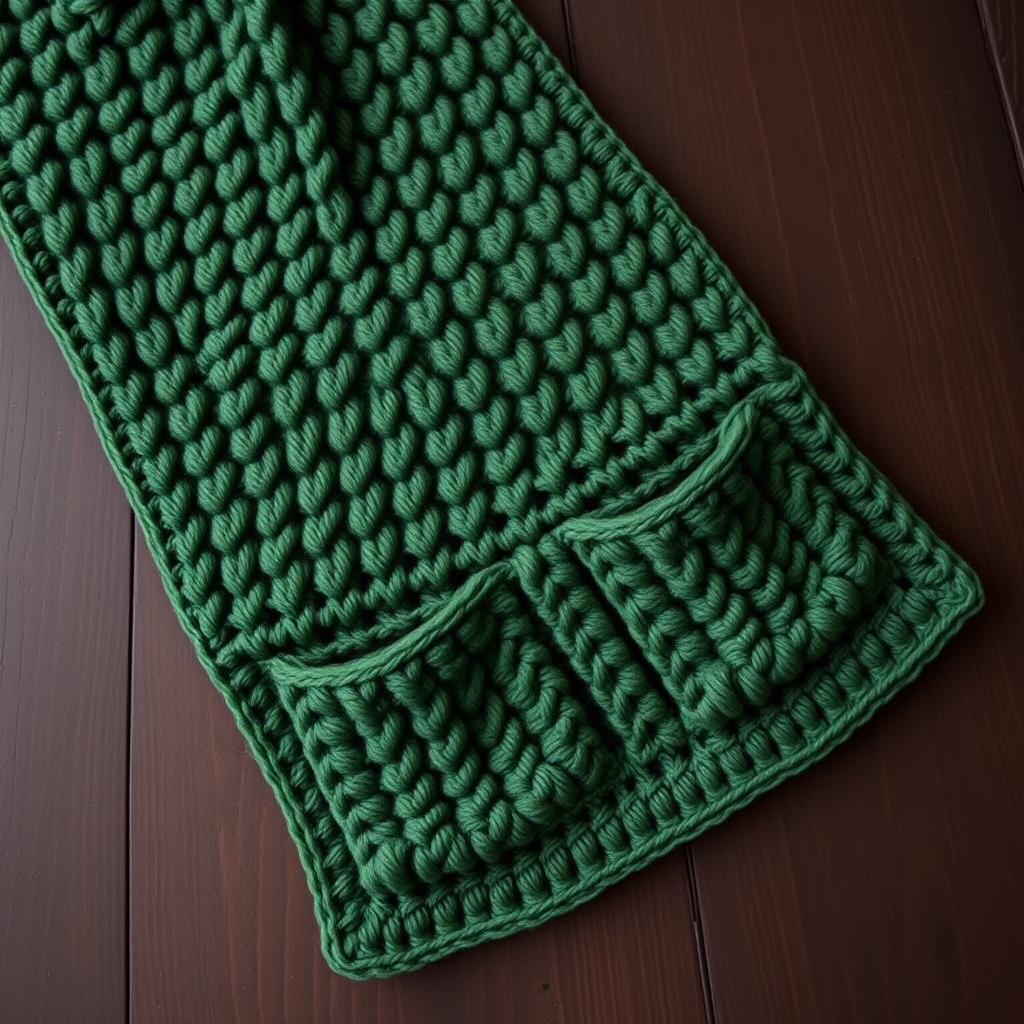
Wrap Yourself in Comfort: The Whispering Pines Pocket Wrap
Imagine wrapping yourself in a cloud of forest green softness, with pockets to warm your hands and hold your phone. That's the magic of the Whispering Pines Pocket Wrap—a generously oversized crochet shawl that combines the cozy luxury of super bulky yarn with a beautifully textured stitch pattern. This free crochet pattern is perfect for beginners and experienced makers alike, creating a stunning, functional piece that feels like a warm hug on a chilly day.
The lush, crossed double crochet stitch mimics the dense canopy of a pine forest, while the integrated pockets add a practical, modern touch. Using Bernat Blanket yarn, this wrap works up quickly and is incredibly plush. Whether you're curling up on the couch or heading out for a winter walk, this pocket shawl is your new best friend. Let's get started on this rewarding project!
Materials Needed
Before you begin, gather these simple supplies. The beauty of this pattern is its simplicity—you only need yarn, a hook, and a tapestry needle!
- Yarn: Bernat Blanket Yarn (Super Bulky Weight 6) in 'Forest Green' (or any super bulky yarn) – 3 skeins (approx. 600g / 660 yards). The plushness of this yarn is what makes the wrap so cozy.
- Crochet Hook: 10 mm (N/P-15) crochet hook. This larger hook creates the perfect drape for the fabric.
- Extras: Tapestry needle for weaving in ends and seaming the pockets, and scissors.
- Gauge: 8 dc x 4 rows = 4 inches (10 cm) square. Important: Adjust your hook size if needed to match this gauge to ensure your wrap is the correct size.
Step-by-Step Instructions
This pattern is worked in one piece from the bottom up, then cleverly folded and seamed to create the pockets. Don't worry—it's much easier than it sounds! Follow these detailed instructions carefully, and you'll have a beautiful wrap in no time.
Abbreviations
Familiarize yourself with these standard crochet abbreviations before starting:
- ch = chain
- dc = double crochet
- st(s) = stitch(es)
- sk = skip
- sl st = slip stitch
- RS = right side
- WS = wrong side
Foundation and Main Body
Foundation Row: Ch 62 loosely. (This is a multiple of 2 + 2, which sets up the stitch pattern perfectly.)
Row 1: Dc in the 4th ch from the hook (the skipped chains count as your first dc). Dc in each ch across the row. You should have 60 dc stitches total.
Row 2 (Crossed Stitch Row): Ch 3 (this counts as your first dc), turn your work. *Sk the next st, dc in the following st, then dc in the skipped st (this creates a crossed dc pair).* Repeat from * to * across the row, ending with a dc in the top of the turning ch from the previous row. You will have 30 crossed dc pairs.
Row 3 (Plain Row): Ch 3 (counts as dc), turn. Dc in each st across the row. (60 dc)
Rows 4-30: Now, simply alternate Rows 2 and 3. Repeat this pattern until you have completed Row 30. You will have 15 crossed dc rows and 15 plain dc rows. Pro Tip: Always end with a plain dc row (Row 30) to create a clean edge for the border.
Adding the Border
Do not fasten off your yarn yet! We'll work the border directly onto the shawl.
Ch 1, and turn your work. Work single crochet (sc) evenly around the entire outer edge of the shawl. When you reach each corner, work 3 sc in the corner stitch to help the corners lay flat and turn nicely. When you return to your starting point, join with a sl st to the first sc. Fasten off and weave in all loose ends with your tapestry needle.
Pocket Formation
This is the fun part—transforming your wrap into a pocket shawl!
- Fold: Lay the shawl flat on a table with the right side (RS) facing up. Take the bottom edge and fold it up towards the center by about 10 inches (25 cm). This folded-up portion will become your pocket flaps.
- Pin: Use stitch markers or safety pins to hold the folded edges in place on both sides. This ensures your seams will be straight.
- Sew the Pockets: Thread your tapestry needle with a length of your yarn. Sew the side edges of the folded-up portion to the main body of the shawl. Start from the bottom corner and sew up about 8 inches (20 cm) on each side. Important: Leave the center section open—this is the opening of your pocket!
- Secure: Weave in all yarn ends securely to ensure your pockets are sturdy and will hold up to daily use.
And that's it! Your Whispering Pines Pocket Wrap is complete. The dense, braided texture of the crossed stitches combined with the deep forest green color creates a stunning, professional-looking piece. This wrap is not just a project; it's a cozy companion for years to come. Happy crocheting!



