Whispering Pines Forest Floor Rug Free Crochet Pattern – Textured Earth-Tone Oval
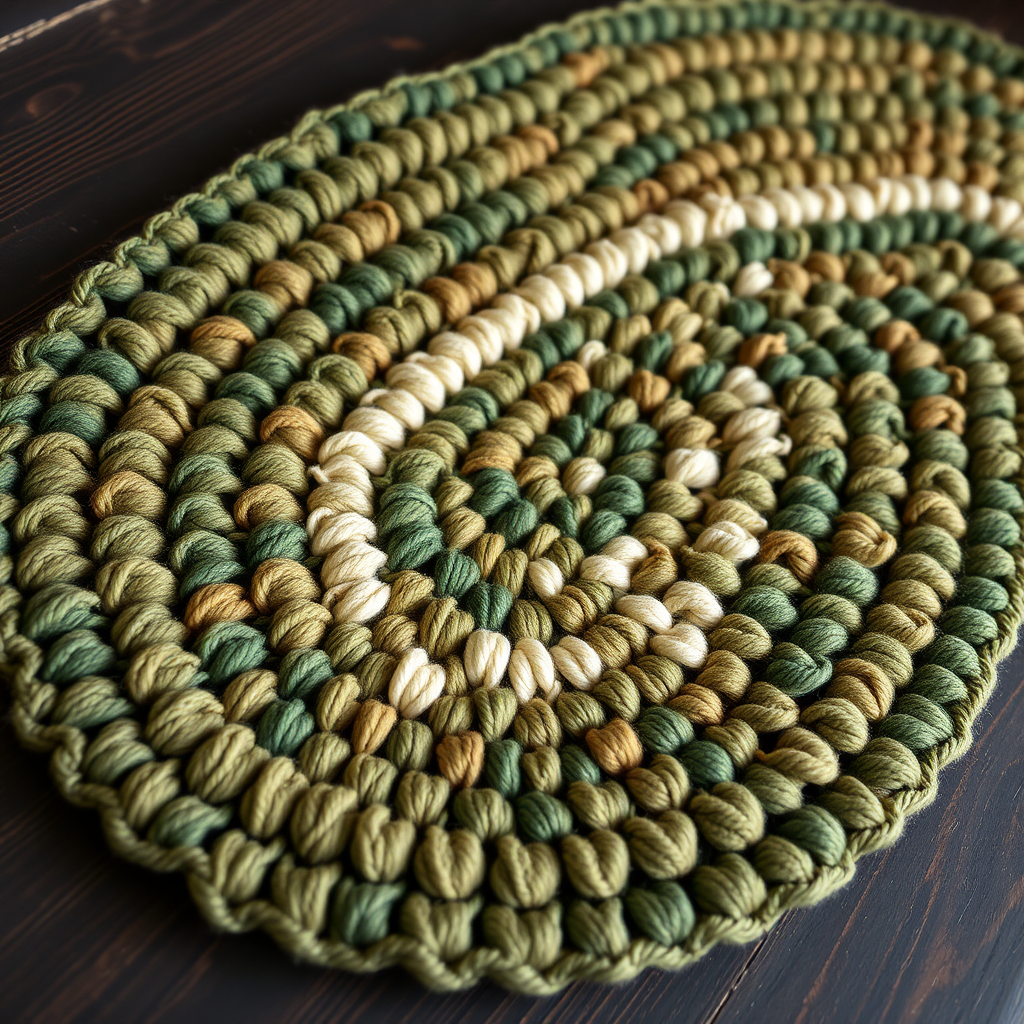
Whispering Pines Forest Floor Rug: A Free Crochet Pattern for a Cozy, Textured Oval
Imagine stepping out of bed onto a soft, mossy forest floor—without ever leaving your home. That's the magic of the Whispering Pines Forest Floor Rug. This free crochet pattern combines dense single crochet with plush loop stitches to create a richly textured oval rug that brings the serene, organic beauty of the woods into any room. The earthy palette of deep forest green, moss green, warm taupe, and cream mimics dappled light filtering through the canopy, making this handmade piece a true statement of cozy, natural style.
Whether you're an experienced crocheter looking for a rewarding home decor project or a confident beginner ready for a challenge, this pattern is designed to be clear, detailed, and achievable. Let's gather our materials and start creating this stunning, tactile centerpiece.
Materials Needed
Before you begin, make sure you have everything ready. This project uses bulky yarn for quick progress and a wonderfully chunky, plush feel.
- Yarn: Bulky weight yarn in 4 shades:
- Deep Forest Green (approx. 300-375 yards)
- Moss Green (approx. 300-375 yards)
- Warm Taupe (approx. 300-375 yards)
- Cream (approx. 300-375 yards)
- Crochet Hook: US Size K/10.5 (6.5 mm) hook. This larger hook helps create a soft, drapey fabric that's perfect for a rug.
- Other Tools: Yarn needle for weaving in ends, scissors, and stitch markers (optional but helpful for keeping track of rounds).
Gauge: 4 single crochet (sc) and 4 rows = 4 inches. Always check your gauge to ensure your rug turns out the correct size.
Step-by-Step Instructions
This rug is worked in continuous rounds from the center out, creating a seamless oval. The increases are clustered at the two rounded ends to maintain the oval shape, while the middle section stays straight. The color changes and loop stitches create the beautiful, textured forest floor effect.
Abbreviations
- ch: chain
- sc: single crochet
- lp st: loop stitch (see special technique below)
- inc: 2 sc in same stitch (increase)
- rnd: round
Special Technique: The Loop Stitch (lp st)
This stitch creates the shaggy, moss-like texture. Here's how to do it:
- Insert your hook into the next stitch as if to single crochet.
- Yarn over, but before pulling through, wrap the yarn around your non-dominant index finger to create a loop.
- Pull the yarn through the stitch (you'll have two loops on your hook, with the long loop resting on your finger).
- Yarn over and pull through both loops on the hook to complete the stitch.
- Release the loop from your finger. You've created a long, plush loop on the surface of your work!
Foundation & Base Oval
Foundation: With deep forest green, ch 12.
Rnd 1: Work 3 sc in 2nd ch from hook, sc in next 9 ch, 3 sc in last ch. Working on the other side of the chain, sc in next 9 ch. (24 sts)
Rnd 2: (Inc) 3 times, sc in next 9 sts, (inc) 3 times, sc in next 9 sts. (30 sts)
Rnd 3: (Sc in next st, inc) 3 times, sc in next 9 sts, (sc in next st, inc) 3 times, sc in next 9 sts. (36 sts)
Rnd 4: (Sc in next 2 sts, inc) 3 times, sc in next 9 sts, (sc in next 2 sts, inc) 3 times, sc in next 9 sts. (42 sts)
Rnd 5: (Sc in next 3 sts, inc) 3 times, sc in next 9 sts, (sc in next 3 sts, inc) 3 times, sc in next 9 sts. (48 sts)
Rnd 6: (Sc in next 4 sts, inc) 3 times, sc in next 9 sts, (sc in next 4 sts, inc) 3 times, sc in next 9 sts. (54 sts)
Continue in this manner, increasing 6 sts per round (3 at each end) until the rug reaches your desired width (about 30 inches). The increases should always be clustered at the two rounded ends. You'll notice the pattern: each round, the number of sc between increases grows by one (e.g., Rnd 7 would be: (Sc in next 5 sts, inc) 3 times, sc in next 9 sts, (sc in next 5 sts, inc) 3 times, sc in next 9 sts).
Pro Tip: Place a stitch marker at the beginning of each round to help you keep track of your place, especially as the rug grows larger.
Textured Rounds
Once your base oval is wide enough, it's time to add the beautiful texture. You'll now work without increases, maintaining the stitch count for the length of the rug.
Rnd 1 (texture): Change to moss green. Sc in each st around. (Still 54 sts, but now you'll maintain the count without increases for the length)
Rnd 2: *Lp st in next st, sc in next st* repeat from * to * around. (27 lp sts, 27 sc)
Rnd 3: Sc in each st around.
Rnd 4: Change to warm taupe. Sc in each st around.
Rnd 5: *Sc in next st, lp st in next st* repeat from * to * around. (This staggers the loops for a more organic look)
Rnd 6: Sc in each st around.
Rnd 7: Change to cream. Sc in each st around.
Rnd 8: *Lp st in next st, sc in next st* repeat from * to * around.
Rnd 9: Sc in each st around.
Rnd 10: Change to deep forest green. Sc in each st around.
Repeat Rounds 2-10 until the rug reaches your desired length (about 50 inches), ending with a round of sc in deep forest green.
Finishing Touches
When your rug reaches the perfect size, it's time to finish it off beautifully.
- Fasten off: Cut your yarn, leaving a 6-inch tail. Pull the tail through the last loop on your hook and tighten gently.
- Weave in ends: Thread your yarn needle with the tail and weave it carefully through the stitches on the wrong side of the rug. Repeat for all other yarn tails from color changes.
- Steam block: Gently steam block your rug to flatten the edges and set the loops. Use a steam iron held a few inches above the rug (don't press directly on the loops) or a garment steamer. This will help the rug lay flat and give it a polished, professional look.
And there you have it—your very own Whispering Pines Forest Floor Rug! This textured, earthy oval will add warmth and a touch of nature to your living room, bedroom, or reading nook. The combination of colors and loop stitches creates a unique, handmade piece that's as beautiful to look at as it is comfortable underfoot.
We'd love to see your finished creation! Share your photos online with the hashtag #WhisperingPinesRug and inspire fellow crocheters. Happy hooking!


