Whispering Pines Cable Knit Scarf Free Pattern – Forest Floor Elegance
Whispering Pines Cable Knit Scarf Free Pattern – Forest Floor Elegance
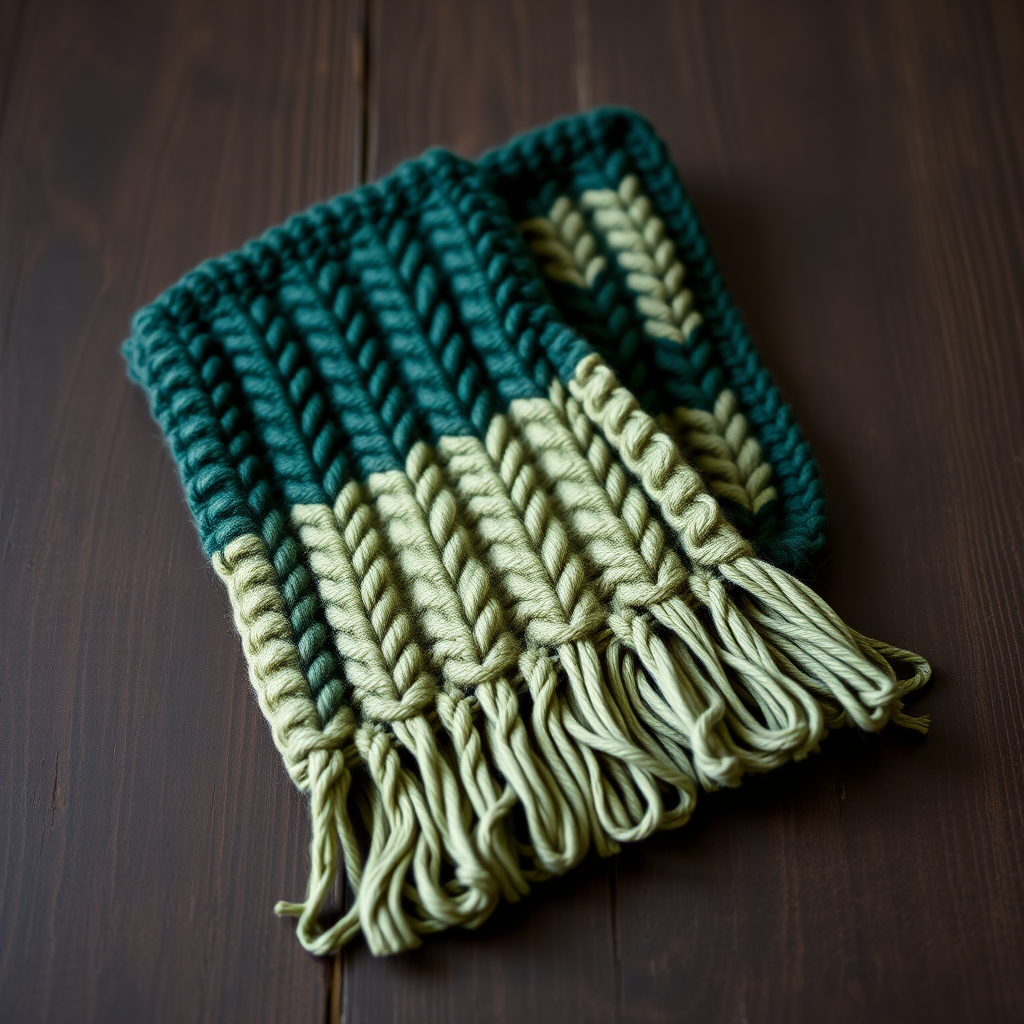
Wrap yourself in the serene beauty of a pine forest with this richly textured cable knit scarf. Featuring a deep emerald and mossy sage color palette, this pattern creates an heirloom-quality accessory that elevates any winter outfit. The intricate braided cables mimic the bark of ancient pine trees, while the ribbed edges provide a polished, cozy finish. Whether you're a seasoned knitter or ready to tackle your first cable project, this free pattern will guide you through every step to create a stunning, forest-inspired scarf.
Materials Needed
Before you begin, gather the following supplies to ensure a smooth knitting experience:
- Yarn: Worsted weight yarn in two colors:
- Color A (Deep Emerald Green) – 350 yards (e.g., Lion Brand Wool-Ease Worsted)
- Color B (Mossy Sage) – 150 yards (e.g., Lion Brand Wool-Ease Worsted)
- Needles: US Size 8 (5.0 mm) knitting needles
- Cable needle
- Tapestry needle for weaving in ends
- Crochet hook (for fringe, optional but helpful)
- Scissors
Gauge
18 stitches and 24 rows = 4 inches in stockinette stitch. Cable pattern gauge: 24 stitches and 28 rows = 4 inches. Adjust needle size if necessary to achieve gauge.
Finished Dimensions
Approximately 8 inches wide and 60 inches long (excluding fringe).
Abbreviations
- CO: cast on
- K: knit
- P: purl
- C4F: slip 2 stitches to cable needle, hold in front, knit 2, knit 2 from cable needle
- C4B: slip 2 stitches to cable needle, hold in back, knit 2, knit 2 from cable needle
- K2tog: knit two together
- P2tog: purl two together
- St(s): stitch(es)
Step-by-Step Instructions
Foundation
CO 40 stitches with Color A (Deep Emerald Green).
Set-up Row (Wrong Side)
P2, *K2, P2; repeat from * to end. This establishes the ribbed border that will frame your cables beautifully.
Main Pattern
Work the following 8-row repeat until the scarf measures 58 inches from the cast-on edge, ending with a wrong-side row (Row 2, 4, 6, or 8).
Row 1 (Right Side): With Color A, K2, P2, K4, P2, K4, P2, K4, P2, K4, P2, K4, P2, K2.
Row 2 (Wrong Side): P2, K2, P4, K2, P4, K2, P4, K2, P4, K2, P4, K2, P2.
Row 3 (Right Side): K2, P2, C4F, P2, C4B, P2, C4F, P2, C4B, P2, C4F, P2, K2.
Row 4: Repeat Row 2.
Row 5: Repeat Row 1.
Row 6: Repeat Row 2.
Row 7: K2, P2, C4B, P2, C4F, P2, C4B, P2, C4F, P2, C4B, P2, K2.
Row 8: Repeat Row 2.
Repeat Rows 1-8 for the pattern. The alternating C4F and C4B twists create the beautiful braided cable effect that mimics pine bark.
Color Transition
After the scarf measures 58 inches from the cast-on edge, switch to Color B (Mossy Sage) for the final 2 inches. Continue working the same 8-row pattern but with Color B. This creates a subtle, elegant ombre effect at the end of the scarf.
Binding Off
Bind off loosely in pattern. To do this, work the stitches as they appear (knit the knit stitches and purl the purl stitches) while binding off. This ensures the ribbed edge remains stretchy and matches the rest of the scarf.
Fringe
Cut 12-inch strands of Color A and Color B. For each fringe group:
- Take 3 strands of Color A and 1 strand of Color B together.
- Fold the group in half to create a loop.
- Using a crochet hook, pull the loop through the edge stitch at the short end of the scarf.
- Pull the loose ends through the loop and tighten gently.
Place fringe every 4 stitches along both short ends of the scarf. Once all fringe is attached, trim the ends evenly to 5 inches for a polished, full look.
Finishing
Weave in all loose ends with a tapestry needle, being careful to hide them within the ribbed edges or cable columns so they're invisible from the right side. Block the scarf gently by wetting it and pinning it to the desired dimensions. This will open up the cables, even out the stitches, and give your scarf that professional, heirloom-quality finish.
Pro Tips for Perfect Cables
- Keep your tension consistent, especially when working the cable rows. Cables naturally pull in, so don't be alarmed if the fabric looks narrower at those rows.
- Use a cable needle that's slightly smaller than your main needles to avoid stretching stitches.
- If you're new to cabling, practice the C4F and C4B on a swatch first to build confidence.
- Count your stitches after each cable row to catch mistakes early—you should always have 40 stitches.
This Whispering Pines Cable Knit Scarf is more than just an accessory—it's a wearable piece of forest serenity. The deep emerald and mossy sage colors evoke the quiet stillness of a winter woodland, while the bold, dimensional cables add rustic elegance to any outfit. Whether you're making it for yourself or as a heartfelt handmade gift, this scarf is sure to become a treasured favorite for years to come.
Happy knitting, and may your stitches always be cozy!


