Whimsical Woodland Sloth Baby Blanket Free Pattern

Whimsical Woodland Sloth Baby Blanket: A Free Tunisian Crochet Pattern
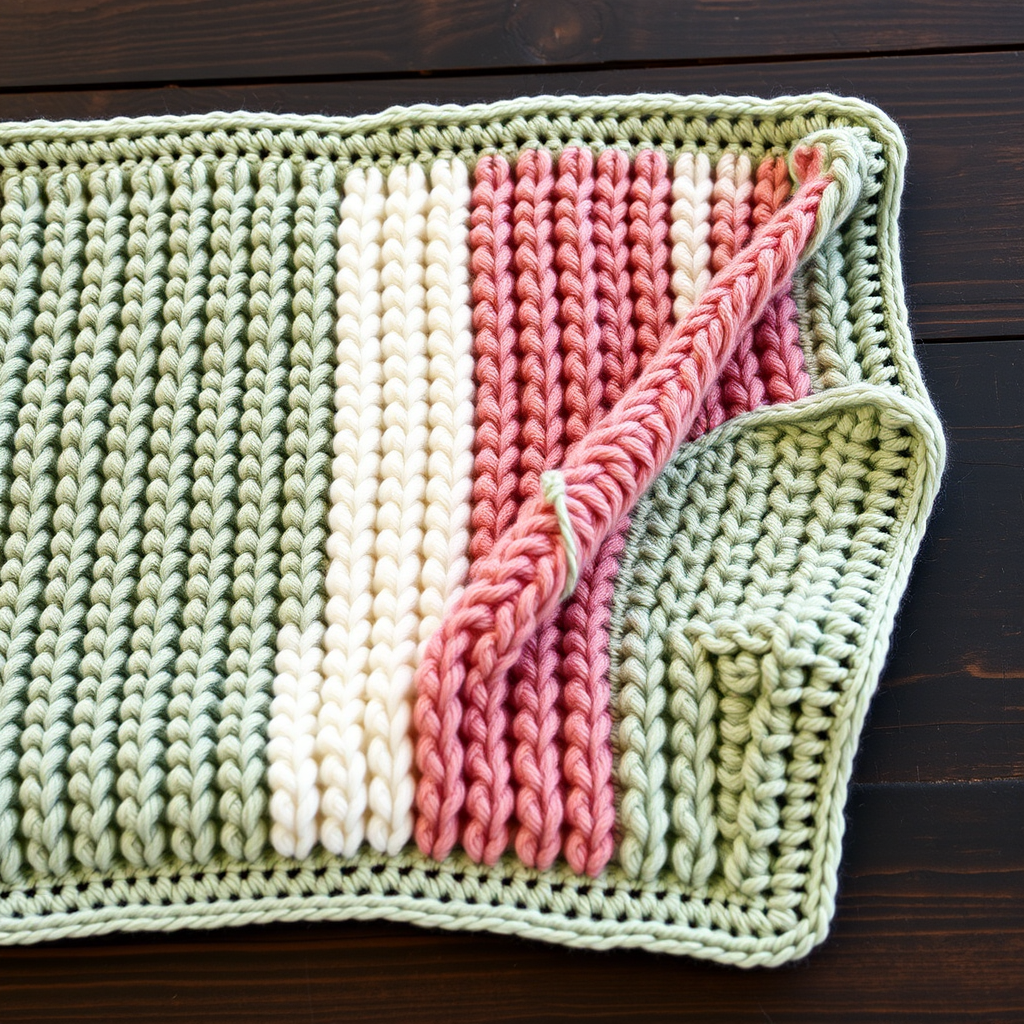
Welcome to a world of gentle ripples and woodland charm! Today, I'm thrilled to share a truly special project: the Whimsical Woodland Sloth Baby Blanket. This isn't just any baby blanket; it's a heirloom-quality piece that masterfully blends the cozy, dense texture of Tunisian crochet with the playful, three-dimensional charm of a hand-crafted sloth appliqué. The soothing, earthy palette of sage green, cream, and warm brown creates a calming, nature-inspired centerpiece for any modern nursery.
This pattern is designed to be approachable for confident beginners ready to try a new technique. We'll break down the Tunisian crochet basics, the rhythmic ripple stitch, and the adorable appliqué step-by-step. The result is a beautifully textured, ultra-soft blanket that your little one will snuggle with for years to come. Let's gather our supplies and get started on this rewarding project!
Materials Needed: Your Crochet Toolkit
Before we dive into the stitches, let's ensure you have everything you need. This project calls for specific tools to achieve the perfect gauge and texture.
- Yarn: Worsted weight (4) cotton or acrylic blend in the following colors (approx. 1200 yds total):
- Sage Green: Approx. 500 yds
- Cream: Approx. 400 yds
- Warm Brown: Approx. 300 yds
- Hooks:
- Tunisian Crochet Hook: Size I/9 (5.5 mm) with a 32-inch cable. This is crucial for holding all your stitches.
- Standard Crochet Hook: Size G/6 (4.0 mm) for the border and the sloth appliqué.
- Other Notions: Yarn needle for weaving in ends and sewing the appliqué, scissors, stitch markers (optional, but helpful for keeping track of increases/decreases), and a small amount of polyester fiberfill for stuffing the sloth's body.
Gauge: 18 Tunisian knit stitches and 10 rows = 4 inches (10 cm) square. It's always a good idea to make a small swatch first to ensure your tension matches, though for a blanket, slight variations won't be a disaster.
Step-by-Step Instructions: Crafting Your Masterpiece
We'll tackle this in three main parts: the blanket body, the border, and the adorable sloth appliqué. Take your time, especially with the Tunisian crochet, and you'll be amazed at what you create.
Part 1: The Blanket Body (Tunisian Crochet)
Tunisian crochet creates a beautiful, woven-like fabric. We'll be using the Tunisian Simple Stitch (Tss) with a ripple pattern. The key is to remember every row has a Forward Pass (picking up loops) and a Return Pass (closing the loops).
Foundation Row: Chain 120 loosely. Now, work the forward pass: Insert your hook into the second chain from the hook, yarn over, and pull up a loop. Leave it on the hook. Repeat this in every chain across. You should now have 120 loops on your hook.
Foundation Return Pass: Yarn over and pull through the first loop on your hook. *Yarn over and pull through two loops on your hook.* Repeat from * to * across until you have only one loop remaining on your hook. This is your working loop for the next row.
Row 1 (Right Side): This is where the magic happens. You'll be working into the vertical bars created by the previous row. Work a Tss in each vertical bar across, but to create the ripple effect, we'll add increases and decreases:
- Work Tss in the next 9 vertical bars.
- Increase: Work 2 Tss in the very next vertical bar (the 10th stitch).
- Work Tss in the next 9 vertical bars.
- Decrease: Skip the next vertical bar (the 20th stitch).
Return Pass: Work this exactly like the foundation return pass: Yarn over, pull through one loop, then *yarn over, pull through two loops* across until one loop remains.
Rows 2–80: Repeat Row 1, but here's the fun part—we'll be creating stripes! Follow this color sequence, repeating every 10 rows:
- Rows 2-10: Sage Green
- Rows 11-20: Cream
- Rows 21-30: Sage Green
- Rows 31-40: Warm Brown
- Rows 41-50: Sage Green
- Rows 51-60: Cream
- Rows 61-70: Sage Green
- Rows 71-80: Warm Brown
Binding Off: After completing Row 80, bind off by working a slip stitch in each vertical bar across the row. This creates a neat, finished edge.
Part 2: The Delicate Picot Border
Now we'll switch to your standard crochet hook (G/6) and cream yarn to give our blanket a beautiful, finished edge.
Round 1: Join the cream yarn in any corner. Work a round of single crochet (sc) evenly around the entire blanket. In each corner, work 3 sc in the same stitch to turn the corner smoothly. Slip stitch to the first sc to join.
Round 2: This round creates the picot edge. *Sc in the next 3 stitches, chain 2, skip 1 stitch.* Repeat from * to * around the entire blanket. At the corners, just continue the pattern as best you can, working the sc's evenly. Slip stitch to join, fasten off, and weave in all ends.
Part 3: The Whimsical Sloth Appliqué
This is the star of the show! We'll make the body, face, and limbs separately, then assemble them. All of this is done with your G/6 hook.
Body (Make 1 with Warm Brown):
- Round 1: Make a magic ring and work 6 sc into it. (6)
- Round 2: Work 2 sc in each stitch around. (12)
- Round 3: *Sc in the next stitch, 2 sc in the next stitch* around. (18)
- Round 4: *Sc in the next 2 stitches, 2 sc in the next stitch* around. (24)
- Rounds 5-8: Sc in each stitch around. (24)
- Round 9: *Sc in the next 2 stitches, sc2tog (single crochet two together)* around. (18)
- Round 10: *Sc in the next stitch, sc2tog* around. (12) Stuff the body lightly with fiberfill.
- Round 11: Sc2tog around. (6)
- Fasten off, leaving a long tail for sewing. Weave the tail through the front loops of the remaining 6 stitches and pull tight to close the hole.
Face (Make 1 with Cream):
- Round 1: Make a magic ring and work 6 sc into it. (6)
- Round 2: Work 2 sc in each stitch around. (12)
- Round 3: *Sc in the next stitch, 2 sc in the next stitch* around. (18)
- Fasten off, leaving a long tail for sewing.
Arms and Legs (Make 4 with Warm Brown):
- Foundation: Chain 8.
- Row 1: Sc in the 2nd chain from the hook and in each chain across. (7)
- Rows 2-6: Chain 1, turn, sc in each stitch across. (7)
- Fasten off, leaving a long tail for sewing.
Assembly & Details:
- Face: Sew the cream face onto the brown body, positioning it slightly off-center for a whimsical look.
- Eyes: With black yarn, embroider two French knots, or sew on safety eyes if the blanket is for an older child. Place them on the face.
- Nose: With dark brown yarn, embroider a small oval at the center of the face, just below the eyes.
- Limbs: Sew the arms and legs to the sides of the body at slight angles, making the sloth look relaxed and huggable.
- Final Placement: Center the completed sloth appliqué on the blanket, about 6 inches from the top edge. Sew it on securely using the tails. Weave in all remaining ends.
And there you have it! Your very own Whimsical Woodland Sloth Baby Blanket. This project is a labor of love, but the result is a stunning, textured, and utterly unique gift that will be treasured. The combination of the rhythmic Tunisian stitch and the adorable, puffy sloth makes this a true showstopper. Happy crocheting!