Whimsical Woodland Acorn Pacifier Clip Free Pattern
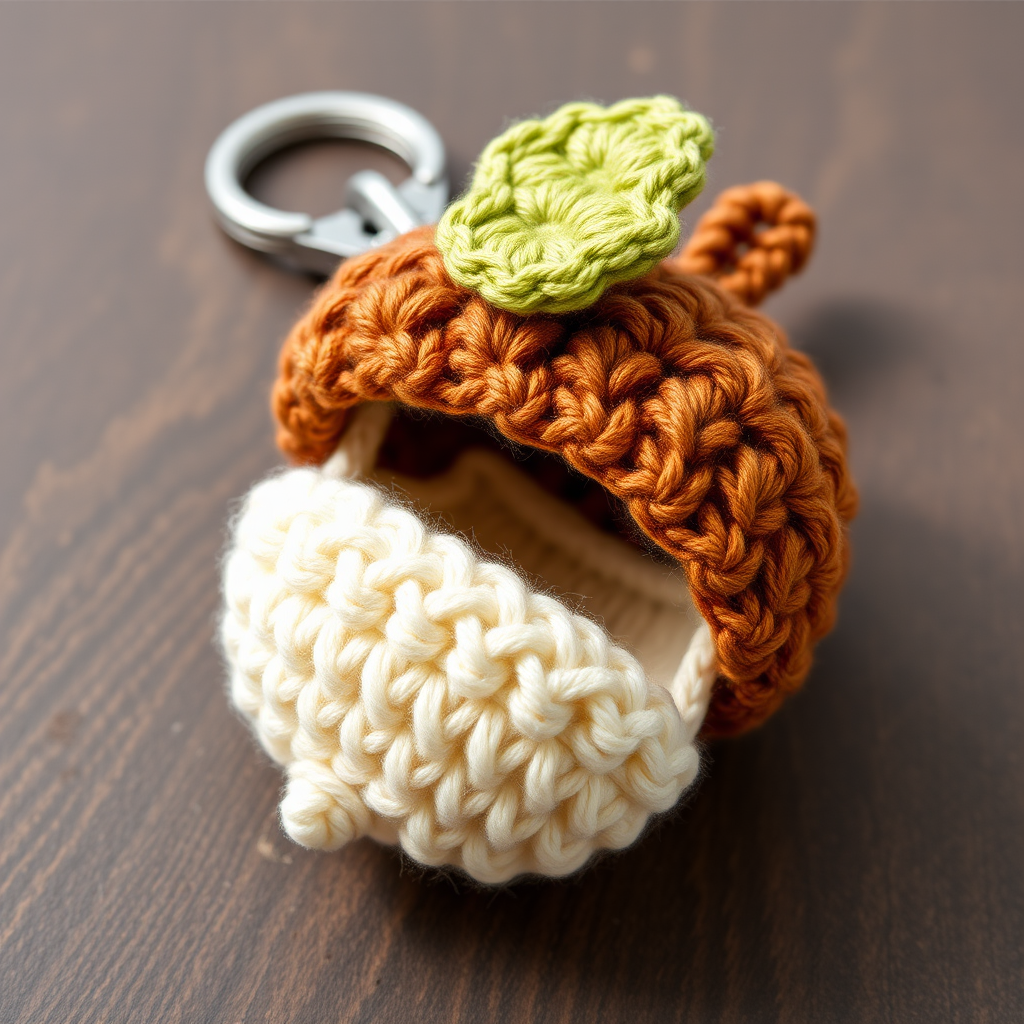
Whimsical Woodland Acorn Pacifier Clip: A Quick & Adorable Crochet Project
Are you looking for a quick, practical, and utterly charming gift for a new baby? This Whimsical Woodland Acorn Pacifier Clip is the perfect project! Not only is it a fast and satisfying make, but it also solves the age-old problem of dropped pacifiers. This cute, woodland-inspired accessory keeps the soother clean and within reach, whether you're on a stroller walk or enjoying playtime at home. Using soft DK yarn and a simple clip, you can create a beautiful, handmade gift that any parent will adore. Let's get started!
Materials Needed
Before you begin, gather your supplies. This project is wonderfully portable and requires very little yarn, making it a great stash-buster.
- Yarn: Light/DK weight yarn in three colors: brown (for the acorn cap), cream (for the acorn body), and green (for the leaf). A great example is Lion Brand Coboo, which is soft and durable.
- Crochet Hook: F/5 (3.75 mm) crochet hook. This smaller hook size helps create a tight, firm fabric that holds its shape well.
- Pacifier Clip: One 2.5-inch (6 cm) plastic pacifier clip with a ring or loop at one end. Ensure it has a sturdy clasp for the pacifier.
- Other Notions: Yarn needle for sewing and weaving in ends, scissors, and a stitch marker (optional, but helpful for keeping track of rounds).
- Fiberfill: A small amount of polyester stuffing to give the acorn body its plump shape.
Step-by-Step Instructions
This pattern is worked in continuous rounds (spirals) unless otherwise stated. The gauge is not critical for this project, but you should aim for a tight, firm fabric so the stuffing doesn't show through. Let's break it down into simple steps.
Abbreviations
- ch = chain
- sc = single crochet
- sl st = slip stitch
- inc = increase (2 sc in the same stitch)
- dec = decrease (sc 2 stitches together)
- mr = magic ring
- hdc = half double crochet
- dc = double crochet
Part 1: The Acorn Body (Cream Yarn)
We'll start with the plump, rounded base of the acorn. Work this in a continuous spiral, using a stitch marker to keep track of your rounds.
- Round 1: Create a magic ring (mr) and work 6 single crochets (sc) into the ring. Pull the tail to close the ring tightly. (6 stitches)
- Round 2: Increase in each stitch around. This means working 2 sc into every stitch from the previous round. (12 stitches)
- Round 3: *Sc in the next stitch, inc* — repeat this sequence 6 times. (18 stitches)
- Round 4: *Sc in the next 2 stitches, inc* — repeat this sequence 6 times. (24 stitches)
- Rounds 5-7: Sc in each stitch around for three rounds. This creates the straight sides of the acorn body. (24 stitches)
- Round 8: *Sc in the next 2 stitches, dec* — repeat this sequence 6 times. To decrease, insert your hook into the next stitch, yarn over and pull up a loop, insert into the following stitch, yarn over and pull up a loop, then yarn over and pull through all three loops on your hook. (18 stitches)
- Round 9: *Sc in the next stitch, dec* — repeat this sequence 6 times. (12 stitches)
- Fasten off: Cut your yarn, leaving a long tail (about 12 inches) for sewing. Now, stuff the acorn body firmly with fiberfill. Make sure it's plump but not overly stretched.
Part 2: The Acorn Cap (Brown Yarn)
This piece creates the textured top of the acorn. The ribbed effect is achieved by working in the back loops only on the final round.
- Round 1: Create a magic ring (mr) and work 6 sc into the ring. (6 stitches)
- Round 2: Increase in each stitch around. (12 stitches)
- Round 3: *Sc in the next stitch, inc* — repeat 6 times. (18 stitches)
- Round 4: *Sc in the next 2 stitches, inc* — repeat 6 times. (24 stitches)
- Rounds 5-6: Sc in each stitch around for two rounds. (24 stitches)
- Round 7: Working in the back loops only (the loop furthest from you), sc in each stitch around. This creates a neat, ribbed edge. (24 stitches)
- Fasten off: Cut the yarn, leaving a long tail for sewing.
Assembly Tip: Place the cap over the top (the wider, closed end) of the stuffed acorn body. It should fit snugly. Using the long tail, sew the cap to the body. Weave your needle through the back loops of the cap's last round and the corresponding stitches on the body. This creates a nearly invisible seam.
Part 3: The Leaf (Green Yarn)
This simple leaf adds the perfect woodland touch. It's worked flat in rows.
- Row 1: Chain (ch) 8.
- Row 2: Starting in the 2nd ch from your hook, work the following: sc, hdc, dc, dc, dc, hdc, sc. You should now be at the end of the chain.
- Row 3: Ch 1 and turn your work. Now, work back along the other side of the original chain. Work the exact same sequence: sc, hdc, dc, dc, dc, hdc, sc. This creates an oval, leaf-like shape.
- Fasten off: Cut the yarn, leaving a long tail for sewing.
Assembly Tip: Position the leaf on the top of the acorn cap. Sew it in place using the long tail, making small, neat stitches along the center of the leaf.
Part 4: Final Assembly
Now for the final step to make this a functional accessory.
- Attach the Clip: Take your plastic pacifier clip. Insert the ring or loop at the end of the clip through the top of the acorn cap, right between the leaf and the cap.
- Secure the Clip: Using the brown yarn tail from the acorn cap, firmly sew the ring of the clip to the cap. Make several passes with your needle and thread to ensure it is extremely secure, as this will be pulled on.
- Weave in Ends: Use your yarn needle to carefully weave in all remaining loose ends on the inside of the acorn to keep the outside looking clean and professional.
- Attach the Pacifier: Clip the pacifier to the clasp on the other end of the clip. Your Whimsical Woodland Acorn Pacifier Clip is now complete and ready for action!
This project is a joy to make and give. It's a wonderful way to use up small amounts of yarn and create something both beautiful and useful. Happy crocheting!



