Sun-Kissed Watermelon Slice Hat Free Pattern – Crocheted Summer Fruit Cap
Sun-Kissed Watermelon Slice Hat Free Pattern – Crocheted Summer Fruit Cap
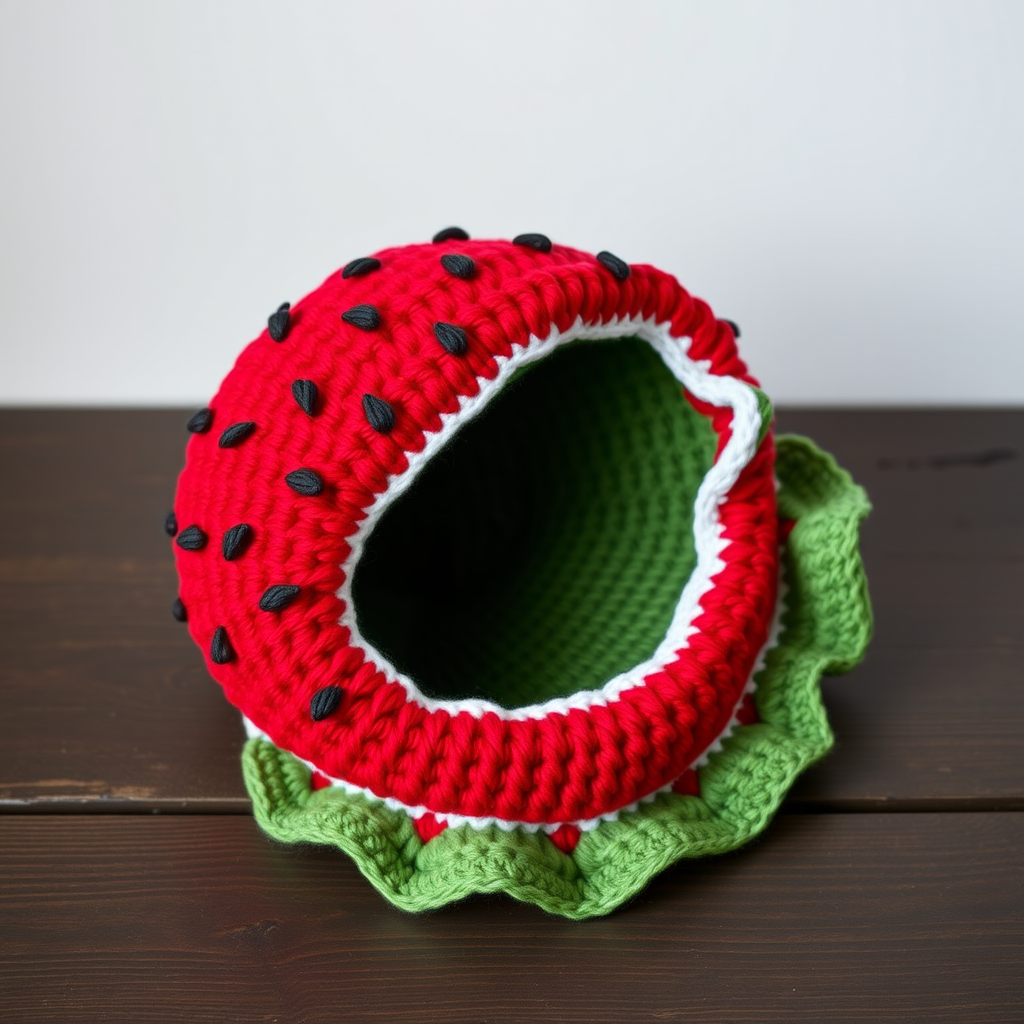
Turn your head into a juicy slice of summer with this adorable crocheted watermelon hat, complete with a textured rind and playful seed details. It's a fresh, fruity accessory that's as fun to make as it is to wear. Whether you're heading to a beach party, a summer festival, or just want to add a splash of whimsy to your day, this hat is guaranteed to bring smiles. Best of all, this pattern is beginner-friendly, uses simple stitches, and works up quickly with worsted weight cotton yarn. Let's dive in and create something deliciously fun!
Materials Needed
Before you begin, gather the following supplies. All items are readily available at your local craft store or online.
- Yarn: Worsted weight cotton yarn in four colors:
- Red (main crown) – approx. 150-180 yards
- White (rind stripe) – approx. 20-30 yards
- Green (rind and brim) – approx. 80-100 yards
- Black or dark brown (seeds) – small amount for embroidery
- Hook: 5.0 mm (H-8) crochet hook
- Notions: Yarn needle for weaving in ends and embroidering seeds, stitch marker (or a scrap of contrasting yarn), scissors
- Gauge: 16 sc x 18 rows = 4 x 4 inches (10 x 10 cm). Gauge is important for fit; check your swatch before starting.
Step-by-Step Instructions
This hat is worked in a continuous spiral from the top down, so you won't need to join rounds. Use a stitch marker to keep track of your rounds. The pattern includes detailed stitch counts to help you stay on track.
Abbreviations
- ch = chain
- sc = single crochet
- hdc = half double crochet
- dc = double crochet
- sl st = slip stitch
- rnd = round
- st(s) = stitch(es)
- inc = increase (2 sc in same st)
- dec = decrease (sc 2 together)
Finished Size: Fits average adult head (approx. 21-23 inches circumference). To adjust size, change hook size (smaller hook for smaller head, larger hook for bigger head) or adjust the number of increase rounds.
Crochet the Crown (Red Yarn)
Start with the red yarn. This section forms the top of the hat and the upper sides.
- Rnd 1: Make a magic ring, ch 1, work 6 sc into ring. (6 sts)
- Rnd 2: Inc in each st around. (12 sts)
- Rnd 3: *Sc in next st, inc* repeat around. (18 sts)
- Rnd 4: *Sc in next 2 sts, inc* repeat around. (24 sts)
- Rnd 5: *Sc in next 3 sts, inc* repeat around. (30 sts)
- Rnd 6: *Sc in next 4 sts, inc* repeat around. (36 sts)
- Rnd 7: *Sc in next 5 sts, inc* repeat around. (42 sts)
- Rnd 8: *Sc in next 6 sts, inc* repeat around. (48 sts)
- Rnd 9: *Sc in next 7 sts, inc* repeat around. (54 sts)
- Rnd 10: *Sc in next 8 sts, inc* repeat around. (60 sts)
- Rnd 11: *Sc in next 9 sts, inc* repeat around. (66 sts)
- Rnd 12: *Sc in next 10 sts, inc* repeat around. (72 sts)
- Rnd 13-20: Sc in each st around. (72 sts) – This forms the crown and upper sides. Do not increase; just work even.
Add the White Rind Stripe
Switch to white yarn. This creates the distinct white layer between the red flesh and green rind.
- Rnd 21: Switch to white yarn. Sc in each st around. (72 sts)
- Rnd 22: Sc in each st around. (72 sts)
Crochet the Green Rind
Switch to green yarn. This section forms the main rind of the watermelon.
- Rnd 23: Switch to green yarn. Sc in each st around. (72 sts)
- Rnd 24: Sc in each st around. (72 sts)
- Rnd 25: Sc in each st around. (72 sts)
Shape the Brim (Green Yarn)
Now we'll flare out the brim to mimic the wide, wavy edge of a watermelon slice. Continue with green yarn.
- Rnd 26: *Sc in next 11 sts, inc* repeat around. (78 sts)
- Rnd 27: *Sc in next 12 sts, inc* repeat around. (84 sts)
- Rnd 28: *Sc in next 13 sts, inc* repeat around. (90 sts)
- Rnd 29: Sc in each st around. (90 sts)
- Rnd 30: *Sc in next 14 sts, inc* repeat around. (96 sts)
- Rnd 31: Sc in each st around. (96 sts)
- Rnd 32: *Sc in next 15 sts, inc* repeat around. (102 sts)
- Rnd 33: Sc in each st around. (102 sts)
- Rnd 34: *Sc in next 16 sts, inc* repeat around. (108 sts)
- Rnd 35: Sc in each st around. (108 sts)
- Rnd 36: *Sc in next 17 sts, inc* repeat around. (114 sts)
- Rnd 37: Sc in each st around. (114 sts)
- Rnd 38: Sl st in each st around. Fasten off and weave in ends.
Embroider the Seeds (Black or Dark Brown Yarn)
Now for the fun part – adding the seeds! Using a yarn needle and your black or dark brown yarn, embroider small 'V' shapes or short straight stitches randomly scattered on the red crown area (between Rnds 5-18). Make about 10-12 seeds, each about 1/2 inch long. To make a 'V' shape, bring the needle up through the fabric, then down a short distance away, creating a diagonal line. Repeat to form the other side of the 'V'. Keep the stitches loose enough to lie flat but secure enough not to pull out.
Finishing Touches
- Weave in all ends securely using your yarn needle. Make sure to weave them in on the inside of the hat so they're hidden.
- Fold up the brim slightly if desired for a more defined watermelon look. The brim should naturally curl a bit due to the increases.
- Optionally, add a small green leaf or curly vine on top using green yarn for extra charm. To make a simple leaf, chain 6, then work 1 sc in the second ch from hook, 1 hdc in the next ch, 1 dc in the next ch, 1 hdc in the next ch, 1 sc in the last ch. Fasten off and sew to the top of the hat.
And there you have it – your very own Sun-Kissed Watermelon Slice Hat! This hat is perfect for summer photos, themed parties, or just brightening up a cloudy day. The soft cotton yarn makes it breathable and comfortable, while the playful design is sure to be a conversation starter. Happy crocheting!


