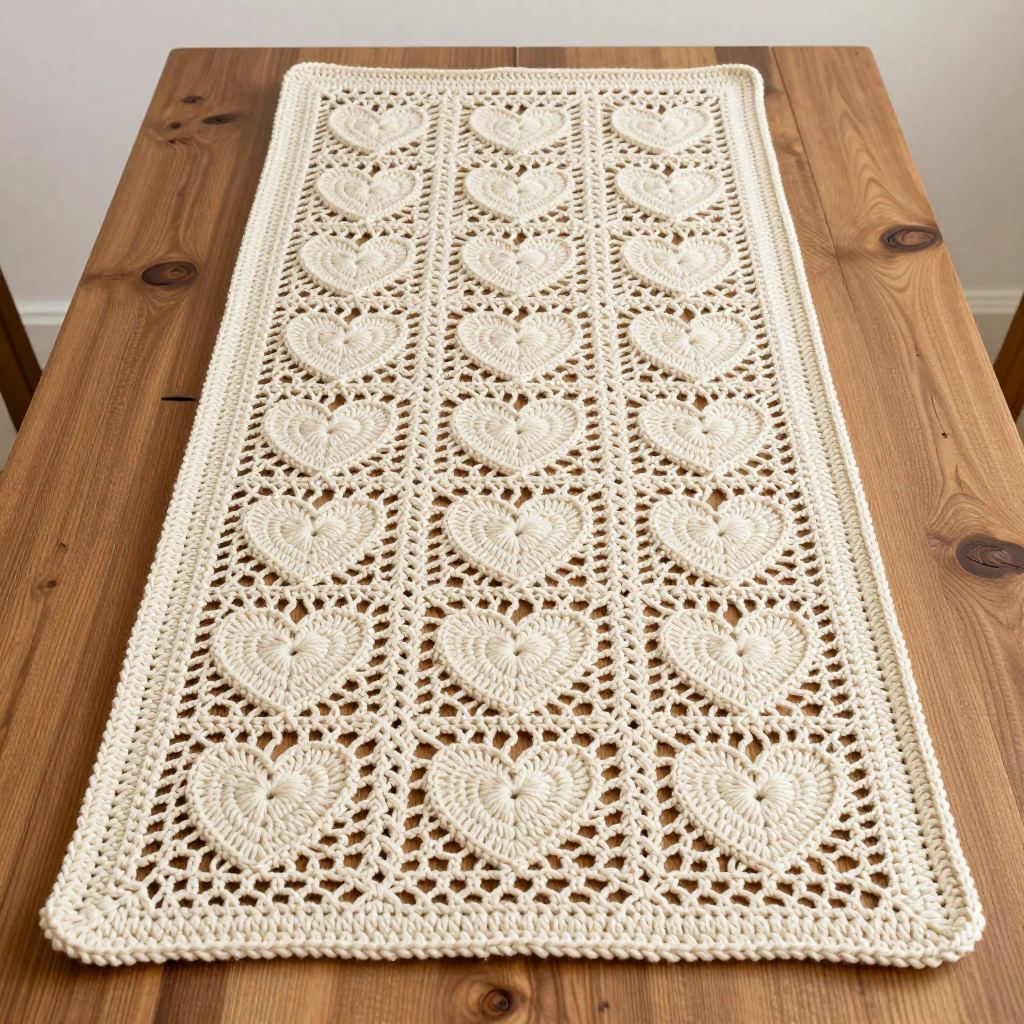
Meadow Whisper Table Runner Free Pattern

Meadow Whisper Table Runner Free Crochet Pattern
Imagine the gentle sway of wildflowers in a summer breeze, captured in delicate thread and transformed into a stunning centerpiece for your dining table. The Meadow Whisper Table Runner is an heirloom-quality crochet project that brings vintage charm and airy elegance to any home. This intricate lace pattern, worked in fine cotton thread, creates a repeating floral motif with shell clusters and chain loops that will impress your guests and become a cherished piece for years to come.
Whether you're an experienced crocheter looking for a rewarding project or a confident beginner ready to stretch your skills, this free pattern offers clear, step-by-step instructions to guide you through every stitch. The result is a beautiful, rectangular runner measuring approximately 36 inches long and 12 inches wide, with gently scalloped edges that lie flat and graceful on any table surface.
Materials Needed
Before you begin your crochet journey with the Meadow Whisper Table Runner, gather these essential supplies:
- Yarn: Size 10 crochet cotton thread in ecru (approximately 400 yards). This fine thread creates the delicate, lace-like texture that defines this pattern. The ecru color adds a subtle, vintage warmth that complements any dining room decor.
- Crochet Hook: Steel crochet hook size 7 (1.65 mm). This small hook is essential for working with fine thread and achieving the proper tension for a crisp, defined lace pattern.
- Scissors: A sharp pair for cutting thread cleanly.
- Tapestry Needle: For weaving in ends and finishing your project neatly.
Gauge Information: First 4 rows = 2 inches wide; 6 rows of pattern = 1 inch. While gauge is important for achieving the exact finished dimensions, this pattern is forgiving—even if your tension varies slightly, you'll still create a beautiful runner.
Step-by-Step Instructions
Follow these detailed instructions carefully, and you'll be amazed at the beautiful lace creation that emerges from your hook. Take your time, count your stitches, and enjoy the meditative rhythm of this elegant pattern.
Getting Started: The Foundation Chain
Begin by making a slip knot and chaining 142 stitches loosely. This loose foundation is crucial—it ensures your runner will lie flat and not pucker at the edges. If your chains tend to be tight, consider using a hook one size larger for this initial chain, then switch to your size 7 hook for the rest of the pattern.
Row 1: Establishing the Base
In the 4th chain from your hook, work a double crochet (dc). This chain-3 counts as your first double crochet. Now, *chain 2, skip 2 chains, work 1 double crochet in the next chain*. Repeat from * across the entire row. When you finish, you should have 47 double crochet stitches total, including your starting chain-3.
Pro Tip: Count your stitches at the end of this row. Getting the foundation right makes every subsequent row easier and more accurate.
Row 2: Creating the First Shell Clusters
Chain 3 (this counts as your first double crochet), then turn your work. Now, working into the chain-2 spaces from Row 1: *Work 2 double crochet into the chain-2 space, chain 1, work 2 more double crochet into the same space. Skip the next double crochet stitch*. Repeat from * across the row, ending with a double crochet in the top of the turning chain from the previous row.
This row creates beautiful little shell clusters that form the foundation of your floral pattern. The chain-1 space in the center of each shell will be important in the next row.
Row 3: Building the V-Stitch Pattern
Chain 4 (this counts as a double crochet plus a chain-1 space), then turn. *Skip the next 2 double crochet stitches, work 1 double crochet into the next chain-1 space (the center of the shell), chain 3, work another double crochet into the same chain-1 space, chain 1*. Repeat from * across the row, ending with a double crochet in the top of the turning chain.
You're now creating the V-stitch pattern with chain-3 loops that will become the airy, open spaces characteristic of this lace design. The chain-3 loops are where you'll work your next row of shells.
Row 4: Filling the Loops
Chain 3 (counts as first double crochet), then turn. *Work 3 double crochet into the chain-3 space, chain 2*. Repeat from * across the row, ending with a double crochet in the top of the turning chain.
This row fills your chain-3 loops with clusters of three double crochet, separated by chain-2 spaces. These will become the base for your next set of V-stitches.
Row 5: Alternating the Pattern
Chain 4 (counts as double crochet plus chain-1), then turn. *Skip the next 3 double crochet stitches, work 1 double crochet into the chain-2 space, chain 3, work another double crochet into the same chain-2 space, chain 1*. Repeat from * across the row, ending with a double crochet in the top of the turning chain.
Notice how this row mirrors Row 3 but is offset by the alternating pattern. This creates the beautiful, rhythmic repetition that gives the Meadow Whisper its distinctive floral appearance.
Rows 6-45: The Main Body
Now you'll alternate Rows 4 and 5 for the next 40 rows. This is the heart of the pattern—the repetitive rhythm that builds the length of your runner. Here's a quick reference:
- Odd rows (7, 9, 11, etc.): Repeat Row 5
- Even rows (6, 8, 10, etc.): Repeat Row 4
Helpful Hint: Place a stitch marker at the beginning of each row to help you keep track of your place, especially if you need to set your project down and return to it later.
Row 46: Preparing for the Finish
Chain 3 (counts as first double crochet), then turn. *Work 3 double crochet into the chain-3 space, chain 1*. Repeat from * across the row, ending with a double crochet in the top of the turning chain.
This row is slightly different from Row 4—you're using a chain-1 instead of a chain-2 between your clusters. This subtle change begins to tighten the pattern and prepare for a clean, neat edge.
Row 47: The Final Pattern Row
Chain 3 (counts as first double crochet), then turn. *Work 1 double crochet in the next double crochet, chain 2, skip 2 double crochet*. Repeat from * across the row, ending with a double crochet in the top of the turning chain.
This creates a lovely open mesh row that mirrors your foundation chain, giving your runner a balanced, symmetrical appearance. Fasten off your yarn and weave in all loose ends with your tapestry needle.
Adding the Scalloped Edging
Now for the finishing touch that transforms your runner from beautiful to breathtaking. Attach your thread to any corner of the runner. *Work 1 single crochet in each double crochet across the edge, work 3 single crochet in each corner*. Repeat from * around the entire perimeter of the runner.
When you return to your starting point, join with a slip stitch to the first single crochet. Fasten off and weave in all ends carefully.
The single crochet edging creates a subtle, scalloped effect at the corners and gives your runner a clean, professional finish. The gentle curves at each corner echo the floral motifs throughout the body of the piece.
Finishing Touches and Care Instructions
Once your Meadow Whisper Table Runner is complete, gently block it to open up the lace pattern and ensure it lies perfectly flat. To block, wet the runner with cool water, gently squeeze out excess moisture (never wring), and lay it flat on a towel. Gently stretch it to the desired dimensions—approximately 36 inches by 12 inches—and pin the edges if needed. Allow it to dry completely before removing the pins.
To care for your finished heirloom piece, hand wash in cool water with a mild detergent and lay flat to dry. Avoid wringing or twisting, as this can distort the delicate lace pattern. With proper care, your Meadow Whisper Table Runner will grace your table for generations to come.
This pattern is perfect for special occasions, everyday elegance, or as a thoughtful handmade gift for a wedding, housewarming, or anniversary. The timeless beauty of this lace design never goes out of style, and the satisfaction of creating such an intricate piece with your own hands is truly unmatched.
Happy crocheting, and enjoy watching your Meadow Whisper come to life, one beautiful stitch at a time!