Lullaby Lagoon Ruffle Coat Free Pattern – Knitted Baby Jacket with Cascading Waves
Introducing the Lullaby Lagoon Ruffle Coat: A Knitted Heirloom for Your Little One
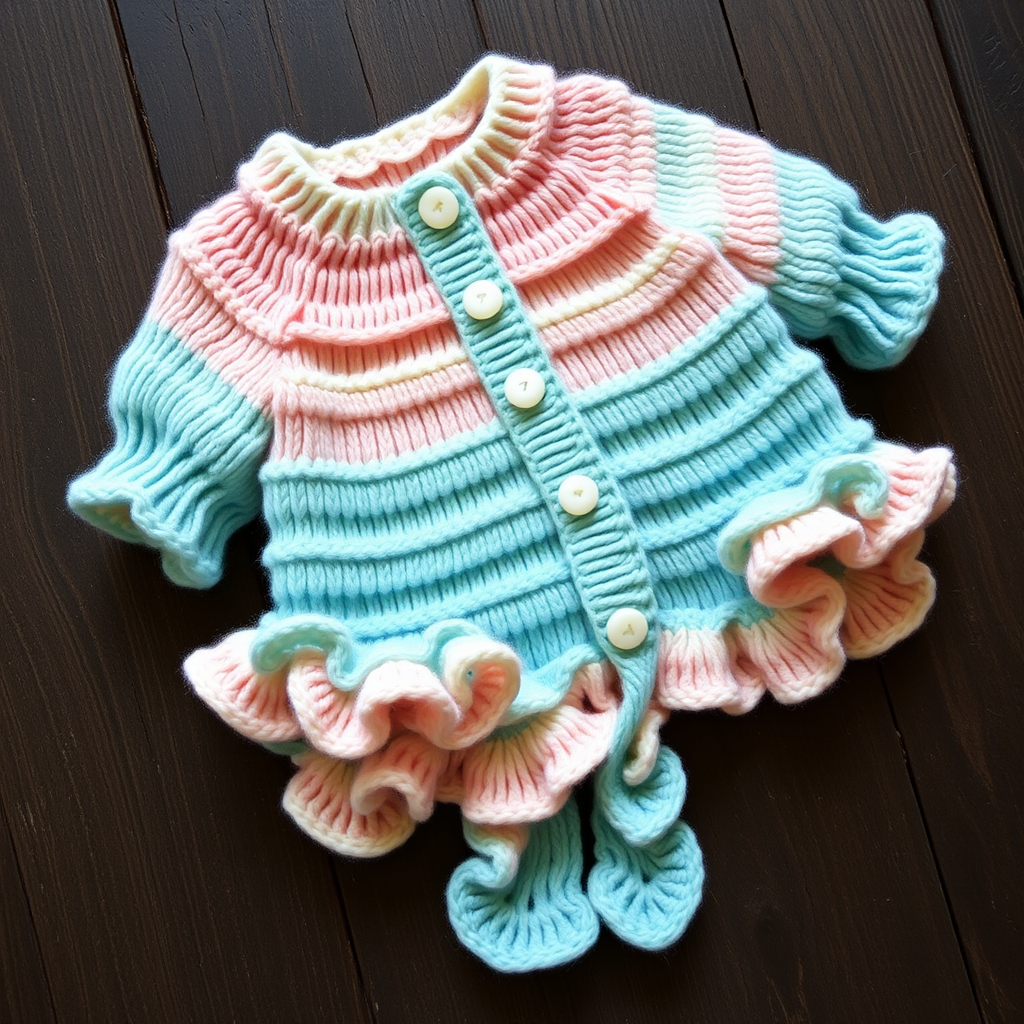
Imagine wrapping your precious baby in a garment that feels like a gentle ocean breeze—soft, serene, and utterly dreamy. The Lullaby Lagoon Ruffle Coat is exactly that: a knitted baby jacket featuring a cascading wave of ruffles in a tranquil gradient of aqua, shell pink, and cream. This isn't just a cardigan; it's a cherished heirloom piece designed to be passed down, evoking the soothing rhythm of a lullaby by the sea.
With its smooth stockinette body, puffed sleeves, and delicate ruffles that flare along the bottom, plackets, and collar, this coat is a showstopper. The classic cardigan silhouette is elevated by three small pearl buttons, creating a timeless look that's perfect for photos, christenings, or simply cozy everyday wear. Whether you're a seasoned knitter or a confident beginner ready for a rewarding project, this free pattern will guide you through every step to create a truly special piece.
Materials Needed for Your Knitted Baby Jacket
Before you begin, gather these supplies to ensure a smooth knitting experience. The pattern calls for a soft, breathable cotton blend that's gentle on baby's skin.
Yarn
- DK weight cotton blend (e.g., Lion Brand Coboo) in the following colors:
- Aqua – 1 (1, 2) skeins
- Shell Pink – 1 (1, 2) skeins
- Cream – 1 (1, 2) skeins
Needles & Notions
- US 6 (4.0 mm) circular needles, 24-inch length (for the body)
- US 6 (4.0 mm) double-pointed needles (for sleeves)
- Stitch holders or waste yarn
- Stitch markers
- Tapestry needle for weaving in ends
- Three small pearl buttons (approx. 1/2 inch diameter)
Gauge
20 stitches and 28 rows = 4 inches in stockinette stitch, blocked. Always knit a gauge swatch to ensure your finished measurements match the pattern.
Step-by-Step Instructions: Knitting the Lullaby Lagoon Ruffle Coat
This pattern is written for sizes 0-3 (3-6, 6-12) months, with finished chest measurements of 16 (18, 20) inches. Follow the numbers in parentheses for your chosen size throughout.
Abbreviations
CO = cast on, K = knit, P = purl, K2tog = knit two together, Kfb = knit front and back (increase), St st = stockinette stitch (K on right side, P on wrong side), RS = right side, WS = wrong side, PM = place marker, SM = slip marker.
Body (Worked in One Piece to Armholes)
- With Aqua, CO 120 (132, 144) sts. Work in St st for 2 inches, ending with a WS row.
- Switch to Shell Pink, work 2 rows St st.
- Switch to Cream, work 2 rows St st.
- Continue alternating 2-row stripes of Aqua, Shell Pink, and Cream until the piece measures 6 (7, 8) inches from the CO edge, ending with a WS row.
Divide for Armholes
- Next row (RS): K30 (33, 36) sts for the right front, bind off 6 sts, K48 (54, 60) sts for the back, bind off 6 sts, K30 (33, 36) sts for the left front.
- Place each section on separate stitch holders or waste yarn.
Right Front
- Work on the 30 (33, 36) sts for the right front. Continue the stripe pattern (2 rows each color).
- Decrease for armhole: Decrease 1 st at the armhole edge every RS row 3 times by working K2tog at the armhole edge. You will have 27 (30, 33) sts.
- Work even (no decreases) until the armhole measures 3 (3.5, 4) inches, ending at the neck edge (the edge closest to the center front).
- Shape neck: Bind off 5 (6, 7) sts at the neck edge once. Then, bind off 2 sts at the neck edge every RS row 2 times.
- Decrease 1 st at the neck edge every RS row 2 times (by working K2tog). You will have 18 (20, 22) sts remaining.
- Work even until the armhole measures 4 (4.5, 5) inches. Bind off all sts.
Back
- Work on the 48 (54, 60) sts for the back. Continue the stripe pattern.
- Decrease for armholes: Decrease 1 st at each armhole edge every RS row 3 times. You will have 42 (48, 54) sts.
- Work even until the armhole measures 4 (4.5, 5) inches. Bind off all sts.
Left Front
- Work as for the right front, mirroring all decreases (decrease at the armhole edge on the left side and at the neck edge on the right side of the piece).
Sleeves (Make 2)
- With Aqua, CO 36 (40, 44) sts. Work in St st in the stripe pattern (2 rows each color) for 2 inches.
- Increase row (RS): K1, Kfb, knit to last 2 sts, Kfb, K1. Repeat this increase row every 4th row until you have 48 (54, 60) sts.
- Work even until the sleeve measures 5 (6, 7) inches from the CO edge. Bind off all sts.
Ruffle Edging (Bottom Edge and Front Plackets)
- Bottom edge: With RS facing and using Cream, pick up and knit 120 (132, 144) sts along the bottom edge of the body.
- Work 4 rows St st.
- Next row (RS): Kfb into every stitch across the row. You will now have 240 (264, 288) sts.
- Work 4 rows St st. Bind off loosely.
- Front plackets: With RS facing and using Cream, pick up and knit sts evenly along each front placket (the vertical edges). Work the same ruffle pattern: 4 rows St st, then Kfb into every stitch, then 4 rows St st, and bind off loosely.
Collar Ruffle
- With Cream, pick up and knit 40 (44, 48) sts around the neck edge.
- Work 4 rows St st.
- Next row: Kfb into every stitch. You will have 80 (88, 96) sts.
- Work 4 rows St st. Bind off loosely.
Finishing Touches
- Sew the shoulder seams using a tapestry needle and matching yarn.
- Sew the sleeve caps into the armholes, gathering slightly at the top to fit. Sew the sleeve seams.
- Attach 3 small pearl buttons on the left front placket (for a girl's garment) or right front placket (for a boy's), using the holes in the ruffle as natural buttonholes.
- Weave in all loose ends carefully.
- Block gently to shape, laying flat to dry. This will help the ruffles lie beautifully and even out your stitches.
Your Lullaby Lagoon Ruffle Coat is now complete! This knitted baby jacket is more than just clothing—it's a work of art. The cascading ruffles mimic gentle waves, and the soft color palette creates a calming, dreamy aesthetic. Whether you gift it or keep it for your own little one, this heirloom piece is sure to be treasured for years to come. Happy knitting!


