Harvest Glow Pixel Pumpkin Free Pattern – Textured Knitted Autumn Decor
Harvest Glow Pixel Pumpkin Free Pattern – Textured Knitted Autumn Decor
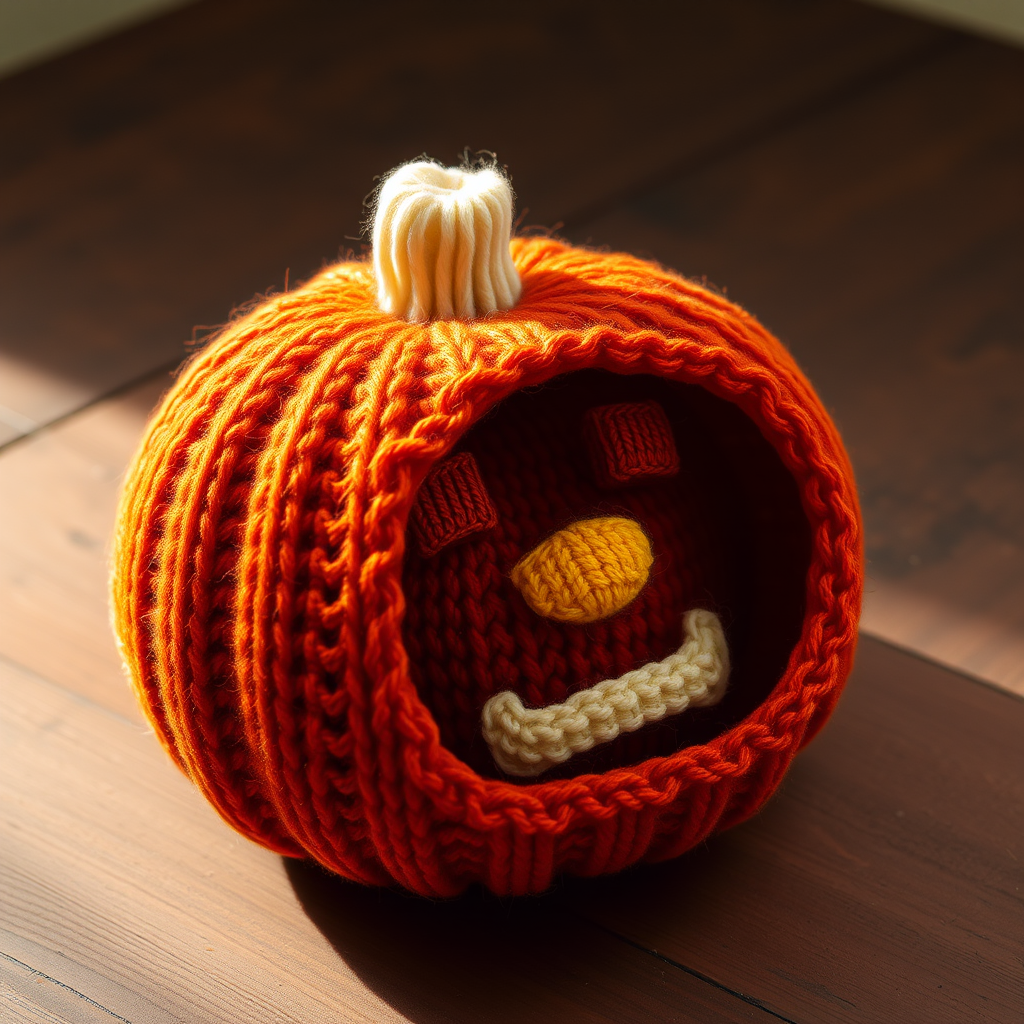
Bring a cozy, modern twist to your fall decor with this charming pixel-art pumpkin! Knitted in warm autumnal hues with a soft, textured surface, this plump little pumpkin is perfect for mantels, tablescapes, or as a heartfelt handmade gift. The pixelated face—complete with rust eyes, a golden nose, and a cream smile—adds a playful, contemporary touch to traditional harvest decor. Best of all, this pattern is beginner-friendly, using simple stockinette stitch and an easy duplicate-stitch technique for the face. Let's get started!
Materials Needed
Before you begin, gather the following supplies:
- Yarn: Worsted weight yarn in 4 colors:
- Burnt Orange (MC) – approx. 200g
- Rust (C1) – approx. 50g
- Golden Yellow (C2) – approx. 50g
- Cream (C3) – approx. 50g
- Needles: US 7 (4.5mm) knitting needles
- Notions: Tapestry needle, stitch markers, polyester fiberfill for stuffing
- Gauge: 20 stitches x 26 rows = 4 inches in stockinette stitch (important for correct sizing!)
Step-by-Step Instructions
Part 1: Knitting the Pumpkin Body
This pumpkin is knitted flat in one piece using stockinette stitch, then seamed and stuffed. The base is a simple rectangle that you'll shape at the top.
- Cast on: With MC (Burnt Orange), cast on 20 stitches.
- Knit the body: Work in stockinette stitch (knit on right side, purl on wrong side) for 26 rows. This creates the main pumpkin body. Tip: Place a stitch marker on the right side so you can easily identify it later.
Part 2: Shaping the Top
Now we'll decrease to create the rounded top of the pumpkin. Follow these rows carefully:
- Row 27 (RS): K2tog, knit to last 2 stitches, k2tog. (18 stitches)
- Row 28 (WS): Purl all stitches.
- Row 29: K2tog, knit to last 2 stitches, k2tog. (16 stitches)
- Row 30: Purl all stitches.
- Row 31: K2tog, knit to last 2 stitches, k2tog. (14 stitches)
- Row 32: Purl all stitches.
- Row 33: K2tog, knit to last 2 stitches, k2tog. (12 stitches)
- Row 34: Purl all stitches.
- Row 35: K2tog, knit to last 2 stitches, k2tog. (10 stitches)
- Row 36: Purl all stitches.
- Row 37: K2tog, knit to last 2 stitches, k2tog. (8 stitches)
- Row 38: Purl all stitches.
- Row 39: K2tog, knit to last 2 stitches, k2tog. (6 stitches)
- Row 40: Purl all stitches.
- Row 41: K2tog, knit to last 2 stitches, k2tog. (4 stitches)
- Row 42: Purl all stitches.
- Row 43: K2tog twice. (2 stitches)
- Row 44: K2tog. (1 stitch)
- Cut yarn, leaving a long tail, and pull through the last stitch to secure.
Part 3: Creating the Pixel Art Face
We'll use the duplicate stitch technique to embroider the pixel face onto the front of the pumpkin. This is much easier than intarsia for a small design and gives a clean, crisp result.
Face Chart (each square = 1 stitch):
- Eyes: Two 2x2 squares of C1 (Rust), placed 4 stitches apart, starting at row 10 from the bottom.
- Nose: A 2x2 square of C2 (Golden Yellow), centered between the eyes, starting at row 16.
- Mouth: A 2x4 rectangle of C3 (Cream), centered below the nose, starting at row 20.
How to duplicate stitch:
- Thread a tapestry needle with the desired color yarn.
- Insert the needle from the wrong side to the right side at the base of the "V" of the stitch you want to cover.
- Thread the needle under the two legs of the "V" of the stitch above, then back down into the same hole you started from.
- Repeat for each stitch in your chart, working from bottom to top. Each knitted stitch becomes one pixel.
Placement tips: To center the face, fold the pumpkin piece in half horizontally and vertically to find the center. The eyes should be 4 stitches apart (meaning there are 3 stitches between them). The nose sits directly between and slightly below the eyes. The mouth is centered under the nose. Take your time—this is what gives your pumpkin its character!
Part 4: Seaming and Stuffing
- Seam the pumpkin: Fold the knitted piece in half with right sides together. Using MC yarn and a tapestry needle, sew the side seams using a mattress stitch or whip stitch. Leave the bottom open.
- Turn right side out: Carefully turn the pumpkin so the right side faces out. Use a blunt tool to gently push out the corners.
- Stuff: Stuff the pumpkin firmly with polyester fiberfill. Make sure to fill the top and bottom corners well for a plump, rounded shape.
- Close the bottom: Thread a tapestry needle with MC yarn and sew the bottom closed using a whip stitch. Weave in the end securely.
Part 5: Adding the Stem
You have two options for the stem—both are easy!
Option A (Knitted stem):
- With C3 (Cream) yarn, cast on 6 stitches.
- Knit in stockinette stitch for 4 rows.
- Bind off all stitches.
- Roll the small rectangle into a cylinder and sew it to the top of the pumpkin using the yarn tail.
Option B (Crocheted stem):
- Using a 4.5mm crochet hook and C3 yarn, make a magic ring.
- Chain 3, then work 6 single crochet (sc) into the ring.
- Work 2 rounds of sc (6 stitches each round).
- Fasten off, leaving a long tail. Sew the stem to the top of the pumpkin.
Part 6: Finishing Touches
- Weave in all ends: Use your tapestry needle to hide any loose yarn tails inside the pumpkin.
- Block lightly (optional): If desired, lightly steam block the pumpkin to even out the stitches. Be careful not to flatten the stuffing.
And there you have it—your very own Harvest Glow Pixel Pumpkin! This adorable knitted decor piece is sure to become a seasonal favorite. Make a few in different colorways to create a cozy, pixelated pumpkin patch for your home. Happy knitting!


