Frosted Bramble Mittens Free Knitting Pattern – Textured Berry Stitch
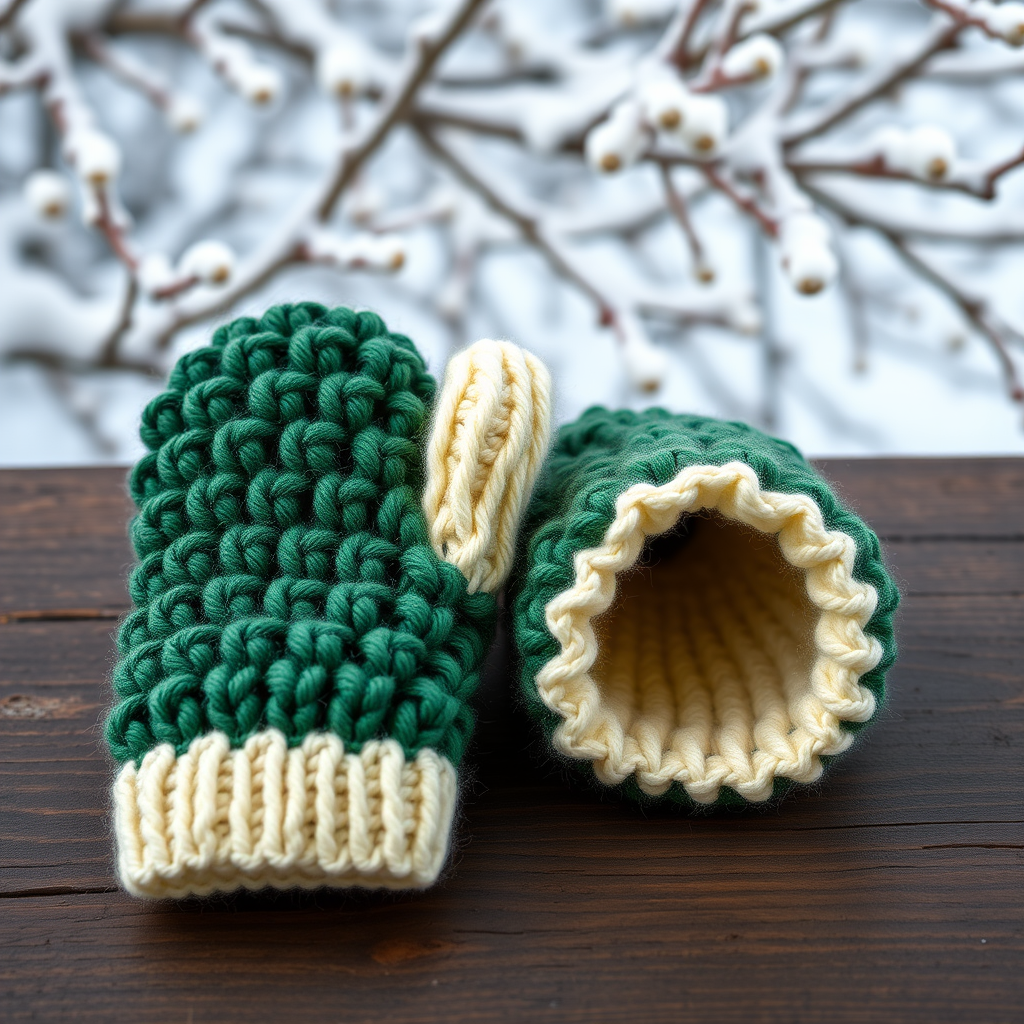
Cozy Up with the Frosted Bramble Mittens: A Free Knitting Pattern
Wrap your hands in the cozy, tactile warmth of the Frosted Bramble Mittens. This free knitting pattern features a rich, all-over berry stitch that mimics a winter thicket, offering a modern, textured twist on a classic essential. Perfect for chilly strolls and fireside evenings, these mittens are as beautiful to look at as they are comfortable to wear. The two-tone design—a deep evergreen or slate blue body with crisp cream cuffs and thumbs—adds a touch of rustic elegance to any winter wardrobe. Let's dive into this rewarding project that's perfect for intermediate knitters looking to expand their skills.
Materials Needed
Before you begin, gather the following materials to ensure a smooth knitting experience:
- Yarn: Worsted weight yarn in two colors:
- Main Color (MC): 180 yards of a deep evergreen or slate blue
- Contrast Color (CC): 60 yards of a soft cream or frosty white for cuffs and thumbs
- Needles: US 6 (4.0 mm) double-pointed needles (or circular for magic loop), plus a spare needle for cabling
- Gauge: 20 stitches and 28 rows = 4 inches in stockinette stitch (after blocking)
- Notions: Stitch markers, scrap yarn or stitch holder, tapestry needle for weaving in ends
Step-by-Step Instructions
This pattern is worked in the round from the cuff up. The bramble stitch is a 4-row repeat that creates a bumpy, berry-like texture. Instructions are for a woman's medium (7.5-inch hand circumference). Adjust needle size to achieve gauge.
Abbreviations
- k = knit
- p = purl
- k2tog = knit two together
- ssk = slip, slip, knit (left-leaning decrease)
- m1 = make one (increase)
- sl = slip
- wyif = with yarn in front
- wyib = with yarn in back
- C3B = slip 1 stitch to cable needle, hold to back, knit next 2 stitches, then knit the slipped stitch (creates a small cable twist)
Cuff (Worked in CC)
- Cast on 40 stitches loosely. Distribute onto 4 DPNs (10 sts each). Join in the round, being careful not to twist.
- Rounds 1-12: Work K2, P2 ribbing for 12 rounds (or until cuff measures 2.5 inches).
Main Body (Switch to MC)
- Round 13: Knit all stitches, increasing 4 stitches evenly (44 sts total).
- Now begin the Berry Stitch pattern. This is a 4-round repeat that creates the beautiful, bumpy texture. Work as follows:
- Round 1: *K1, P1, K1 into next stitch (increase 2), then P3tog* — repeat to end. (Each repeat uses 4 stitches and produces 4 stitches, maintaining stitch count.)
- Round 2: Knit all stitches.
- Round 3: *P3tog, then K1, P1, K1 into next stitch* — repeat to end.
- Round 4: Knit all stitches.
- Repeat these 4 rounds until the piece measures 4 inches from the cuff, ending with a Round 4.
Thumb Gusset
- Next Round (Round 18): Work in pattern across first 22 stitches (back of hand), then place a marker. Work the next 8 stitches in pattern (these will be the thumb gusset). Then continue in pattern to end of round.
- Increase Rounds: On the next round, work in pattern to 1 stitch before the marker, M1, K1, M1, then continue in pattern to end. This adds 2 stitches to the gusset. Work 3 more increase rounds every other round (i.e., increase on rounds 20, 22, 24). To keep it simple, work the gusset stitches in stockinette (knit) so you don't disrupt the pattern. Here's the breakdown:
- Round 19: Work in pattern to marker, then knit across the 8 gusset stitches, then continue in pattern.
- Round 20: Work in pattern to 1 stitch before marker, M1, knit to 1 stitch after marker, M1, then continue in pattern. (Now gusset has 10 sts)
- Round 21: Work in pattern to marker, knit across gusset, continue.
- Round 22: Increase again (12 sts in gusset)
- Round 23: Work even.
- Round 24: Increase again (14 sts in gusset)
- Round 25: Work even.
- Round 26: Increase again (16 sts in gusset)
- Round 27: Work even.
- Now the gusset has 16 stitches. On the next round, work in pattern to marker, then place the 16 gusset stitches on a scrap yarn holder, cast on 4 stitches (for the under-thumb bridge), then continue in pattern to end. You now have 40 stitches on your needles (22 back + 14 remaining palm + 4 cast on).
Hand (After Thumb Separation)
- Continue working in the berry stitch pattern (starting with Round 1) until the hand measures 5 inches from the thumb separation, or until it covers your pinky.
Decreases for Top
- Switch to stockinette stitch (knit every round) for the decreases. Work as follows:
- Round 1 (decrease): *K2tog, K2* repeat to end (40 sts -> 30 sts)
- Round 2: Knit all
- Round 3: *K2tog, K1* repeat to end (30 -> 20)
- Round 4: Knit all
- Round 5: *K2tog* repeat to end (20 -> 10)
- Round 6: *K2tog* repeat to end (10 -> 5)
- Cut yarn, thread through remaining 5 stitches, pull tight, and weave in end.
Thumb
- Place the 16 gusset stitches back onto DPNs. Pick up 4 stitches from the cast-on bridge. Total 20 sts. Join in the round.
- Work in stockinette (knit every round) for 2 inches, or until thumb covers your thumb.
- Decrease: *K2tog* repeat to end (20 -> 10), then *K2tog* repeat to end (10 -> 5). Cut yarn, thread through, pull tight, weave in.
Finishing
- Weave in all ends. Block lightly to even out the texture.
Second Mitten
- Repeat the entire pattern, but when working the thumb gusset, place it on the opposite side (i.e., if the first mitten had the gusset on the right side of the palm, place it on the left side for the second mitten, so you have a left and right mitten). To do this, when you start the gusset, instead of placing the marker after the first 22 stitches, place it after the first 14 stitches of the palm (i.e., work 22 back, then 14 palm, then marker, then 8 gusset, then marker). This will mirror the thumb placement.
And there you have it—a beautiful pair of Frosted Bramble Mittens! The textured berry stitch is not only visually stunning but also incredibly warm and cozy. These mittens make a wonderful gift for loved ones or a delightful treat for yourself. Happy knitting!


