Frosted Berry Preemie Snowflake Hat Free Knitting Pattern
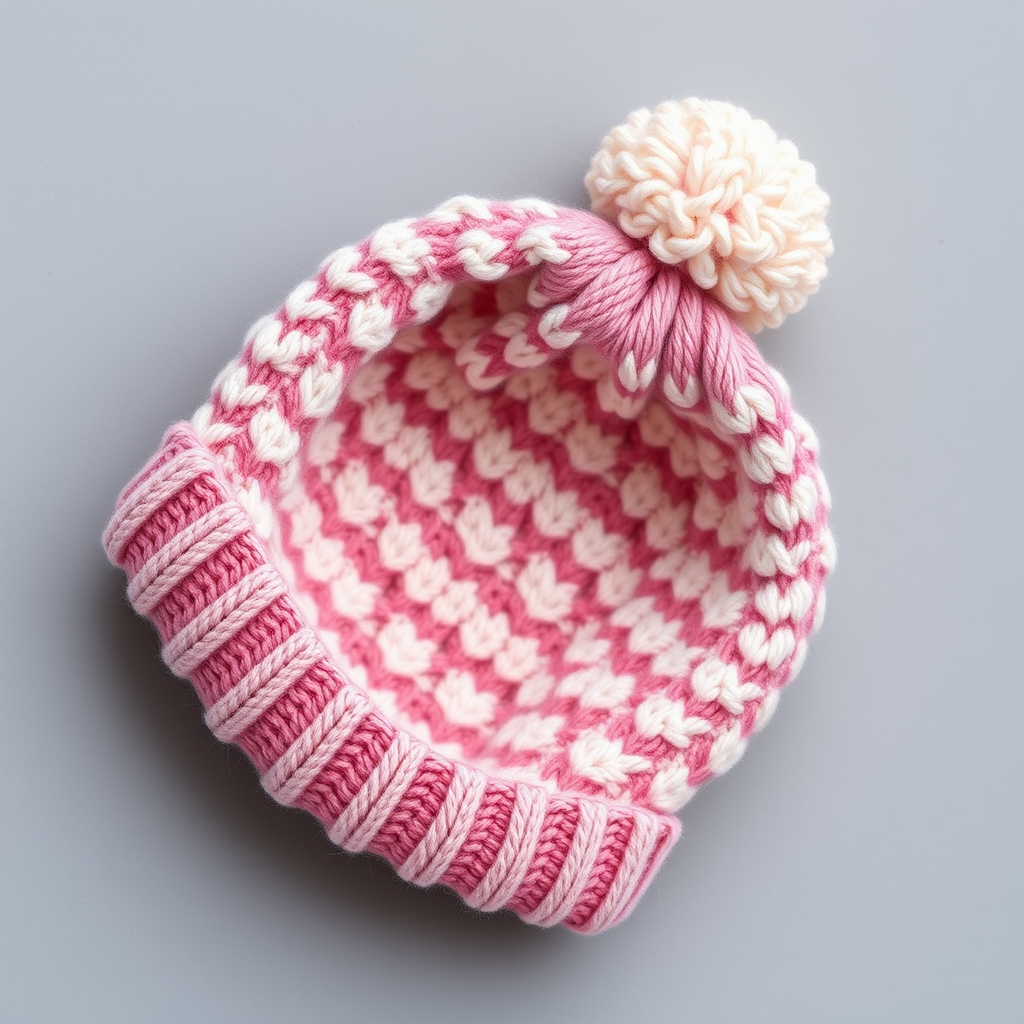
Frosted Berry Preemie Snowflake Hat: A Free Knitting Pattern for Tiny Miracles
Welcome to a world of tiny stitches and boundless love! There is something profoundly special about creating handmade items for the smallest among us. Today, we're diving into a pattern that is as beautiful as it is meaningful: the Frosted Berry Preemie Snowflake Hat. This delicate, textured hat is designed for the tiniest arrivals, wrapping them in a soft, cozy embrace of berry pink and cream. Despite its intricate, woven appearance, this pattern is surprisingly accessible, using a simple combination of knit, purl, and slipped stitches to create a dimensional snowflake motif that feels like a warm hug. Whether you're a seasoned knitter looking for a quick, heartfelt project or a beginner ready to try something new, this pattern is the perfect way to create a precious keepsake. Let's pick up our needles and craft a little bit of winter magic.
Materials Needed: Gathering Your Supplies
Before we cast on, let's ensure you have everything you need. This project is wonderfully portable and requires minimal supplies, making it perfect for knitting on the go.
- Yarn: DK weight yarn in two colors:
- Main Color (MC): Soft Berry Pink (approx. 50-75 yards)
- Contrast Color (CC): Cream (approx. 25-40 yards)
- Needles: US Size 4 (3.5 mm) 16-inch circular knitting needle, and a set of double-pointed needles (DPNs) in the same size for working the crown decreases.
- Notions: Stitch marker, tapestry needle for weaving in ends, and scissors.
Gauge: 24 stitches and 32 rows = 4 inches in Stockinette stitch, after blocking. Getting the correct gauge is crucial for achieving the right size for a preemie, so take a moment to knit a small swatch first.
Step-by-Step Instructions: Knitting Your Frosted Berry Hat
This hat is worked in the round from the brim up to the crown. The snowflake pattern is created using a simple slipped-stitch technique that produces a beautiful, textured motif. Don't be intimidated by the slipped stitches—they are easier than they look and create a stunning effect.
Abbreviations
- CO: Cast on
- K: Knit
- P: Purl
- K2tog: Knit two stitches together
- Sl: Slip stitch purlwise
- MC: Main Color (Soft Berry Pink)
- CC: Contrast Color (Cream)
- Rnd: Round
Getting Started: The Brim
With your Main Color (MC) and your 16-inch circular needle, cast on 72 stitches. Place a stitch marker to mark the beginning of the round and join in the round, being extremely careful not to twist your stitches. The foundation of a neat hat lies in this first join.
Work in a K1, P1 ribbing for 6 rounds. This creates a snug, stretchy brim that will keep the hat securely on a tiny head. After completing the ribbing, you're ready to begin the beautiful snowflake pattern.
The Body: Creating the Snowflake Pattern
Now we'll work the main body of the hat. The pattern repeat is 12 stitches, which will be repeated 6 times around the hat. Pay close attention to whether the slipped stitches are with the yarn in front or in back, as this creates the textured weave.
Rnd 1 (CC): *K1, Sl 1, K1, Sl 1, K1, Sl 1, K1, Sl 1, K1, Sl 1, K1, Sl 1* (all slipped stitches are with yarn in back)
Rnd 2 (CC): *K1, Sl 1, K1, Sl 1, K1, Sl 1, K1, Sl 1, K1, Sl 1, K1, Sl 1* (all slipped stitches are with yarn in front)
Rnd 3 (MC): Knit all stitches.
Rnd 4 (MC): Purl all stitches.
Rnd 5 (CC): *Sl 1, K1, Sl 1, K1, Sl 1, K1, Sl 1, K1, Sl 1, K1, Sl 1, K1* (all slipped stitches are with yarn in back)
Rnd 6 (CC): *Sl 1, K1, Sl 1, K1, Sl 1, K1, Sl 1, K1, Sl 1, K1, Sl 1, K1* (all slipped stitches are with yarn in front)
Rnd 7 (MC): Knit all stitches.
Rnd 8 (MC): Purl all stitches.
Repeat Rounds 1-8 three more times, for a total of 4 pattern repeats. After completing these repeats, your hat should measure approximately 3.5 inches from the cast-on edge. The slipped stitches will have formed a gorgeous, dimensional diamond pattern reminiscent of snowflakes.
Shaping the Crown: Decreases
As the circumference of the hat gets smaller, you'll need to switch to your double-pointed needles (DPNs) when the stitches become too tight to fit comfortably on the circular needle. Continue working with your Main Color (MC) for the decreases.
Rnd 1: *K10, K2tog* (repeat 6 times) – 66 stitches remain.
Rnd 2: *K9, K2tog* (repeat 6 times) – 60 stitches remain.
Rnd 3: *K8, K2tog* (repeat 6 times) – 54 stitches remain.
Rnd 4: *K7, K2tog* (repeat 6 times) – 48 stitches remain.
Rnd 5: *K6, K2tog* (repeat 6 times) – 42 stitches remain.
Rnd 6: *K5, K2tog* (repeat 6 times) – 36 stitches remain.
Rnd 7: *K4, K2tog* (repeat 6 times) – 30 stitches remain.
Rnd 8: *K3, K2tog* (repeat 6 times) – 24 stitches remain.
Rnd 9: *K2, K2tog* (repeat 6 times) – 18 stitches remain.
Rnd 10: *K1, K2tog* (repeat 6 times) – 12 stitches remain.
Rnd 11: *K2tog* (repeat 6 times) – 6 stitches remain.
Cut your yarn, leaving a 6-inch tail. Thread the tail onto your tapestry needle and slide it through the remaining 6 stitches. Pull tight to close the hole at the top of the hat securely. Weave in all loose ends carefully to ensure a clean finish.
Finishing Touches
Gently block the hat to shape, which will help even out the stitches and enhance the snowflake texture. For an extra touch of charm and whimsy, you can optionally create a small pom-pom using your Contrast Color (CC) yarn and attach it to the top of the hat. This fluffy cream pom-pom beautifully echoes the frosted theme of the design.
Your Frosted Berry Preemie Snowflake Hat is now complete! This little hat is more than just a knitting project; it's a tangible expression of care and hope, perfect for a hospital donation, a baby shower gift, or a special keepsake. The combination of the soft pink and crisp cream, along with the textured snowflake pattern, creates a truly heirloom-quality piece. Happy knitting!



