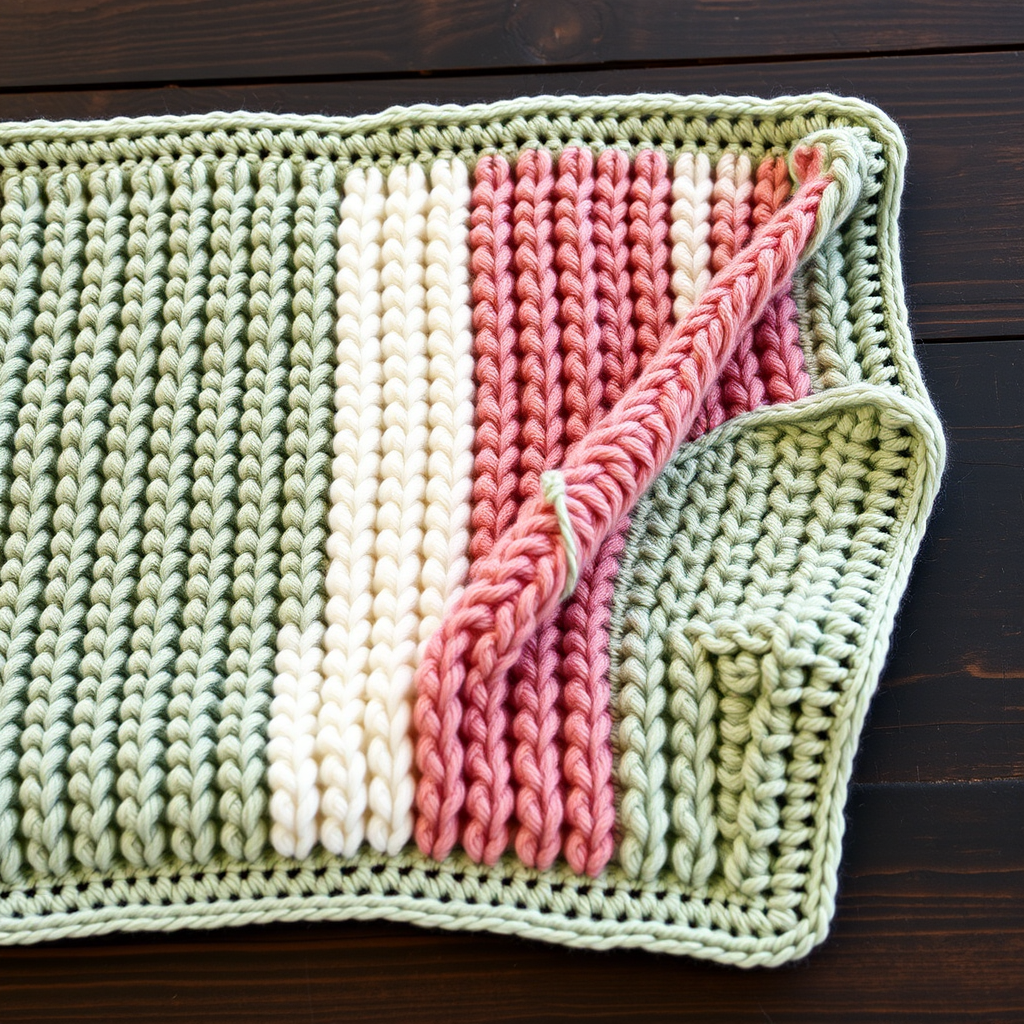
Enchanted Meadow Tunisian Crochet Baby Blanket Free Pattern

Enchanted Meadow Tunisian Crochet Baby Blanket: A Free Pattern for a Stunning Heirloom
Imagine wrapping your little one in a blanket that feels like a walk through a sun-drenched meadow, where each petal of color tells a story of love and craftsmanship. The Enchanted Meadow Tunisian Crochet Baby Blanket is more than just a baby accessory—it's a circular masterpiece that combines the meditative rhythm of Tunisian crochet with a brilliant geometric join-as-you-go design. This pattern creates a seamless, flower-like blanket with eight vibrant wedges in a soft pastel rainbow, finished with a playful bobble edge that begs to be touched.
Whether you're a seasoned crocheter looking for a new challenge or a confident beginner ready to expand your skills, this free pattern offers a rewarding project that results in a truly heirloom-quality piece. The join-as-you-go technique might sound complex, but I'll walk you through every step, ensuring you can create this 35-inch circular wonder with confidence. Let's dive into this enchanting project that's perfect for baby showers, first birthdays, or as a cherished keepsake.
Why You'll Love This Tunisian Crochet Blanket
This pattern is a celebration of color and texture. The Tunisian simple stitch creates a dense, warm fabric that's perfect for keeping a baby cozy, while the wedge-shaped segments in blush pink, butter yellow, mint green, sky blue, lavender, and peach create a vibrant, eye-catching design. The genius of the join-as-you-go method means no tedious seaming at the end—the blanket literally builds itself into a perfect circle as you work.
The finished blanket measures approximately 35 inches in diameter, making it ideal for stroller rides, crib snuggles, or tummy time. The bobble edging adds a three-dimensional, tactile element that babies will love to explore, and the soft cream and white accents tie the whole palette together harmoniously.
Materials Needed: Your Complete Supply List
Before you begin, gather these supplies to ensure a smooth crafting experience. All materials are readily available at your local yarn shop or online.
Yarn Requirements
You'll need worsted weight (4) cotton or acrylic yarn in the following 8 colors. For a truly soft, baby-friendly finish, I recommend a high-quality cotton blend or a super-soft acrylic that's machine washable.
- Color A (Soft Cream): Approximately 200 yards (for the first segment and edging)
- Color B (Blush Pink): Approximately 100 yards
- Color C (Butter Yellow): Approximately 100 yards
- Color D (Mint Green): Approximately 100 yards
- Color E (Sky Blue): Approximately 100 yards
- Color F (Lavender): Approximately 100 yards
- Color G (Peach): Approximately 100 yards
- Color H (White): Approximately 100 yards
Hooks and Notions
- Tunisian crochet hook size I/9 (5.5 mm) with a 24-inch cable. The cable is essential for holding all your loops comfortably.
- Regular crochet hook size I/9 (5.5 mm) for the edging round.
- Stitch markers to track the beginning of rounds and joining points.
- Yarn needle for weaving in ends and finishing.
- Scissors
Gauge Information
To achieve the correct size and drape, your gauge should be 16 Tunisian simple stitches (Tss) = 4 inches (10 cm) and 13 rows = 4 inches (10 cm). Don't skip the gauge swatch! It's your best friend for ensuring the blanket turns out the right size. If your gauge is off, simply adjust your hook size up or down until you hit the target.
Understanding the Tunisian Simple Stitch (Tss)
If you're new to Tunisian crochet, here's a quick primer. Unlike regular crochet, Tunisian crochet uses a longer hook and keeps multiple loops on the hook at once. Each row consists of two passes:
- Forward Pass: You insert your hook into the vertical bar of each stitch from right to left, yarn over, and pull up a loop, leaving all loops on your hook.
- Return Pass: You yarn over and pull through one loop, then *yarn over and pull through two loops* across the row until one loop remains on your hook.
This creates a dense, woven-looking fabric that's perfect for blankets. The right side of the work faces you throughout the entire project, which makes it easy to see your progress and join segments accurately.
Step-by-Step Instructions: Creating Your Enchanted Meadow
Now, let's get to the fun part! The blanket is constructed from 8 identical wedge-shaped segments. Segment 1 is worked independently, Segments 2-7 are joined to the previous segment as you go, and Segment 8 closes the circle by joining to both Segment 7 and Segment 1. Follow these detailed instructions carefully, and you'll have a beautiful circular blanket in no time.
Segment 1: The Foundation Wedge (Color A - Soft Cream)
This first segment sets the stage for the entire blanket. Take your time and ensure your tension is consistent.
Step 1: Foundation Chain
With Color A (soft cream), make a slip knot and chain 30. This chain will form the base of your first wedge.
Step 2: Row 1 - Forward Pass
Insert your Tunisian hook into the 2nd chain from the hook (skipping the chain closest to the hook). Yarn over and pull up a loop. You now have 2 loops on your hook. Continue this process: insert the hook into the next chain, yarn over, pull up a loop, until you've worked across all 30 chains. You should now have 30 loops on your hook.
Step 3: Row 1 - Return Pass
Now, work the return pass. Yarn over and pull through just 1 loop on the hook. This is your chain stitch that stands up. Then, *yarn over and pull through 2 loops* across the entire row. Repeat from * to * until only 1 loop remains on your hook. This completes Row 1.
Step 4: Row 2 and Beyond
For Row 2, you'll work the Tunisian simple stitch (Tss). Insert your hook under the vertical bar of the second stitch (the first stitch is the edge stitch, which you'll skip). Yarn over, pull up a loop. Continue this across all 30 stitches. Then, complete the return pass as described in Step 3.
Step 5: Continue to Length
Repeat Row 2 (Tss across, return pass) until your piece measures 12 inches (30 cm) from the starting chain. Make sure you end with a return pass so you have one loop on your hook. Fasten off, leaving a long tail (about 8 inches) for weaving in later.
Pro Tip: Place a stitch marker at the beginning of each row to help you keep track of your place, especially as the segment grows.
Segments 2-7: The Joining Magic (Colors B through G)
This is where the blanket starts to take shape as a circle. Each new segment will be joined to the left edge of the previous segment. The left edge is the side that was created by the starting chain of the previous segment.
Step 1: Foundation Chain for New Segment
With your next color (e.g., Color B - blush pink), chain 30.
Step 2: Row 1 - Forward Pass with Joining
Work the forward pass exactly as you did for Segment 1: insert hook in 2nd chain, pull up a loop, and continue across all 30 chains. However, on the 30th and final stitch of the forward pass, you'll do something special. Instead of just pulling up a loop from the chain, you'll insert your hook into the first stitch of the left edge of the previous segment (the edge of Segment 1). Yarn over, pull up a loop, and place it on your hook. You now have 30 loops on your hook, with the last one joined to the previous segment.
Step 3: Row 1 - Return Pass
Complete the return pass normally: yarn over, pull through 1 loop, then *yarn over, pull through 2 loops* across. This return pass will secure the join.
Step 4: Row 2 - Tss with Joining
Work Row 2 as a standard Tss row across all 30 stitches. On the last stitch of the forward pass (the 30th stitch), insert your hook into the next stitch of the previous segment's left edge (the second stitch from the top). Pull up a loop, then complete the return pass normally.
Step 5: Repeat the Joining Process
Continue working Row 2, joining each row to the next stitch of the previous segment's edge. You'll join one stitch per row. Keep going until you've joined all 30 stitches of the previous segment's edge. You'll know you're done when you've made 30 joins. Fasten off, leaving a tail.
Step 6: Repeat for Segments 3-7
Now, repeat this entire process for Segments 3, 4, 5, 6, and 7, using a new color for each segment in this order: Color C (butter yellow), Color D (mint green), Color E (sky blue), Color F (lavender), and Color G (peach). Each segment will be joined to the left edge of the segment you just completed.
Pro Tip: As you join each segment, the blanket will naturally curve into a circle. Don't force it—let the Tunisian stitch do its magic. The join-as-you-go technique creates a beautiful, seamless flower.
Segment 8: Closing the Circle (Color H - White)
This final segment is the most exciting because it completes the circle. You'll join it to Segment 7 on the left and to Segment 1 on the right, creating a seamless ring.
Step 1: Foundation Chain
With Color H (white), chain 30.
Step 2: Row 1 - Forward Pass with Joining
Work the forward pass as before, but on the 30th stitch, insert your hook into the first stitch of Segment 7's left edge (the edge you've been joining to). Pull up a loop, and complete the return pass normally.
Step 3: Continue Joining to Segment 7
Work rows of Tss, joining each row to the next stitch of Segment 7's edge, just as you did for Segments 2-7. Continue until you've joined all 30 stitches of Segment 7's edge.
Step 4: The Final Join to Segment 1
On your very last row, after you've completed the return pass (so you have 1 loop on your hook), you'll now join the right edge of Segment 8 to the left edge of Segment 1. To do this, slip stitch into the first stitch of Segment 1's edge (the edge that was created by the starting chain of Segment 1). Yarn over and pull through both loops on your hook. This closes the circle beautifully. Fasten off and weave in the end.
Pro Tip: This final slip stitch is the key to the seamless look. Take your time and make sure you're joining to the correct edge of Segment 1—it should be the edge that's adjacent to Segment 8, creating a full circle.
Adding the Finishing Touch: The Bobble Edging
Now that your circular blanket is complete, it's time to add the playful, tactile edging that makes this pattern truly special. This edging uses double treble crochet (dtr) stitches to create three-dimensional bobbles that pop to the right side.
Step 1: Join Yarn
Switch to your regular crochet hook (size I/9, 5.5 mm). With Color A (soft cream), join the yarn in any stitch around the outer edge of the circle with a slip stitch.
Step 2: Round 1 - Bobble Edging
Work the following repeat around the entire circumference of the blanket:
- *Work 1 double treble crochet (dtr) in the next stitch. To make a dtr: yarn over 3 times, insert hook into the stitch, yarn over, pull up a loop (5 loops on hook), yarn over, pull through 2 loops, yarn over, pull through 2 loops, yarn over, pull through 2 loops, yarn over, pull through 2 loops (1 loop remains).
- Work 1 single crochet (sc) in the next stitch.*
Repeat from * to * around the entire edge. If you encounter any corner stitches (where segments meet and the edge might pucker), work 2 dtr in that corner stitch to keep the edge flat and even.
Step 3: Join and Finish
Join with a slip stitch to the first single crochet of the round. Fasten off and weave in the end.
Step 4: Create the Bobble Effect
Here's the fun part! Take each double treble crochet stitch and gently push it to the right side of the blanket. This will create a beautiful, raised bobble effect that adds dimension and texture to the edge. Babies will love running their fingers over these tactile bumps.
Finishing and Blocking: The Final Steps
Your Enchanted Meadow blanket is almost ready to be enjoyed. The final steps are crucial for achieving that professional, polished look.
Step 1: Weave in All Ends
Using your yarn needle, carefully weave in all loose ends from each color change and the beginning and end of each segment. Make sure to weave them in securely on the wrong side of the blanket so they don't show on the right side.
Step 2: Block the Blanket
Blocking is essential for Tunisian crochet, as it helps even out the stitches and shape the blanket perfectly. Gently hand-wash the blanket in cool water with a mild soap, then press out excess water (don't wring!). Lay the blanket flat on a blocking mat or a clean towel. Gently shape it into a perfect circle, smoothing out any puckers or uneven areas. Pin it in place if needed, and let it air dry completely.
Step 3: Admire Your Work
Once dry, your Enchanted Meadow blanket is ready to be gifted or used. The dense Tunisian stitch makes it warm and cozy, while the vibrant colors and bobble edging make it a true work of art.
Tips for Success and Customization
This pattern is wonderfully versatile. Here are a few tips to make it your own:
- Color Play: Feel free to swap the pastel rainbow for your own palette—think ocean blues, sunset oranges, or even a monochromatic scheme for a modern look.
- Yarn Substitutions: While worsted weight is specified, you could use a DK weight yarn with a smaller hook for a lighter, lacier blanket, or a bulky yarn for a super-cozy throw.
- Size Adjustments: To make a larger blanket, simply chain more stitches at the beginning (e.g., 40 or 50) and work each segment to a longer length. The join-as-you-go technique scales beautifully.
- Practice First: If you're new to Tunisian crochet, practice the Tss stitch on a small swatch before starting the blanket. It's a simple stitch, but getting comfortable with the forward and return passes will make the project much more enjoyable.
Your Heirloom Awaits
Creating the Enchanted Meadow Tunisian Crochet Baby Blanket is a labor of love that will be cherished for generations. The combination of the meditative Tunisian stitch, the satisfying join-as-you-go technique, and the joyful pop of pastel colors makes this a project you'll be proud to say you made. Whether it's for your own little one or as a gift for someone special, this blanket is sure to